Azure Functions offers two models for .NET where code is run in-process or in an isolated process. Historically .NET developers could only use the in-process model which was a mixed blessing. Whilst it meant it was easy to use the full set of bindings/triggers that were available to Azure Functions and performance was great, the downside was that a lot of the referenced packages were pinned, which lead to a lot of frustration for developers. In this post we’re going to cover how you can migrate an in-process Azure Function to use an isolated process, freeing you up to pick the .NET and package versions you want to target.
Note: Please make sure you check out the documentation to determine which process model is best for your Azure Function, particularly this table that covers the differences between the models.
I’m going to split this post into two parts. The first is going to walk through creating a new Azure Function and pushing it to Azure using a GitHub Action. If you’re here for the migration piece, you can skip this and jump ahead to part two that goes through migrating the Azure Function to use the isolated process model.
Creating an In-Process Azure Function
In this section we’re going to create a new Azure Function using Visual Studio (I’m currently running Visual Studio 2022 17.4 Preview 1.0, so some steps may vary if you’re using a different version). We’re then going to push the code to a GitHub repository and then use a GitHub Action (setup via Visual Studio) to publish to an actual Azure Function.
New Azure Function Project
Let’s get started with creating the new Azure Function in Visual Studio. From the Start window (the dialog you typically see when you launch Visual Studio), we’ll Create a new project, followed by selecting the Azure Functions project template.

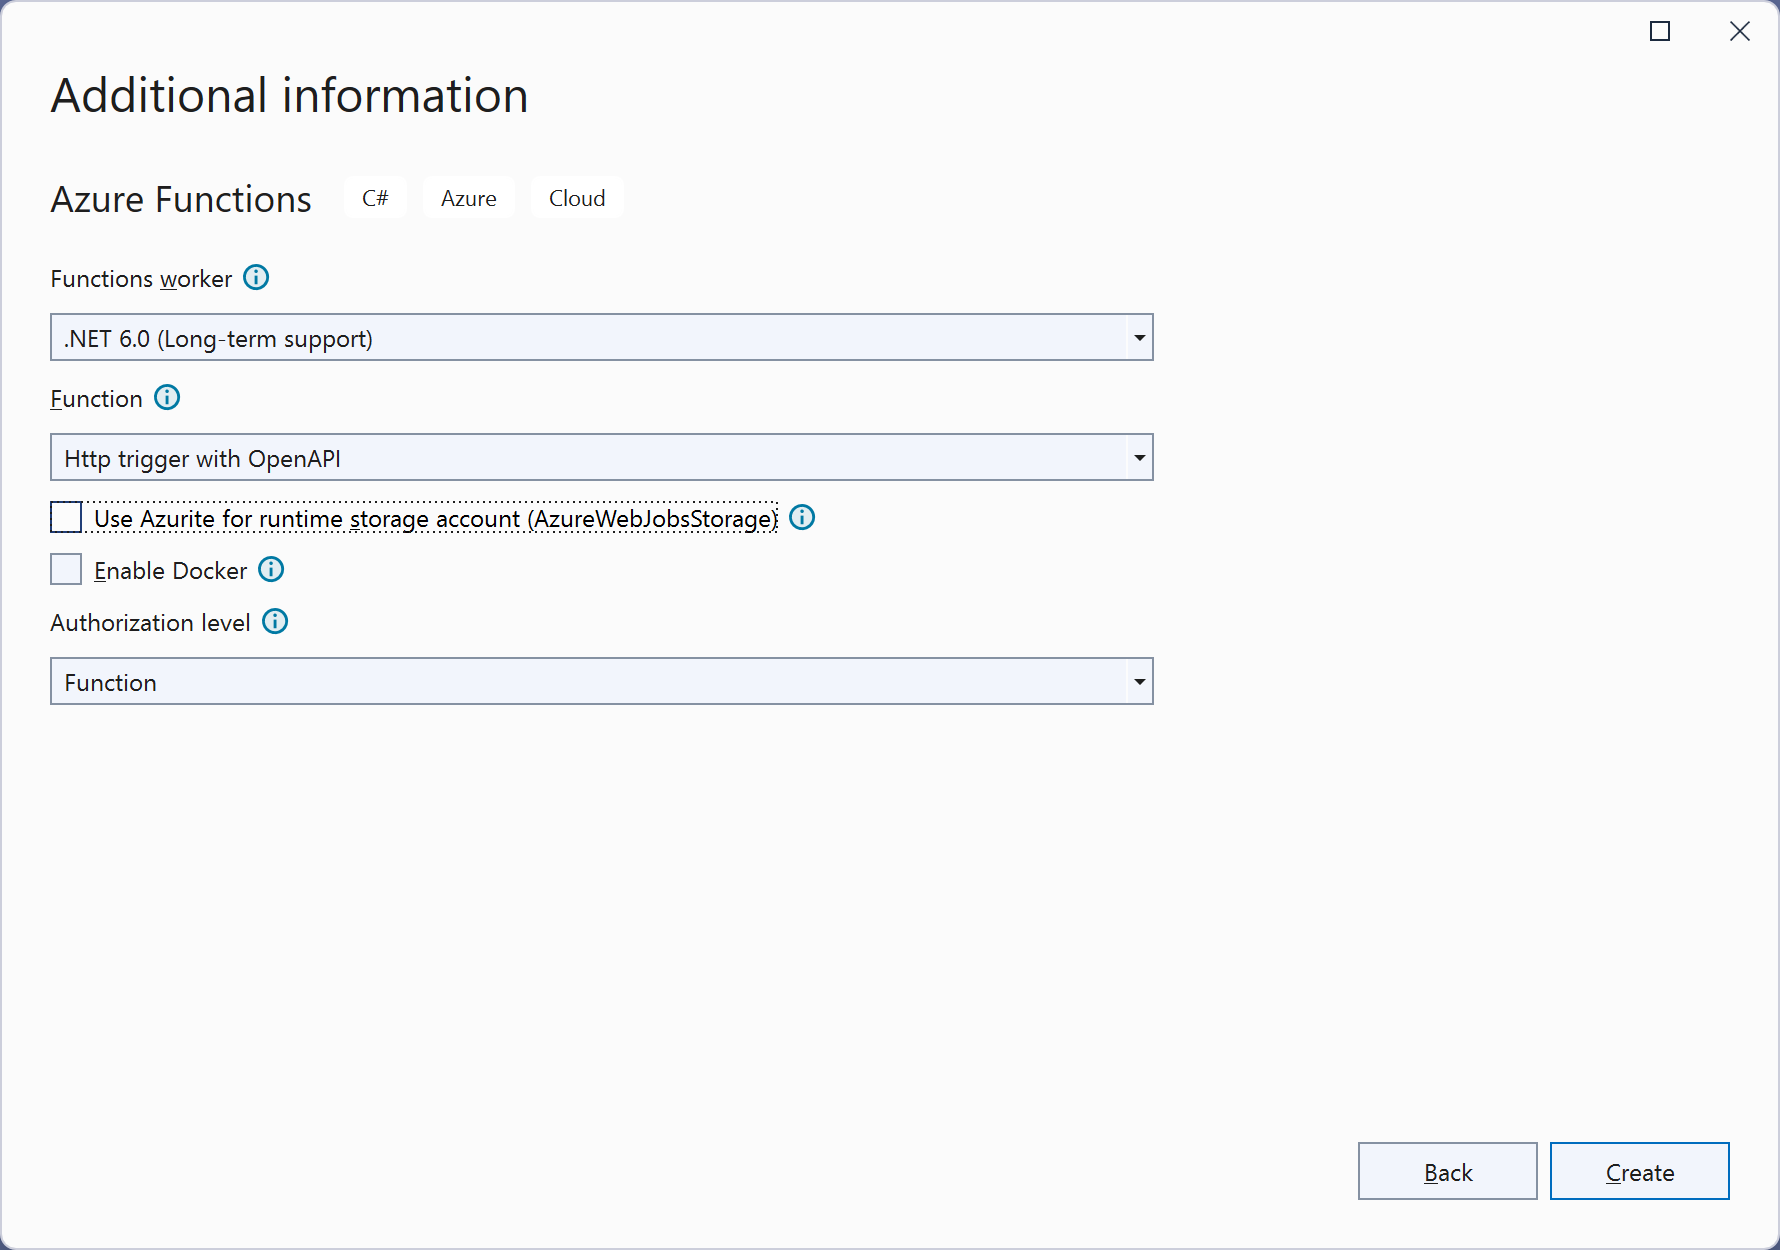
Next we need to select the .NET version – the dropdown isn’t particularly intuitive, especially if you’re not aware of the differences between in-process (not marked) and isolated process (has “Isolated” suffix). For the purposes of this post, we’re going to select .NET 6.0 (not “.NET 6.0 Isolated”).

Since this is only going to be a simple function I’ve unchecked the Azurite checkbox
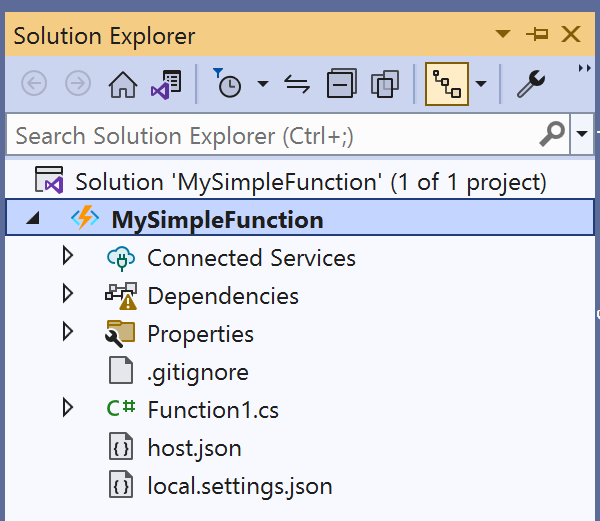
After clicking Create a new Azure Function will be created with a Function1.cs file that contains the logic of the function.
Pressing F5 or clicking the Run button in Visual Studio will launch a console that’s running the Azure Function

To check that the Azure Function is running and test the function, you can open the RenderSwaggerUI url (ie http://localhost:7299/api/swagger/ui) in a web browser.
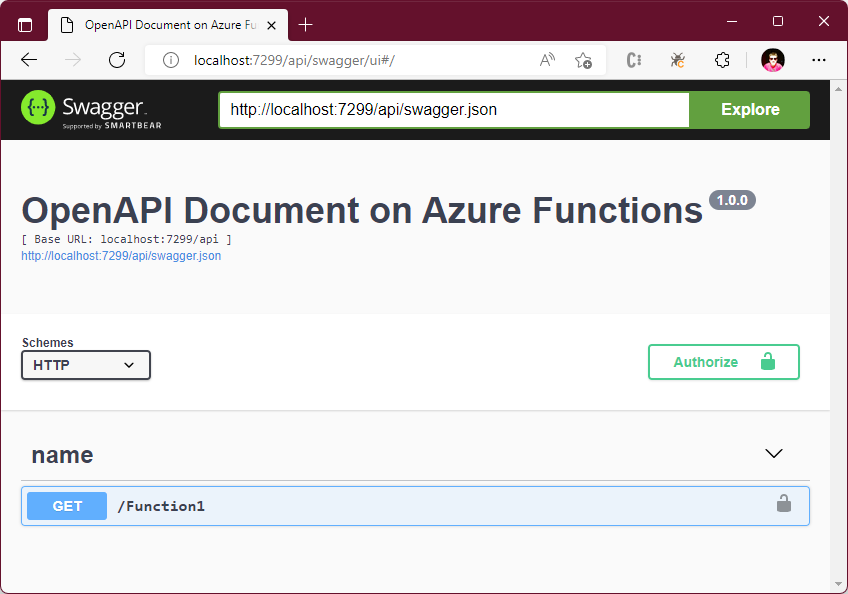
You can click on the button to the left of the function name (ie the blue GET button) to expand out the information about the function, including a UI for invoking the function.
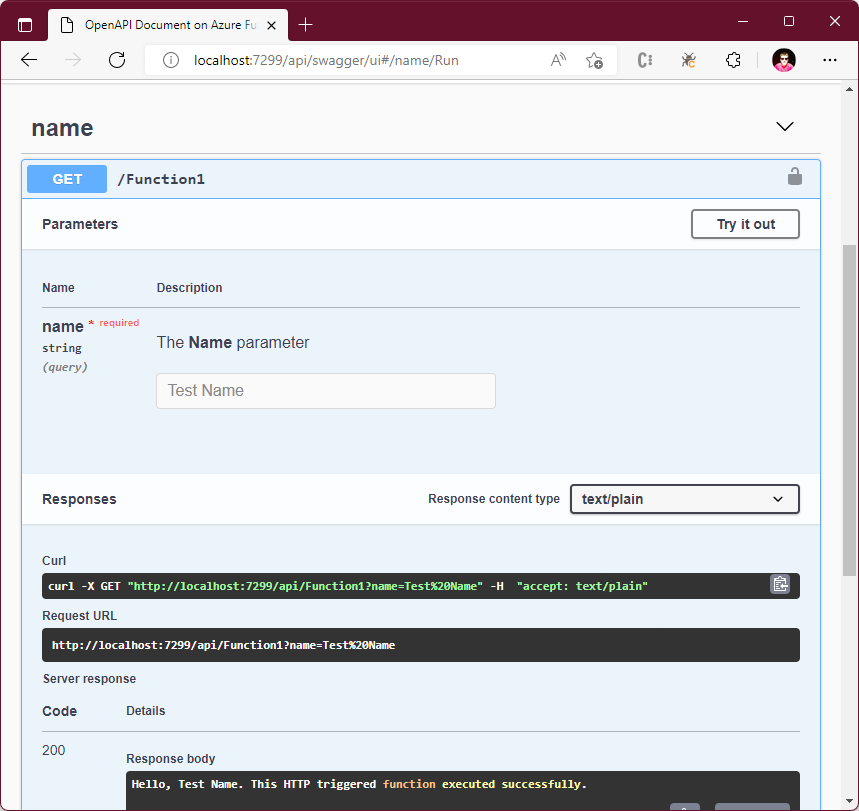
You can also use a tool like Fiddler or Postman to send a http request to the locally running Azure Function but for me the generated Swagger UI is pretty good for development purposes.
Publishing the Azure Function
Now that we have our Azure Function, the next step is to publish it to Azure. This is done in two steps where we first push the code to GitHub and then we setup a GitHub Action to publish to Azure (we’ll create the Azure Function via Visual Studio as part of this step).
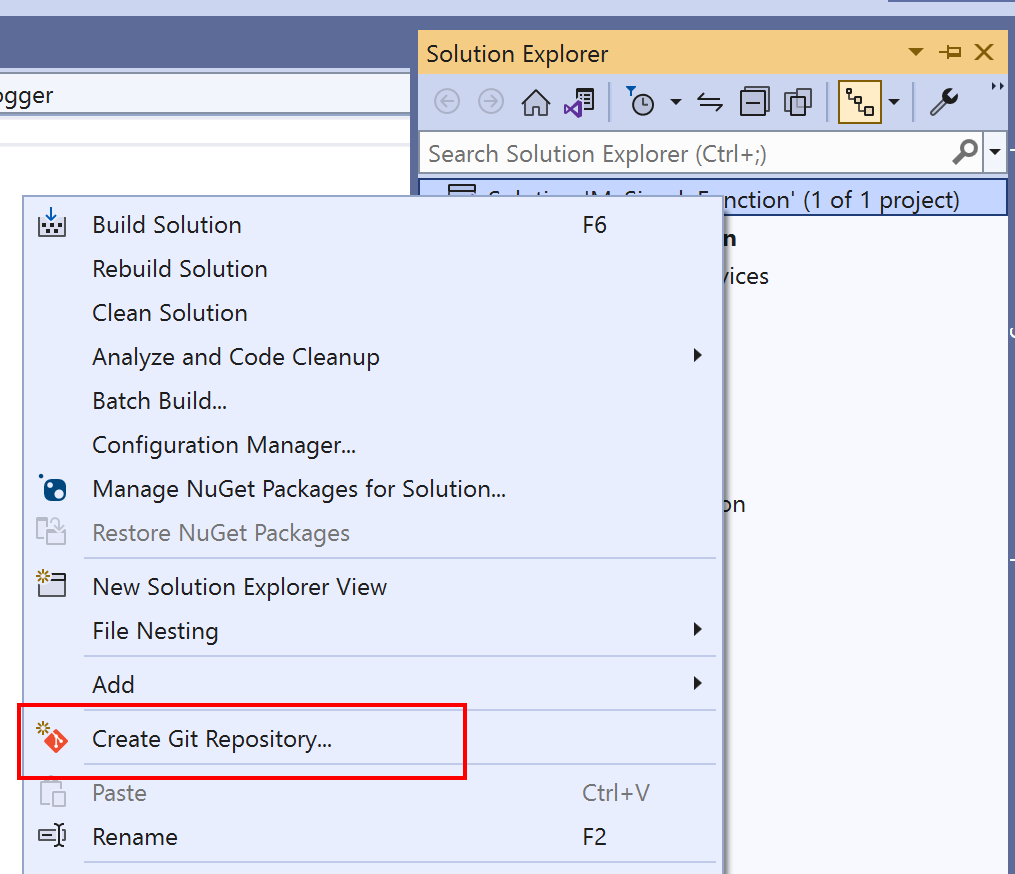
To push the code to GitHub, right click on the Solution node in Solution Explorer and select Create Git Repository (alternatively you can click on the Create Git Repository button on the Git Changes tool window, or via the Git menu).
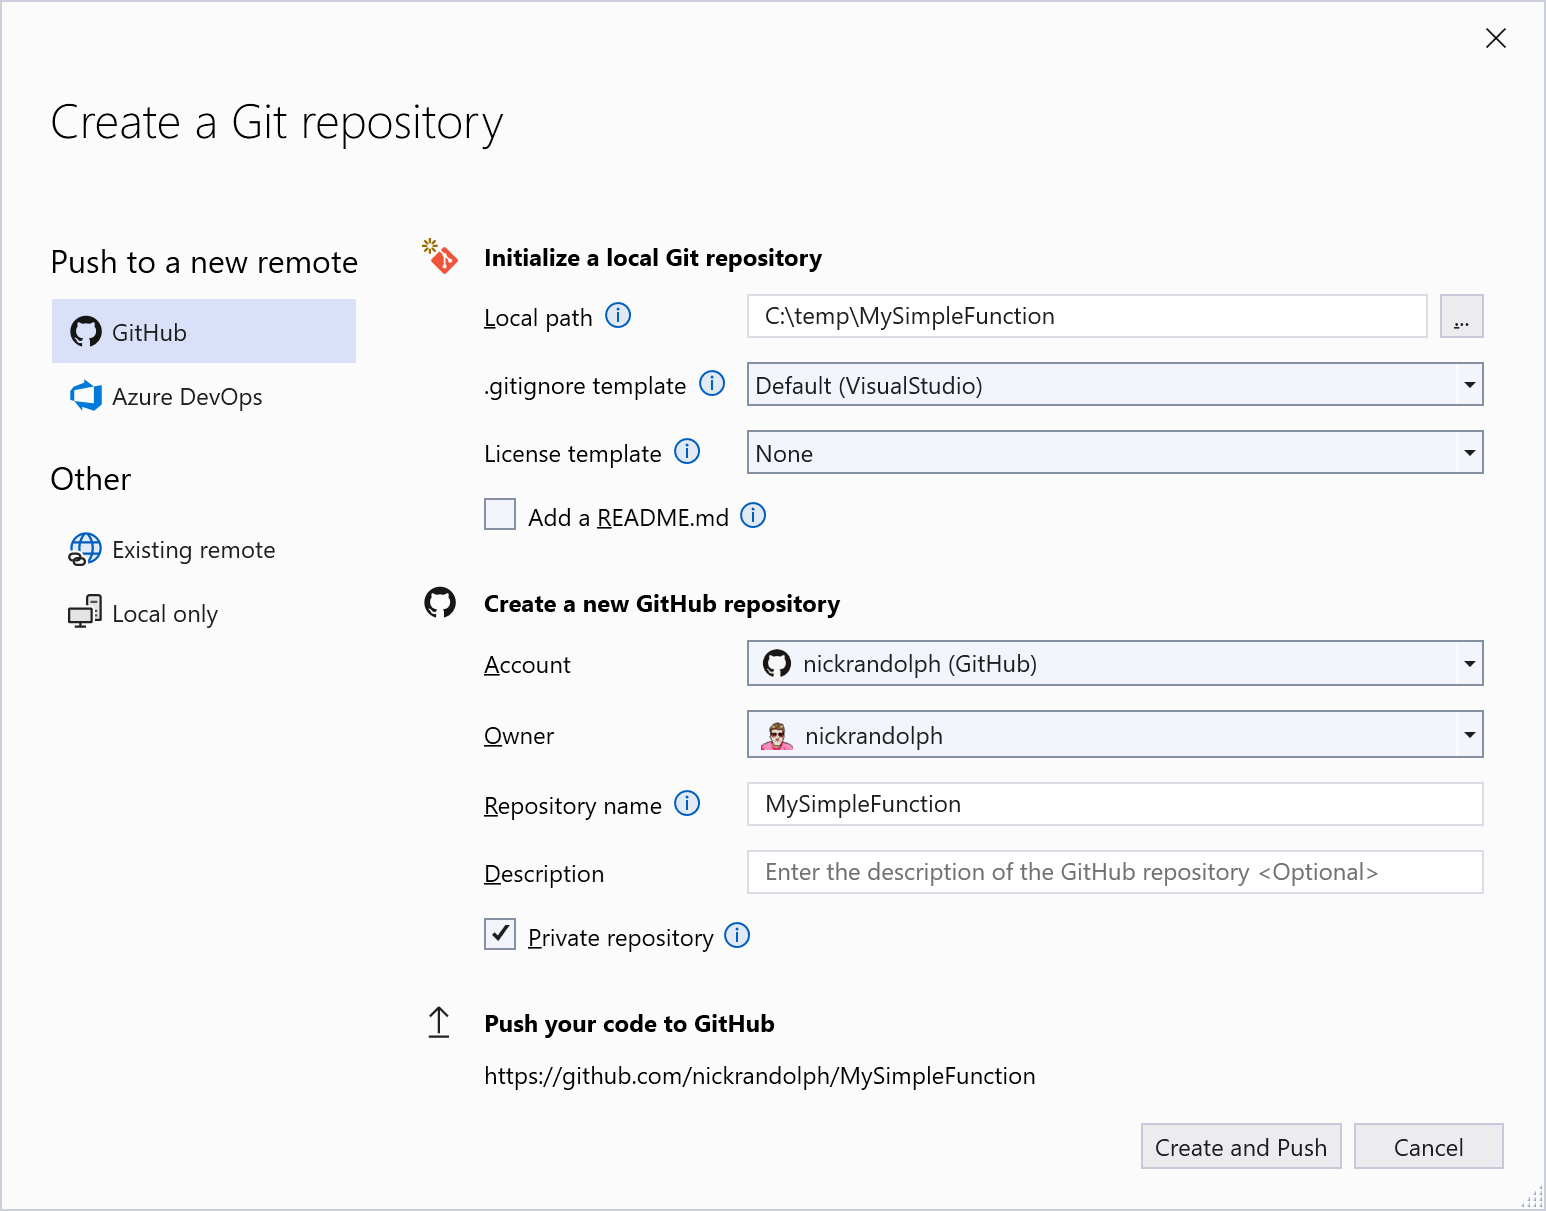
Update any details, including specifying the GitHub Account and Owner you want to use, and then click Create and Push.
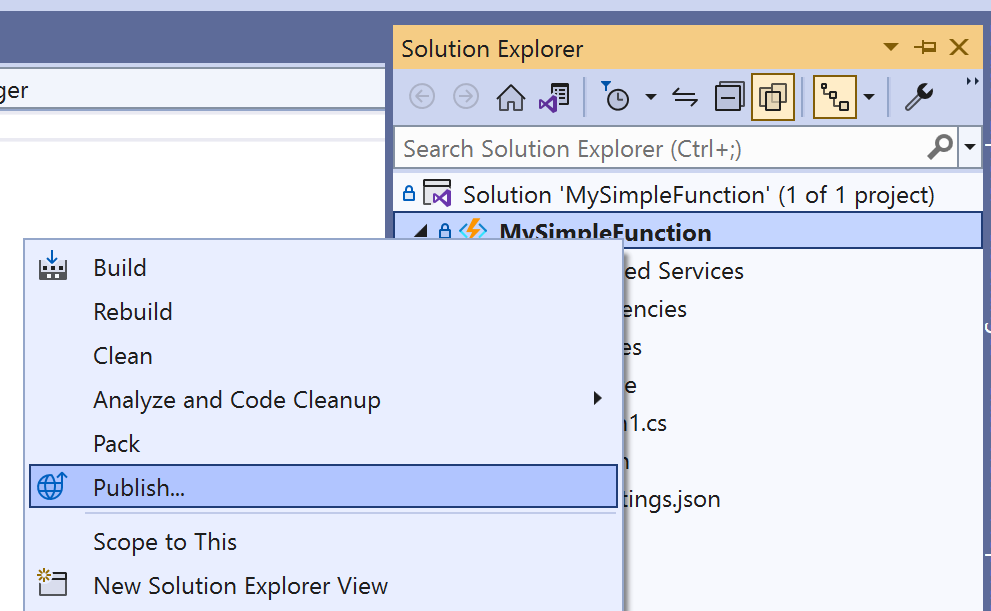
Next we’re going to publish the Azure Function into Azure. Right-click on the Azure Function node in the Solution Explorer tool window and select Publish
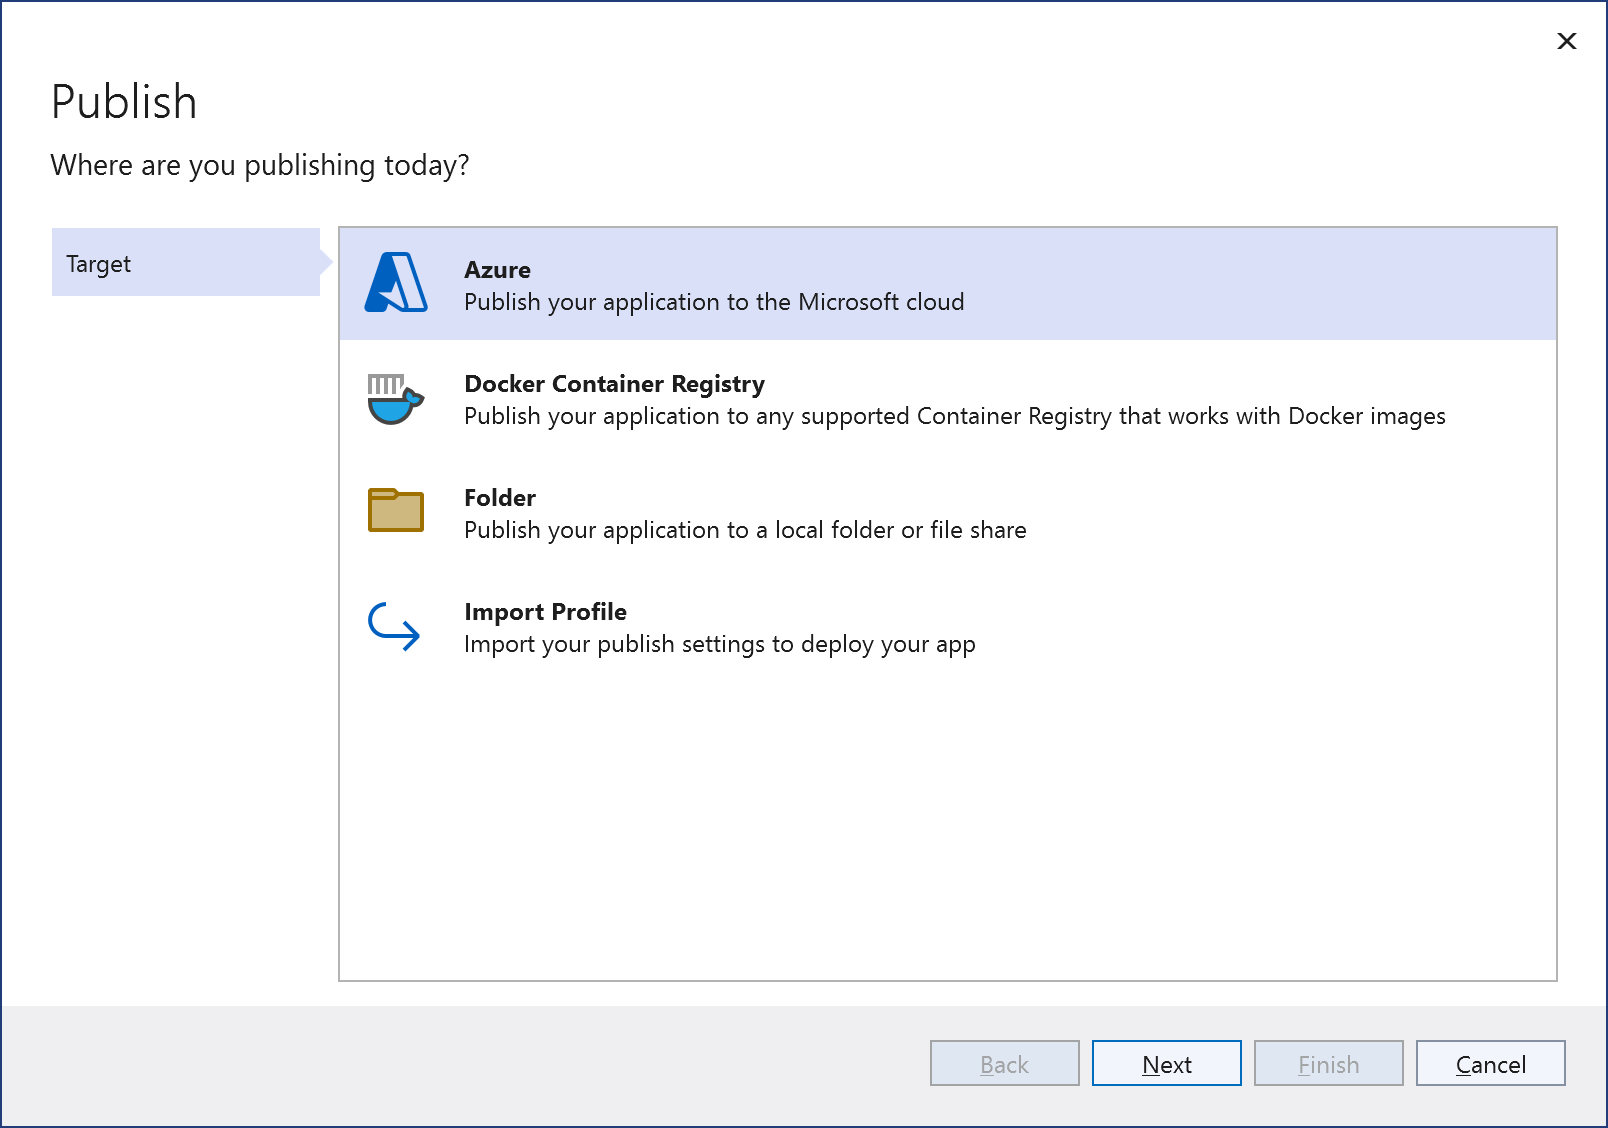
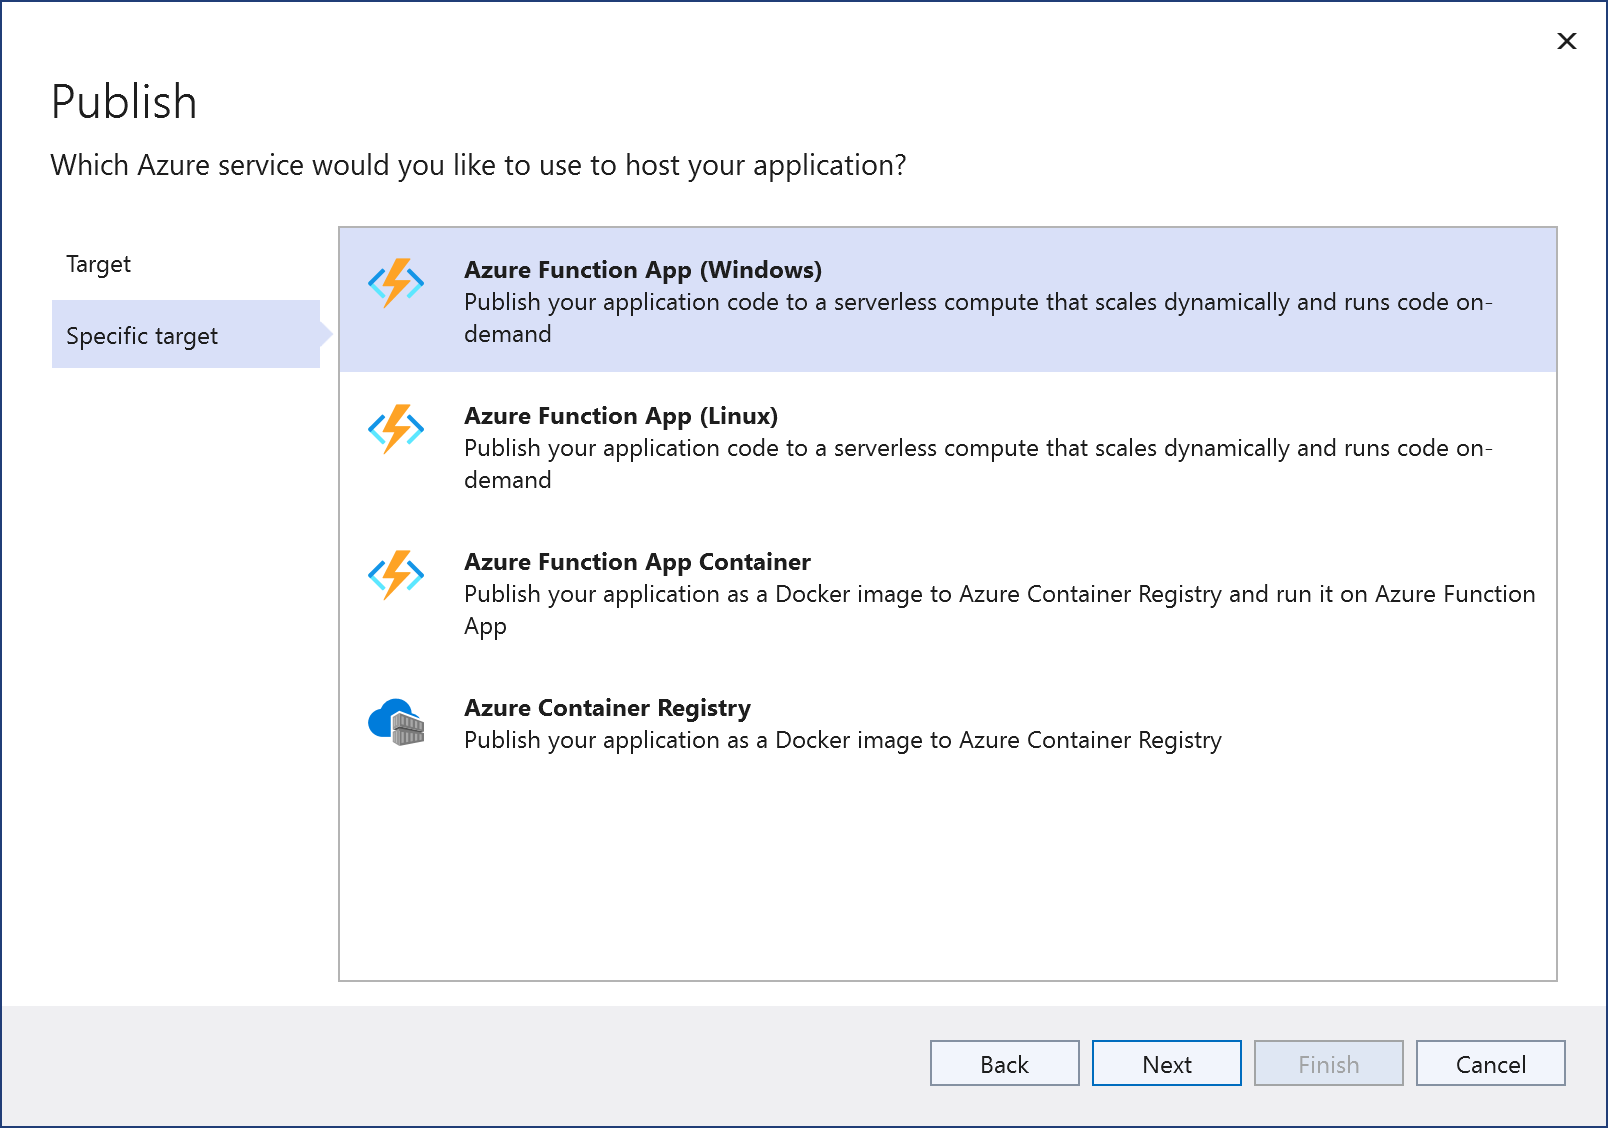
Select Azure and click Next
Select Azure Function App (Windows) and Next. For the other options you need to select the Enable Docker option when creating the Azure Function.
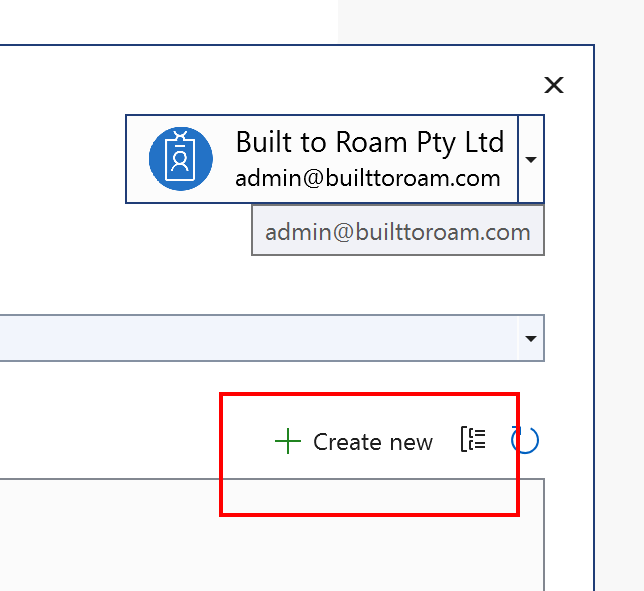
From the Publish dialog that appears, if you don’t already have an Azure Function setup, click the Create new button over on the right side of the dialog
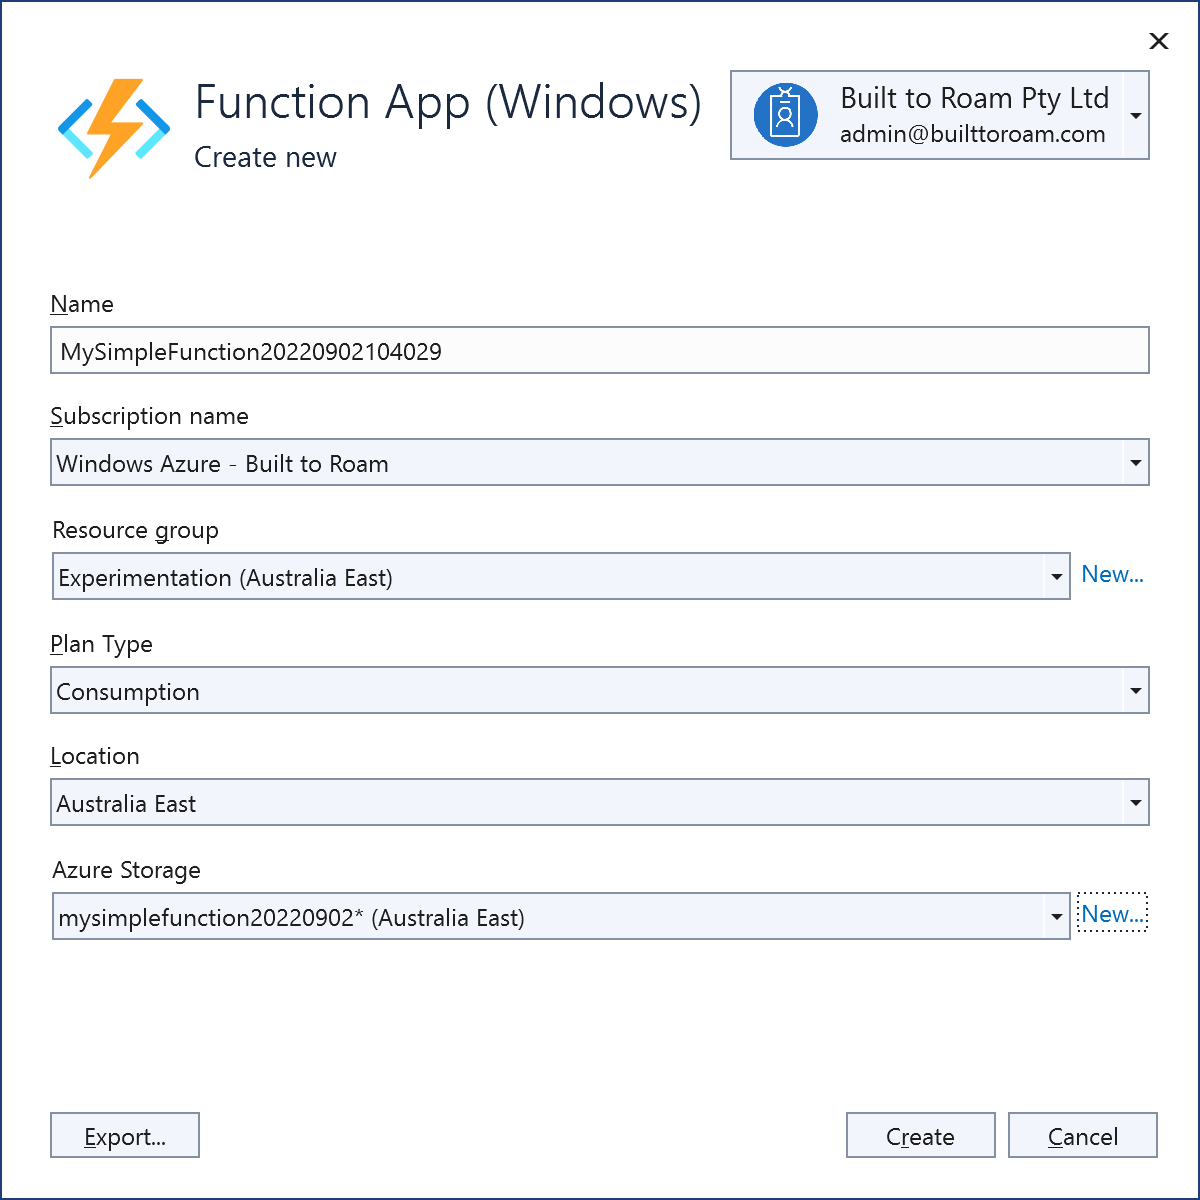
If you’re creating a new Azure Function, you’ll need to select the appropriate Azure subscription, resource group, plan etc and click the Create button
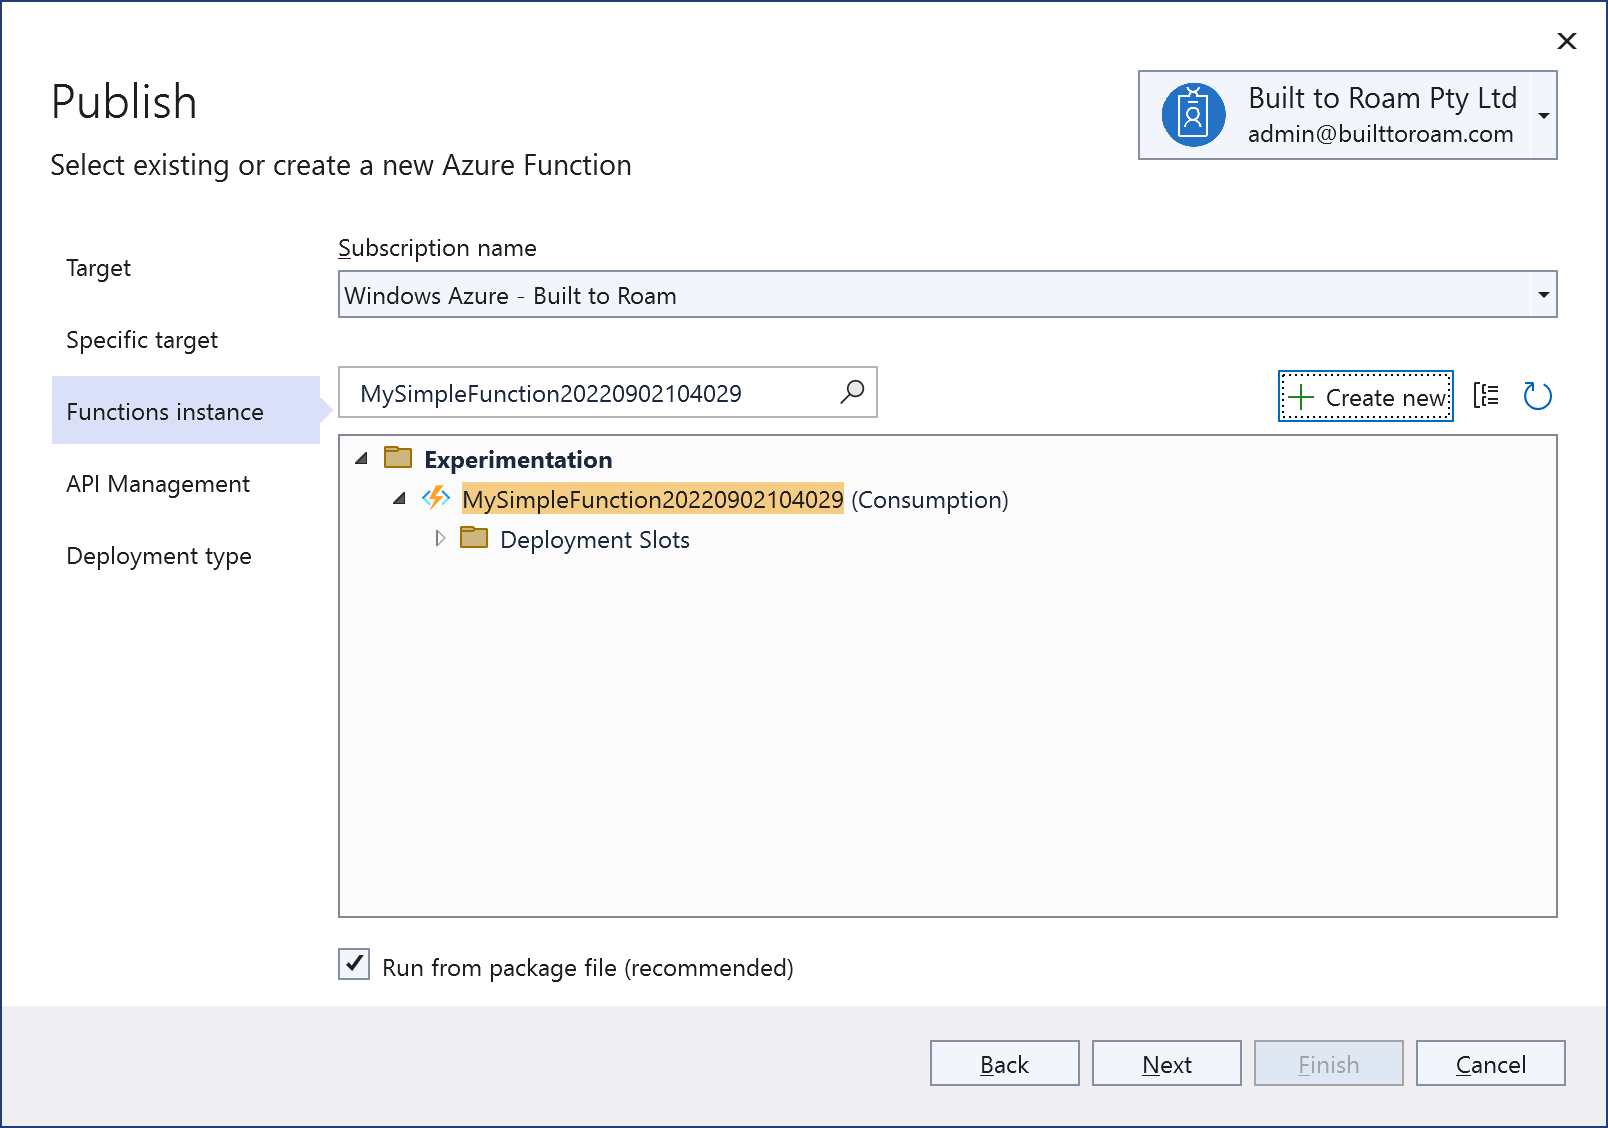
Creating the Azure Function service will take a minute or so, after which you’ll be able to complete the Publish dialog by clicking the Next button. The Publish dialog should have been automatically updated with the newly created Azure Function but double check the details to be sure before clicking Next.
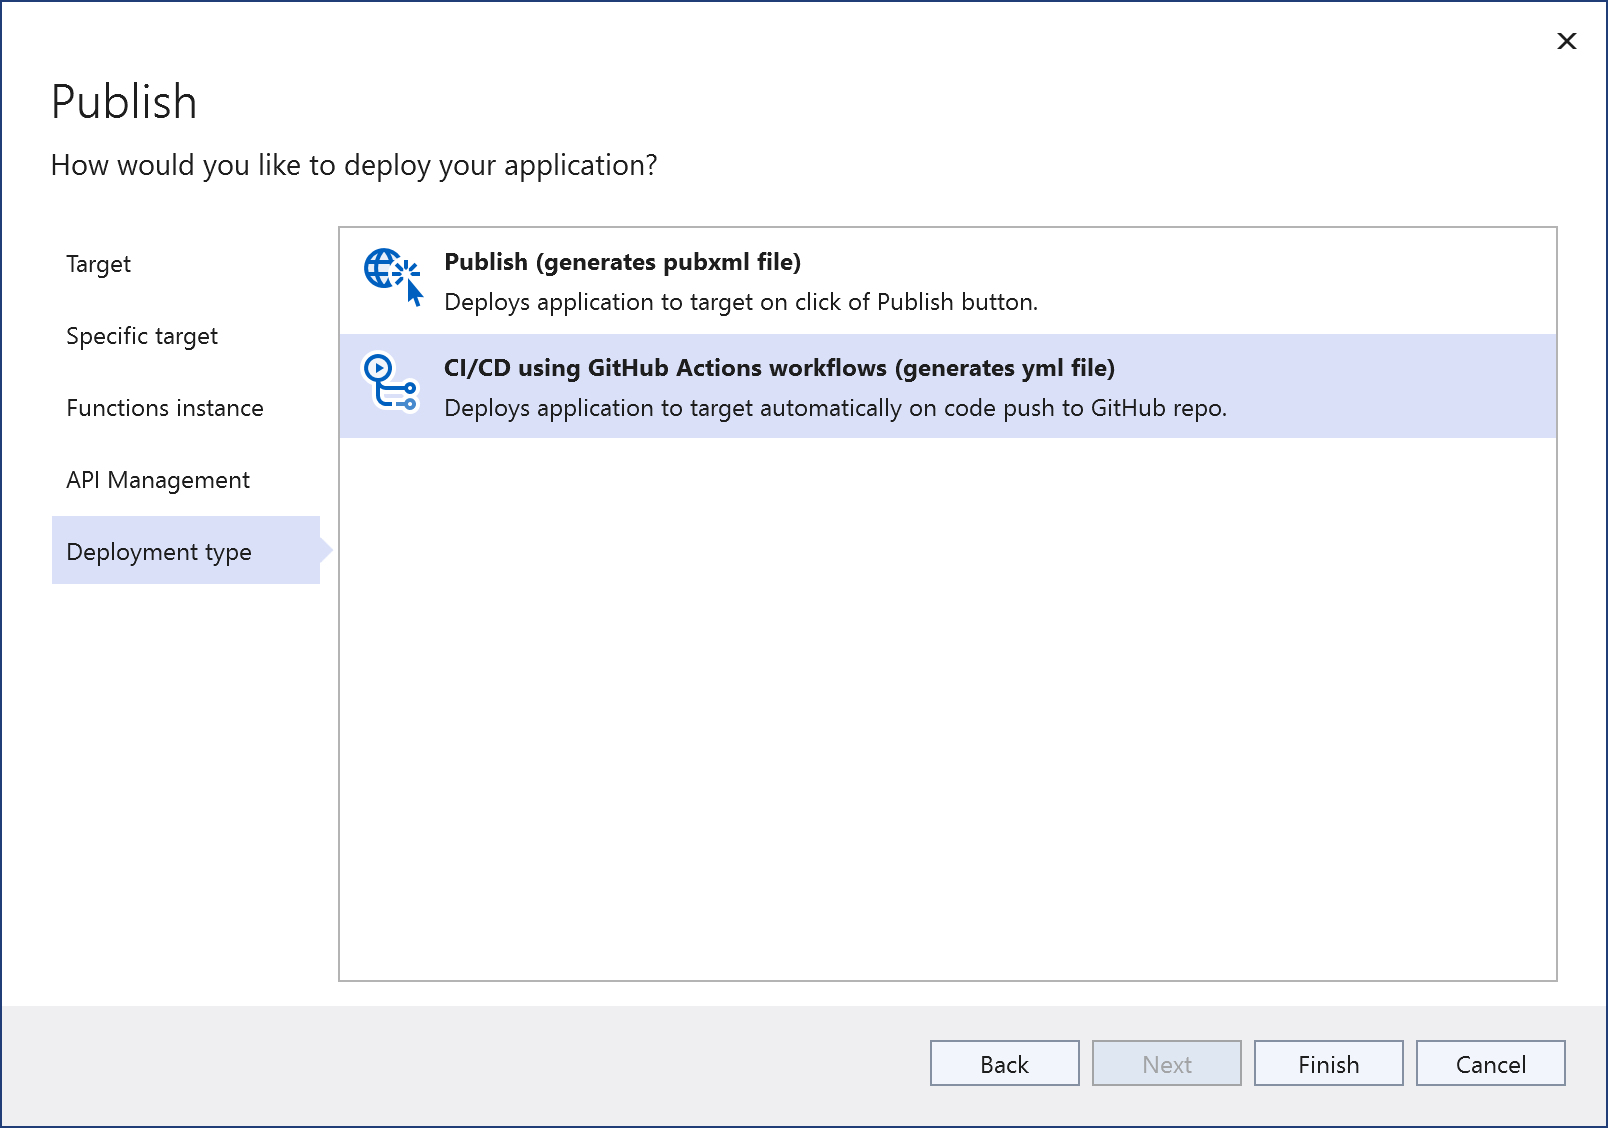
You can skip the API Management step (there’s a Skip this step checkbox just above the Back/Next buttons). In the final step, sleect the GitHub Actions workflows option, before clicking Finish to create the GitHub Action
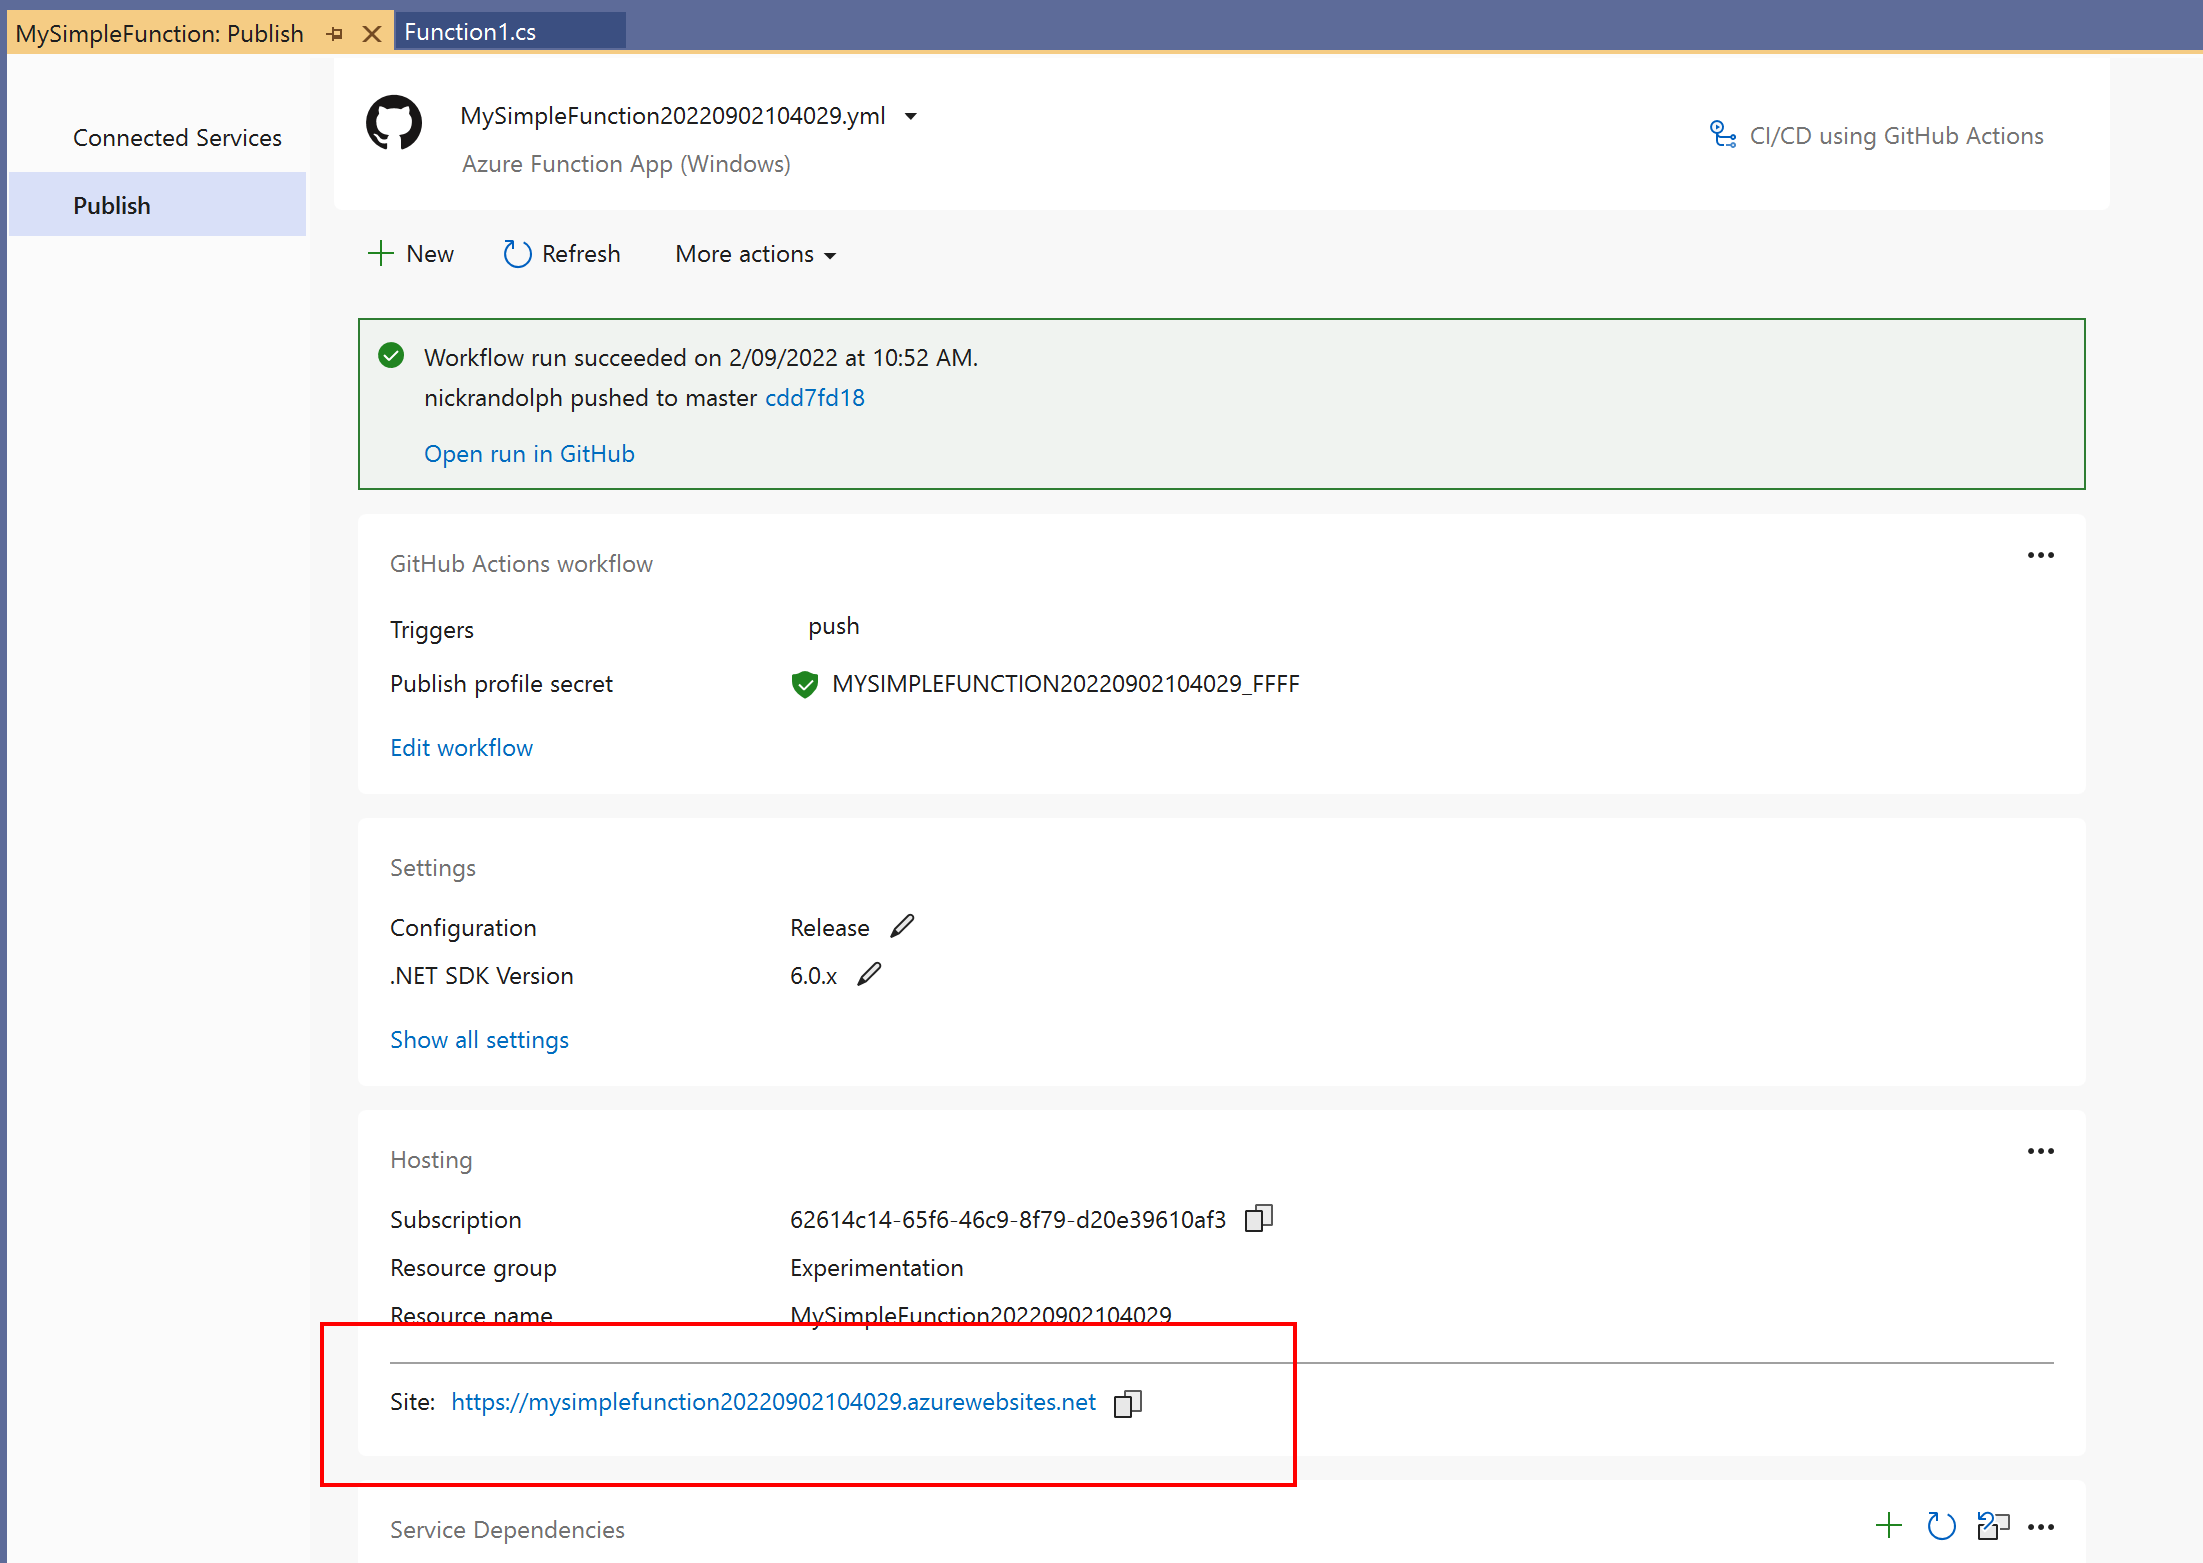
The process of setting up the GitHub Action has created a workflow in the .github\workflows folder. Make sure you commit this change and push to GitHub in order to trigger the workflow.
After pushing the changes to GitHub if you still have the Publish page open in Visual Studio, you should see it update to show that the workflow is running.

Once the workflow has completed (you can click on the Open run in GitHub to see more detail of the workflow progress) you can open the Azure Function in the web browser by clicking the Site link on the Publish page.
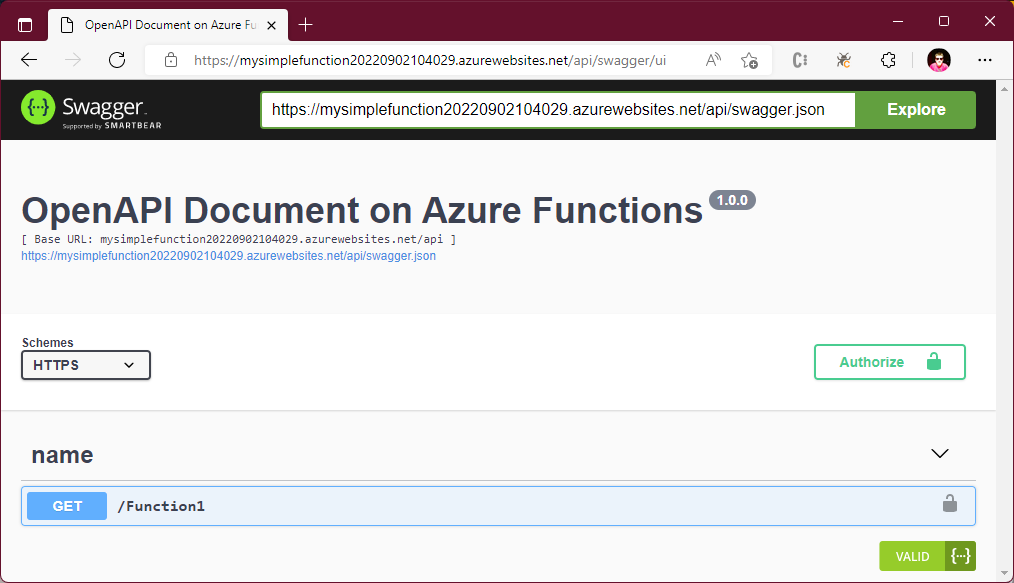
If you just go to the Site link you’ll only see the Azure Function status page, which isn’t very useful. However, you can append “/api/swagger/ui” to the url to see the same Swagger UI page that was available when run locally.
Migrating to an Isolated Process Azure Function
Here are the steps required to migrate this Azure Function from in-process to the isolated process model.
Update NuGet Package References
Start with the Nuget Packages
Replace these:
<PackageReference Include="Microsoft.Azure.WebJobs.Extensions.OpenApi" Version="1.0.0" />
<PackageReference Include="Microsoft.NET.Sdk.Functions" Version="4.1.1" />
With these:
<PackageReference Include="Microsoft.Azure.Functions.Worker" Version="1.6.0" />
<PackageReference Include="Microsoft.Azure.Functions.Worker.Extensions.Http" Version="3.0.12" />
<PackageReference Include="Microsoft.Azure.Functions.Worker.Sdk" Version="1.3.0" />
<PackageReference Include="Microsoft.Azure.Functions.Worker.Extensions.OpenApi" Version="1.4.0" />
Update Using Statements
Next up, we need to update the using statements in the Functions1.cs file
Replace these:
using Microsoft.AspNetCore.Mvc;
using Microsoft.Azure.WebJobs;
using Microsoft.Azure.WebJobs.Extensions.Http;
using Microsoft.Azure.WebJobs.Extensions.OpenApi.Core.Attributes;
using Microsoft.Azure.WebJobs.Extensions.OpenApi.Core.Enums;
using Microsoft.Extensions.Logging;
using Microsoft.OpenApi.Models;
using Newtonsoft.Json;
With these:
using Microsoft.AspNetCore.Mvc;
using Microsoft.Azure.Functions.Worker;
using Microsoft.Azure.Functions.Worker.Extensions.OpenApi.Extensions;
using Microsoft.Azure.Functions.Worker.Http;
using Microsoft.Azure.WebJobs.Extensions.OpenApi.Core.Attributes;
using Microsoft.Azure.WebJobs.Extensions.OpenApi.Core.Enums;
using Microsoft.Extensions.Hosting;
using Microsoft.Extensions.Logging;
using Microsoft.OpenApi.Models;
using Newtonsoft.Json;
using System.IO;
using System.Net;
using System.Threading.Tasks;
Update Class Names and Query Method
There are a few class and attribute names that need to be changed – this can be confusing given that you won’t necessarily see a compile error if you’re using the wrong names. Here are the replacements:
Attribute: FunctionName --> Function
Class: HttpRequest --> HttpRequestData
And you’ll need to change the query value accessor from req.Query["name"] to use the Query extension method req.Query("name").
Add Program.cs and Main
Since the Azure Function will be running in its own process, it needs an entry point (ie a Main method). Add a simple Program class with a Main method. Note that this is where you can add services etc to the DI container.
public class Program
{
    static async Task Main(string[] args)
    {
        var host = new HostBuilder()
            .ConfigureFunctionsWorkerDefaults()
            .ConfigureOpenApi()
            .ConfigureServices(services =>
            {
            })
            .Build();
        await host.RunAsync();
    }
}
Change Local Settings to Dotnet-Isolated
For running locally you need to update the local.settings.json file to set the FUNCTIONS_WORKER_RUNTIME value. Note that this file by default isn’t checked in – if you’re working in a team and want to ensure everyone is able to run locally, you could consider checking this file into the repository.
{
    "IsEncrypted": false,
    "Values": {
        "AzureWebJobsStorage": "",
        "FUNCTIONS_WORKER_RUNTIME": "dotnet-isolated"
    }
}
Change Azure Function Runtime to Dotnet-Isolated
Login to the Azure Portal and change the FUNCTIONS_WORKER_RUNTIME Configuration value from dotnet to dotnet-isolated.
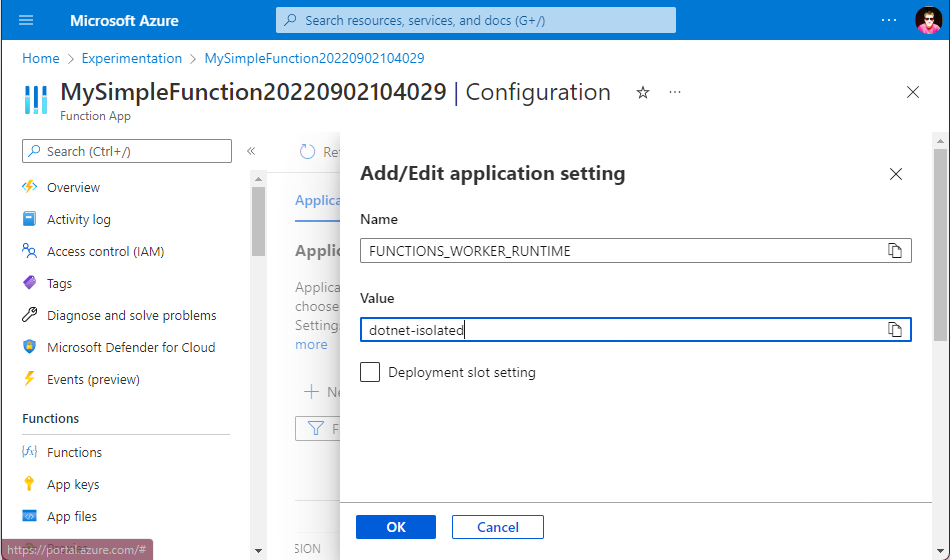
After clicking OK, don’t forget to also click Save to apply the changes to Configuration to the Azure Function.
At this point you should be good to go – your Azure Function has been switched over to using the isolated process model. For the most part you shouldn’t see any difference, except now you have full control over what packages you reference and the version of .NET that you’re targetting.
1 thought on “How to Change an Azure Function Written in .NET from In-Process to Isolated Process”
Comments are closed.