In my previous post we looked at building a super-basic application that leverages Microsoft Orleans to host an instance (grain) of the IHelloWorld interface in a silo that can be invoked remotely. Unfortunately, whilst this was enough to get everything up and running, the configuration we used will only work in development. In this post we’re going to look at using Azure Table Storage or Azure Cosmos DB to link the front and backend components.
What’s not immediately obvious is how the frontend application (in this case a net6 web api) knows how to connect to the silo (also a net6 web api). The code I showed in my previous post leveraged the support provided by Microsoft Orleans for clustering on localhost (i.e. doesn’t require any other infrastructure to get up and running in development). This is setup using the LocalhostSiloBuilder that’s part of the Orleans.Azure.Infrastructure project we added (shout out to Brady Gaster for this fantastic work)
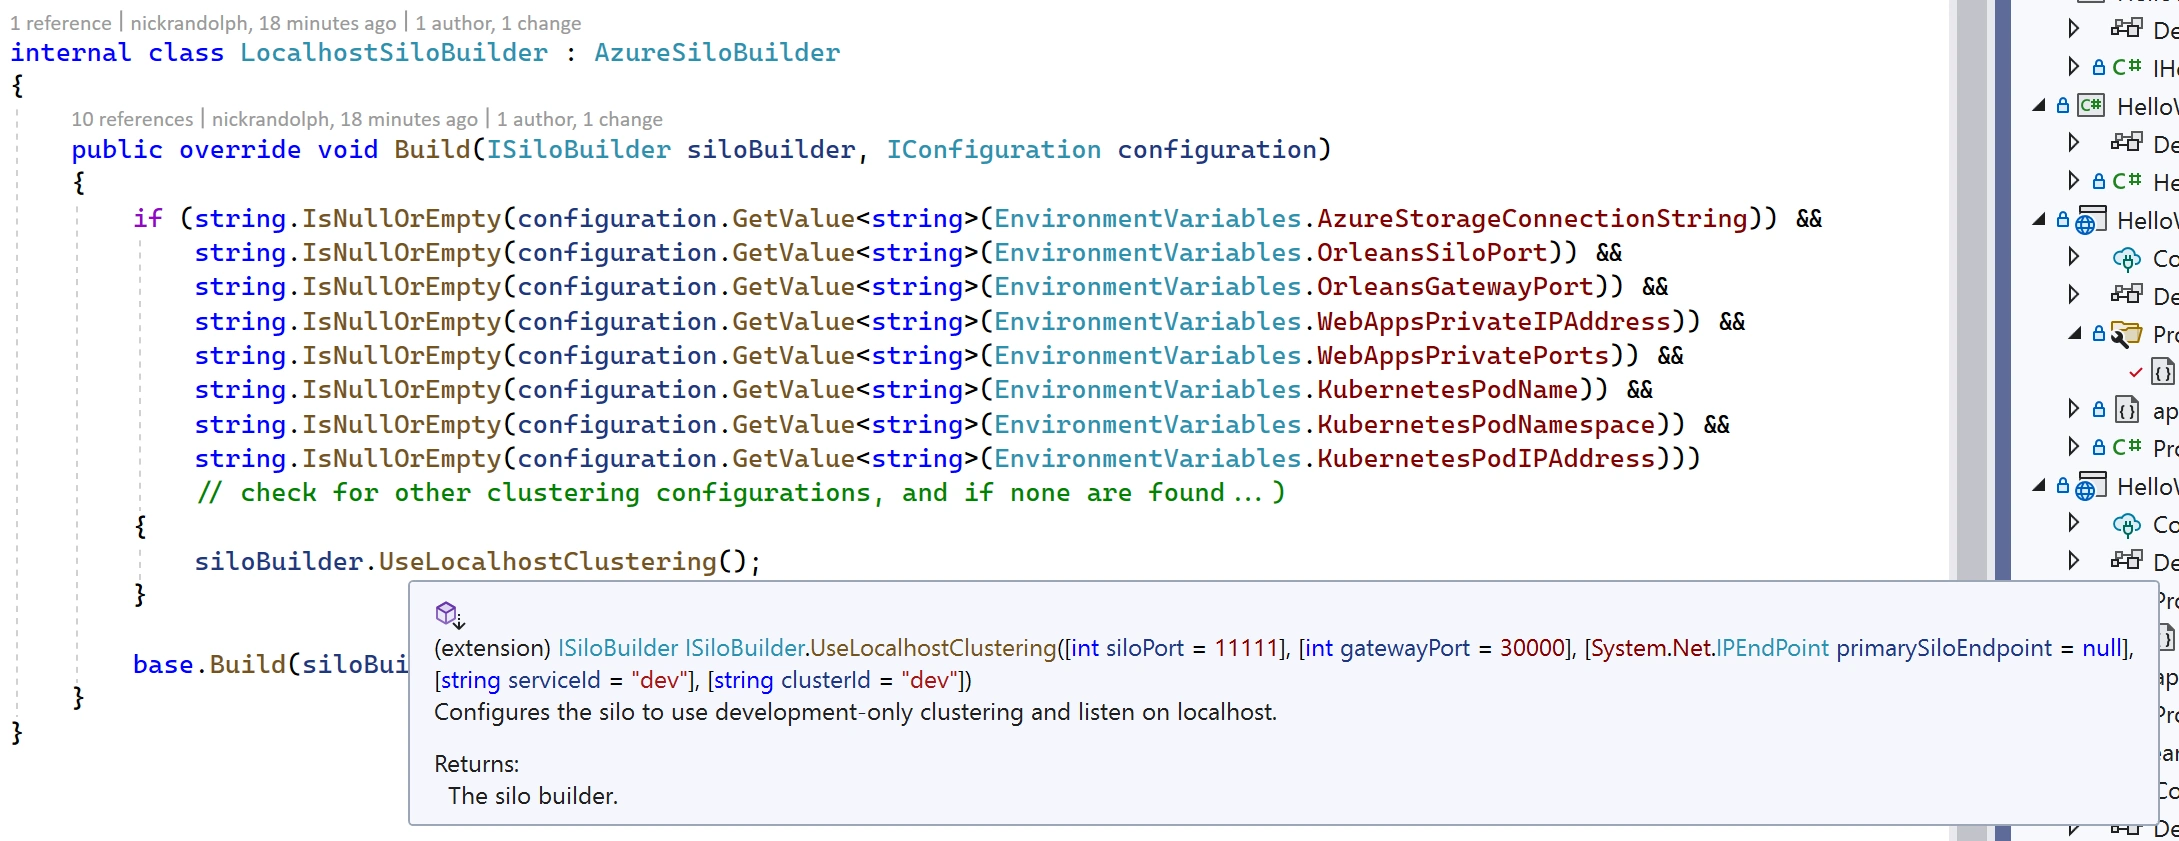
However, as you can imagine, this isn’t going to work in a production environment, since your silos are likely to be on different machines/containers and won’t be able to communicate via localhost. Luckily all we need to do in order to use something more resilient is to change the configuration information we specify in the launch settings (when we deploy to Azure, these will be environment/configuration values that can be set either via bicep/arm template or in the portal).
In this post we’re going to use the Microsoft Orleans built in support for Azure Table API to connect to either Azure Table Storage or Azure Cosmos DB. We’re going to cover both in this post because you will need to consider which storage technology is suitable for your scenario – in some scenarios Azure Table Storage can be cheaper but Azure Cosmos DB might give you higher availability and additional features such as a change feed.
Azure Table Storage
We’ll start with using Azure Table Storage. To get started with local development, you shouldn’t need to install anything as Azurite is installed as part of Visual Studio 2022. Azurite (more information) is an open source emulator for working locally with Azure blob, table and queue storage and supercedes the now deprecated Azure Storage Emulator.
You will need to start Azurite from the command prompt (run as Administrator).

The only change we need to make to our Microsoft Orleans based application is to add an environment variable, ORLEANS_AZURE_STORAGE_CONNECTION_STRING. This can be done by adding a new key-value pair under the environmentVariables node in the launchsettings.json file for both the HelloWorld.Silo and HelloWorld.Services projects.
{
  "$schema": "https://json.schemastore.org/launchsettings.json",
  "profiles": {
    "HelloWorld.Services": {
      "commandName": "Project",
      "dotnetRunMessages": true,
      "launchBrowser": true,
      "applicationUrl": "https://localhost:7048;http://localhost:5048",
      "environmentVariables": {
        "ASPNETCORE_ENVIRONMENT": "Development",
        "ORLEANS_AZURE_STORAGE_CONNECTION_STRING": "UseDevelopmentStorage=true"
      }
    }
  }
}
To connect to the Azurite, set the value of the ORLEANS_AZURE_STORAGE_CONNECTION_STRING variable to “UseDevelopmentStorage=true”. This is consistent with the Azure Storage Emulator if you happen to still be using that.
That’s all you need to do in order to use Azure Table Storage to link the front and backend parts of the application. When you run your application, connecting to the Azurite emulator, you still want to be able to confirm that data is being correctly written. The Azure Storage Explorer can be used to explore the data that’s being persistent locally.

Of course, when you publish your application to Azure, you’ll need to replace the value of the ORLEANS_AZURE_STORAGE_CONNECTION_STRING variable with the actual connection string for your Azure Table Storage service.
Your actual connection string should take the format;
DefaultEndpointsProtocol=https;AccountName=<account-name>;AccountKey=<account-key>
You can retrieve the connection string from the Access Keys tab. You need to click the Show Keys button at the top of the tab, and then you can copy the Connection String.
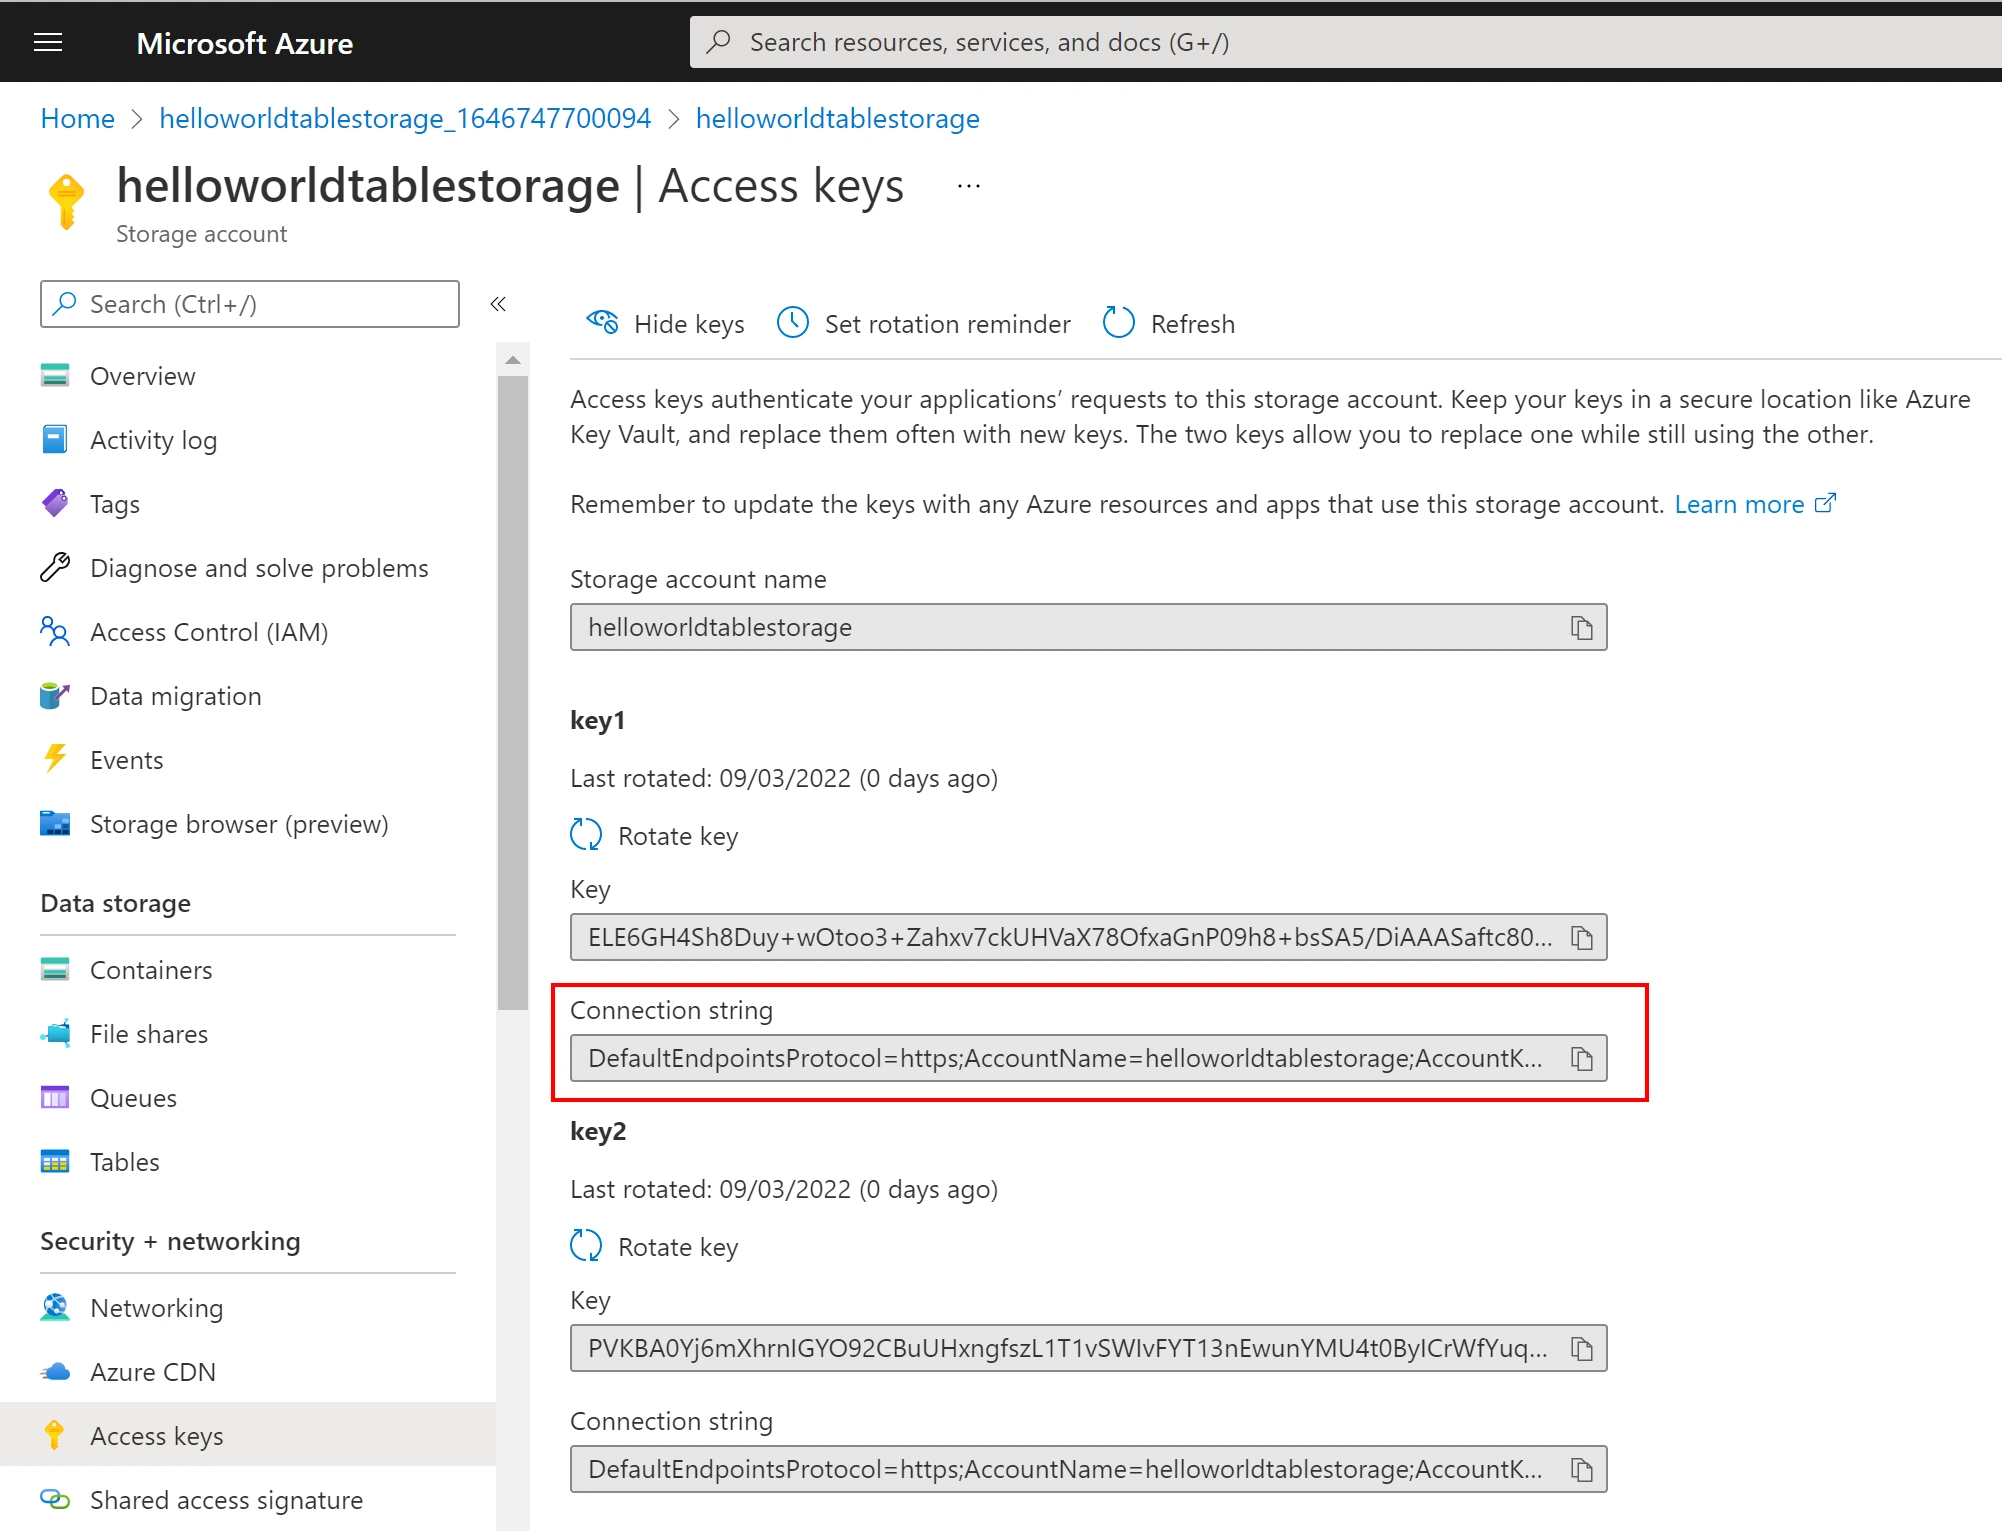
You can get more information on connecting strings for Azure storage here
When you run the application with connection strings set to use Azure table storage, you’ll probably want to check that data is being created. From the Azure Portal you can select the Storage browser (preview) tab and drill down to inspect the silo instances that have been entered.

Azure Cosmos DB
An alternative to using Azure table storage is to use Azure Cosmos DB. This is as simple as changing the connection string because Azure Cosmos DB supports the same Table API that Azure table storage uses.
Similar to using table storage, there is Azure Cosmos DB Emulator that can be installed and run in order to faciliate local development. However, it’s important that when you launch the emulator, you enable the table api (disabled by default) according to the documentation. Open a command prompt as Administrator and start the emulator using the /EnableTableEndpoint flag
C:\Program Files\Azure Cosmos DB Emulator>Microsoft.Azure.Cosmos.Emulator.exe /EnableTableEndpoint
The connection string for the Cosmos emulator is always the same (unless you override the startup parameters to use a different key). Don’t forget to update the connection string for both the HelloWorld.Silo and HelloWorld.Services projects.
"ORLEANS_AZURE_STORAGE_CONNECTION_STRING": "DefaultEndpointsProtocol=http;AccountName=localhost;AccountKey=C2y6yDjf5/R+ob0N8A7Cgv30VRDJIWEHLM+4QDU5DE2nQ9nDuVTqobD4b8mGGyPMbIZnqyMsEcaGQy67XIw/Jw==;TableEndpoint=http://localhost:8902/;"
Unfortunately if you attempt to run the application, you’ll get an exception when the connection string is being parsed.
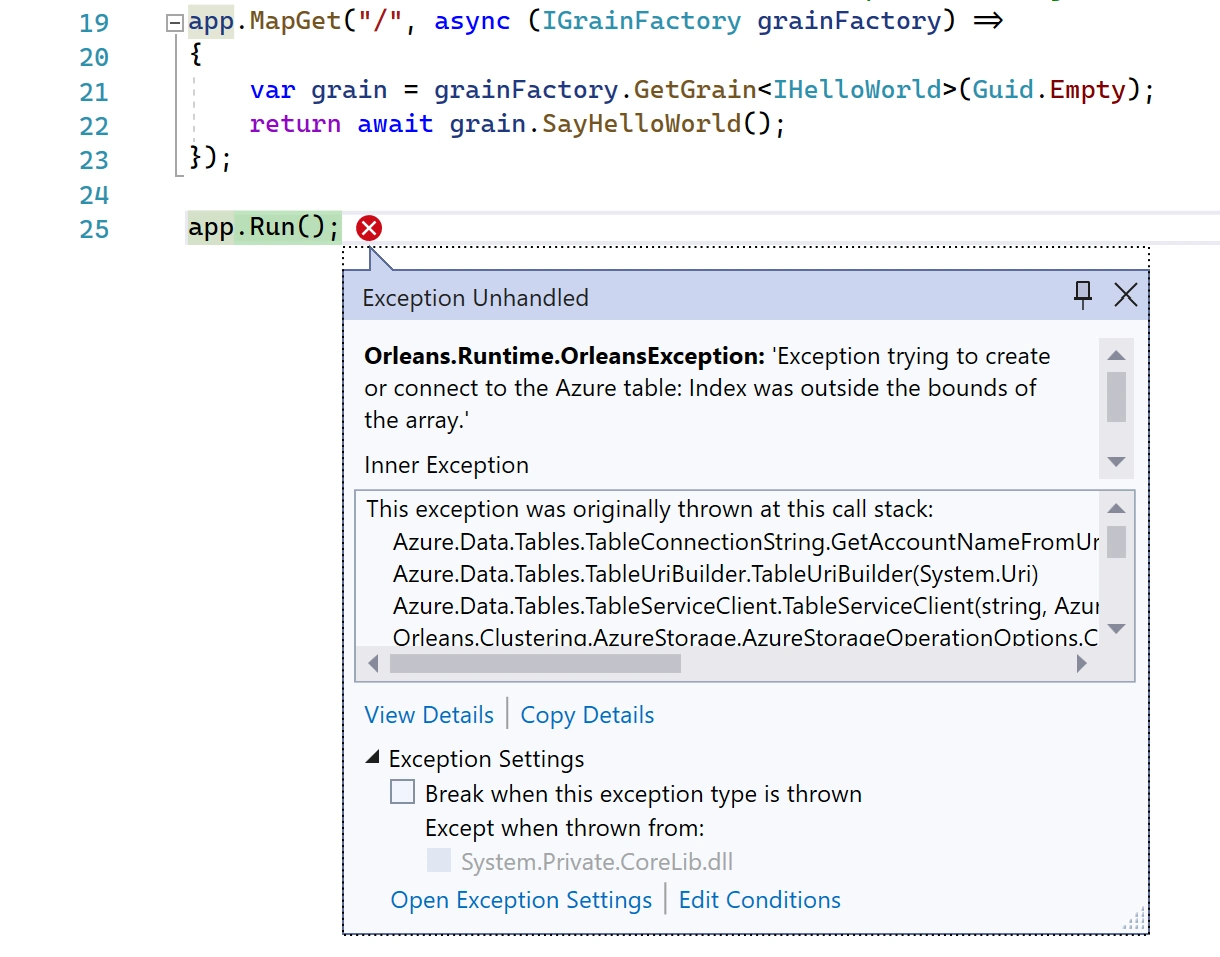
This exception can be resolved by upgrading to the latest version of the Azure.Data.Tables nuget package.

After installing the latest Azure.Data.Tables package into the HelloWorld.Silo and HelloWorld.Services project, you should be able to successfully run the application, connecting to the locally running Cosmos DB emulator.
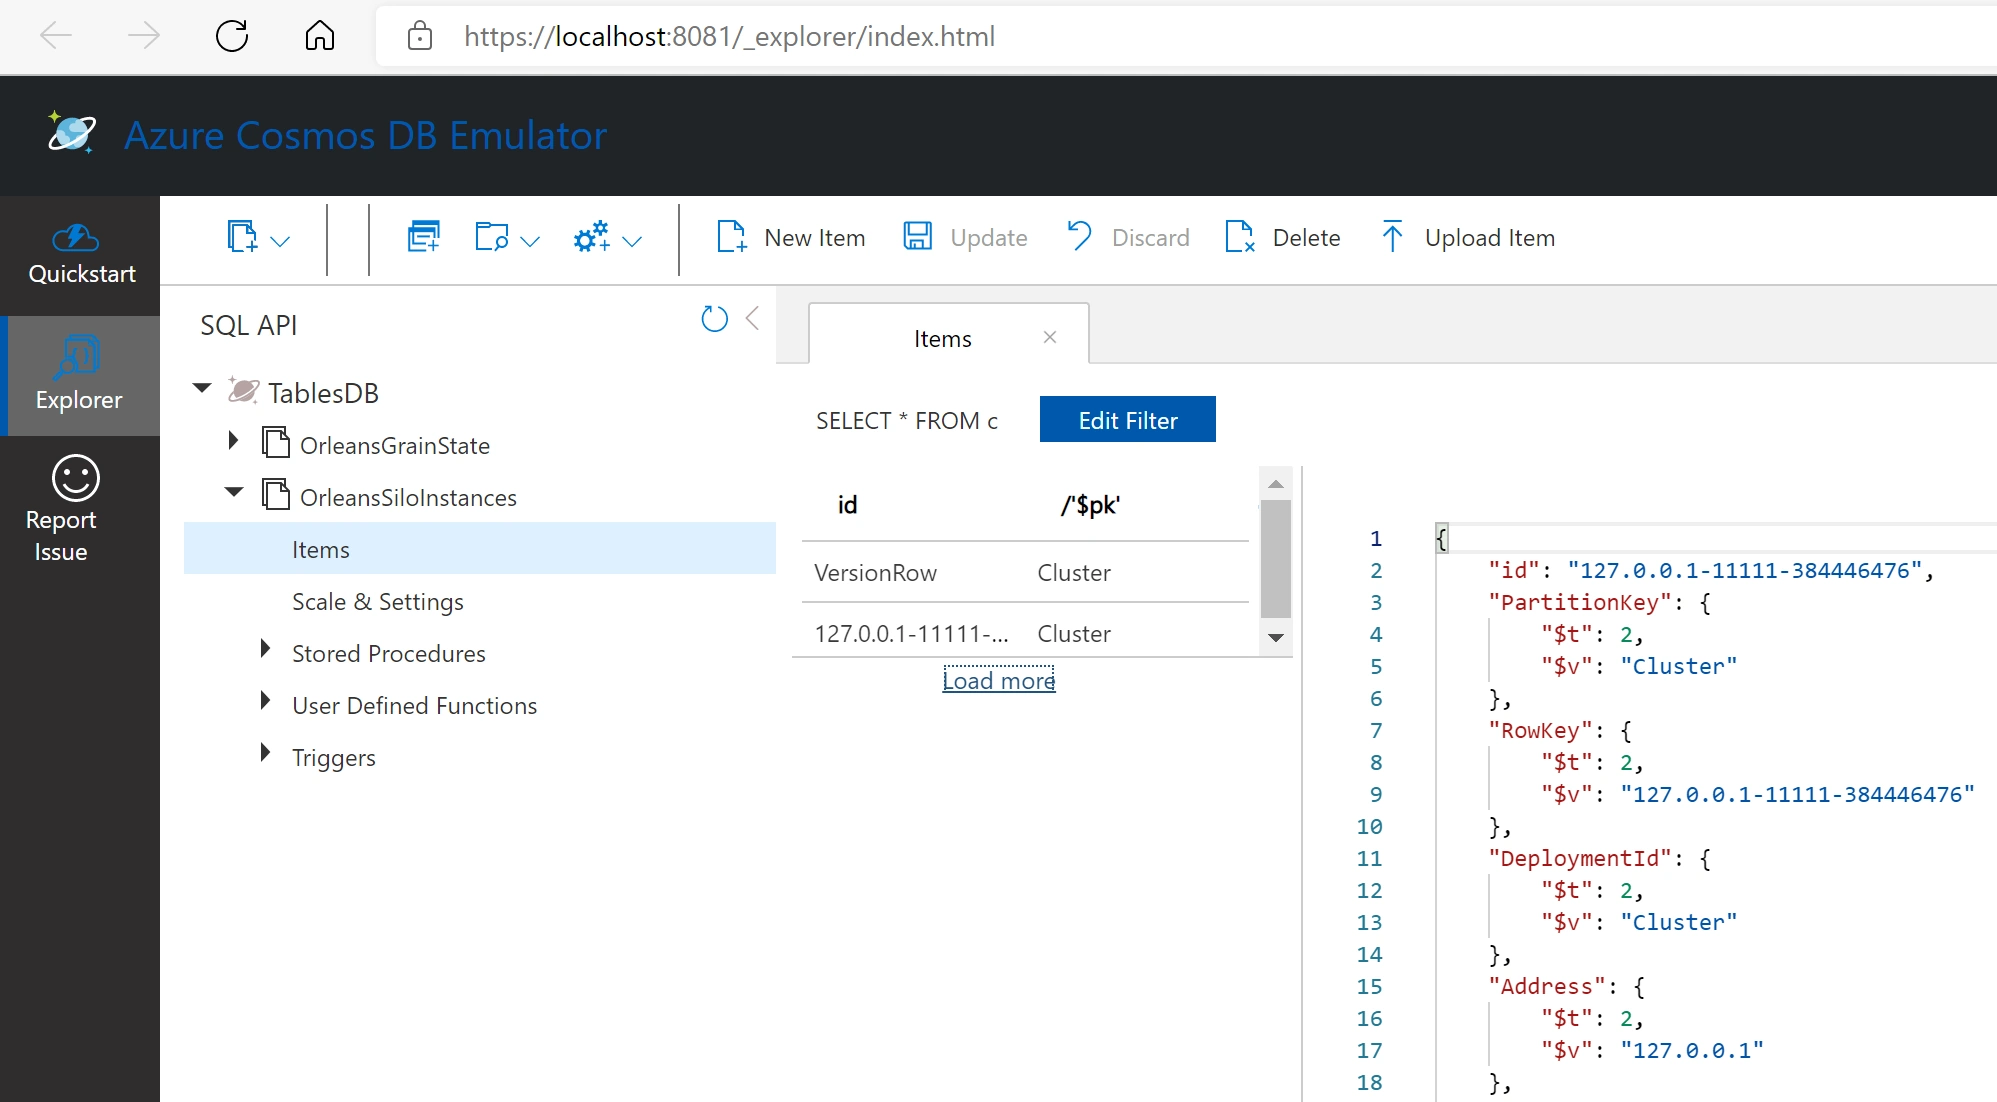
When the Cosmos DB emulator is launched, it opens a browser window, which has an Explorer tab. The Explorer tab can be used to inspect and query the data that’s been saved to the emulator.
The last thing to do is to switch out the connection string with one for an actual Azure Cosmos DB service. You can get the connection string from either the Quick Start tab, or the Connection String tab.

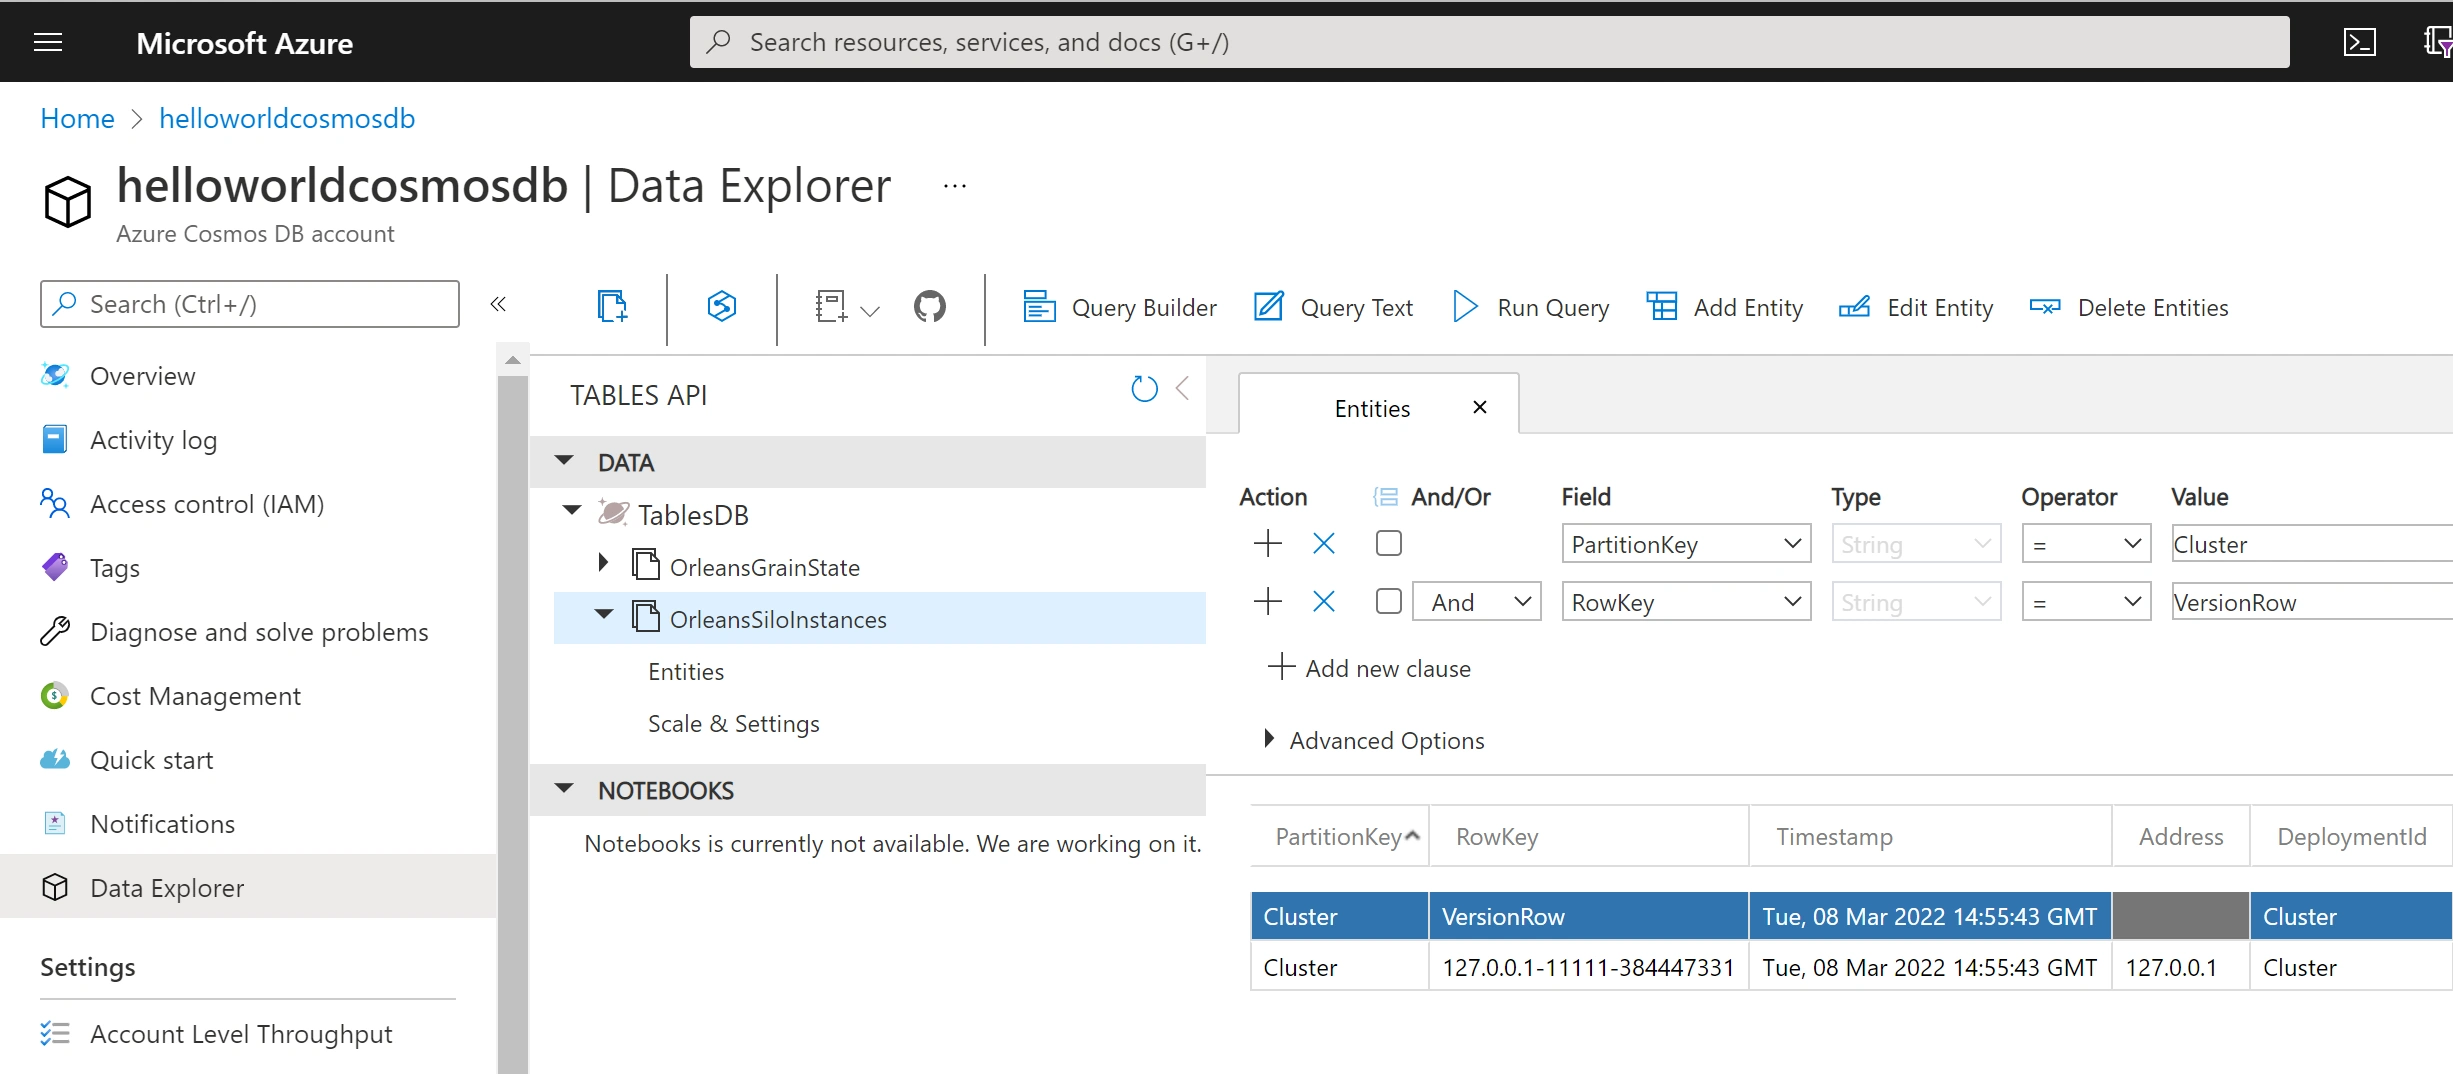
Similar to the Cosmos DB emulator, when you’re connecting to an actual Azure Cosmos DB service, you can use the Data Explorer tab on the Azure portal to explore the data that’s been persisted.
In this post we’ve covered connecting the HelloWorld sample application that uses Microsoft Orleans to both Azure Table Storage and Azure Cosmos DB. In the next post I’ll cover publishing the services into Azure.