One of the guilty truths of software development is that despite our best efforts we never write enough tests, and seldom do we write enough automated tests. This isn’t entirely our fault because for some reason testing frameworks, particularly those for UI testing, always seem to be an after thought. In this post we’re going to look at writing and executing UI test for the WebAssembly (WASM) head of an application built using the Uno Platform.
Now before I get into this I’m going to write a bit of a side note, mainly to have a mini-rant on the current state of cross platform tools development by Microsoft. Why Microsoft (since this is a post about the Uno platform)? Because Uno uses UWP, and going forward, WinUI, as the specification for the APIs that they make available across Android, iOS, Web (WASM), MacOS, Linux etc. As such, you’d expect Microsoft to have appropriate tooling to support the creation and execution of UI tests. I mean, surely if Microsoft is creating frameworks like UWP and WinUI, they must have tooling to test the generated UI, so why not open source this to the benefit of the community?
Whilst on the topic of Microsoft, I will commend them on Xamarin.UITest which can be used to author and execute UI tests for Android and iOS. Uno leverages Xamarin.UITest to invoke the cross platform UI tests on Android and iOS. However, what’s concerning is whether Xamarin.UITest will continue to work with dotnet Maui, or whether there will be some other tool for test automation.
Ok, that’s enough of a rant, let’s get on with writing some tests for an Uno application
Uno.Extensions
One of the projects that the Uno team have been working on is Uno.Extensions. This is similar to the Microsoft.Extensions libraries (aka Extensions to the runtime libraries) and has the goal of making it easier and quicker to build applications using the Uno platform. The Uno.Extensions libraries are all published via nuget and you can pick and choose which libraries make sense for your application. Alteratively, if you’re just getting started with a new application, you can install Uno.Extensions.Templates which will give you some dotnet new templates that you can use to create your application.
dotnet new --install Uno.Extensions.Templates
For the purpose of this blog post we’re going to use the unoapp-extensions template, which will give us a very basic application with a couple of pages and a number of the default extensions libraries pre-configured.
dotnet new unoapp-extensions -o UnoForUITestingApp
This will create a solution with the name UnoForUITestingApp, which you can open in Visual Studio.

As you can see, the solution contains head, or target, projects for each of the supported platforms. It also includes a Shared project, for any UI code such as pages, controls, styles etc and a Core project, for any non-UI code such as model/entities, view models and services. There are also two test projects, Tests, for unit tests and UITests, for UI tests. Each of thest test project contains a single test to get you going – it won’t give you 100% code coverage from the get go, but it’s a great starting point because the responsibility is now with you to write the tests, no excuses!
Executing UI Tests on WebAssembly
You’d think since everything is already created, that executing the UI tests would be as simple as right-clicking the UITests project and selecting Run Tests. Well, the good news is that it is almost that easy. However, the bad news is that if you don’t check a couple of things, you may end up going in circle not knowing why your UI tests are failing.
Install and Use Chrome
Yeh, you’re probably rolling your eyes as if this was joke – of course we all have Chrome installed. For me, I didn’t have Chrome installed on my dev machine initially because the latest version of Edge is so similar I didn’t see the point. Anyhow, the upshot is that UI Tests don’t currently (at the time of writing this post) work with Edge, so you’ll need Chrome installed.
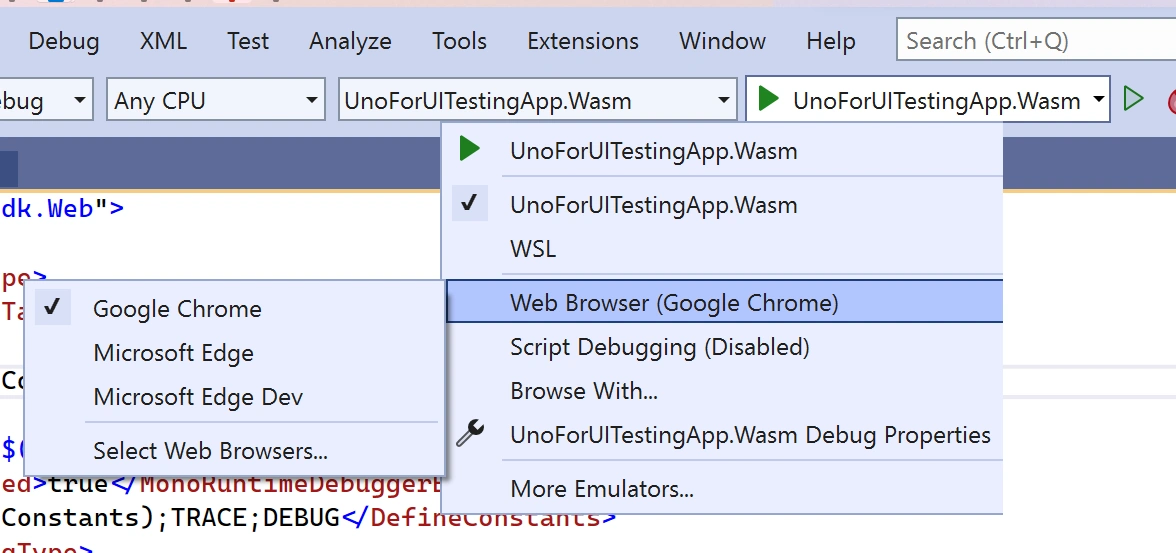
You also need to set Chrome to be your default browser in Visual Studio. Easiest way to do this is to set the Wasm project to be the startup project and then set the Web Browser to Google Chrome from the run dropdown.
Start without Debugging
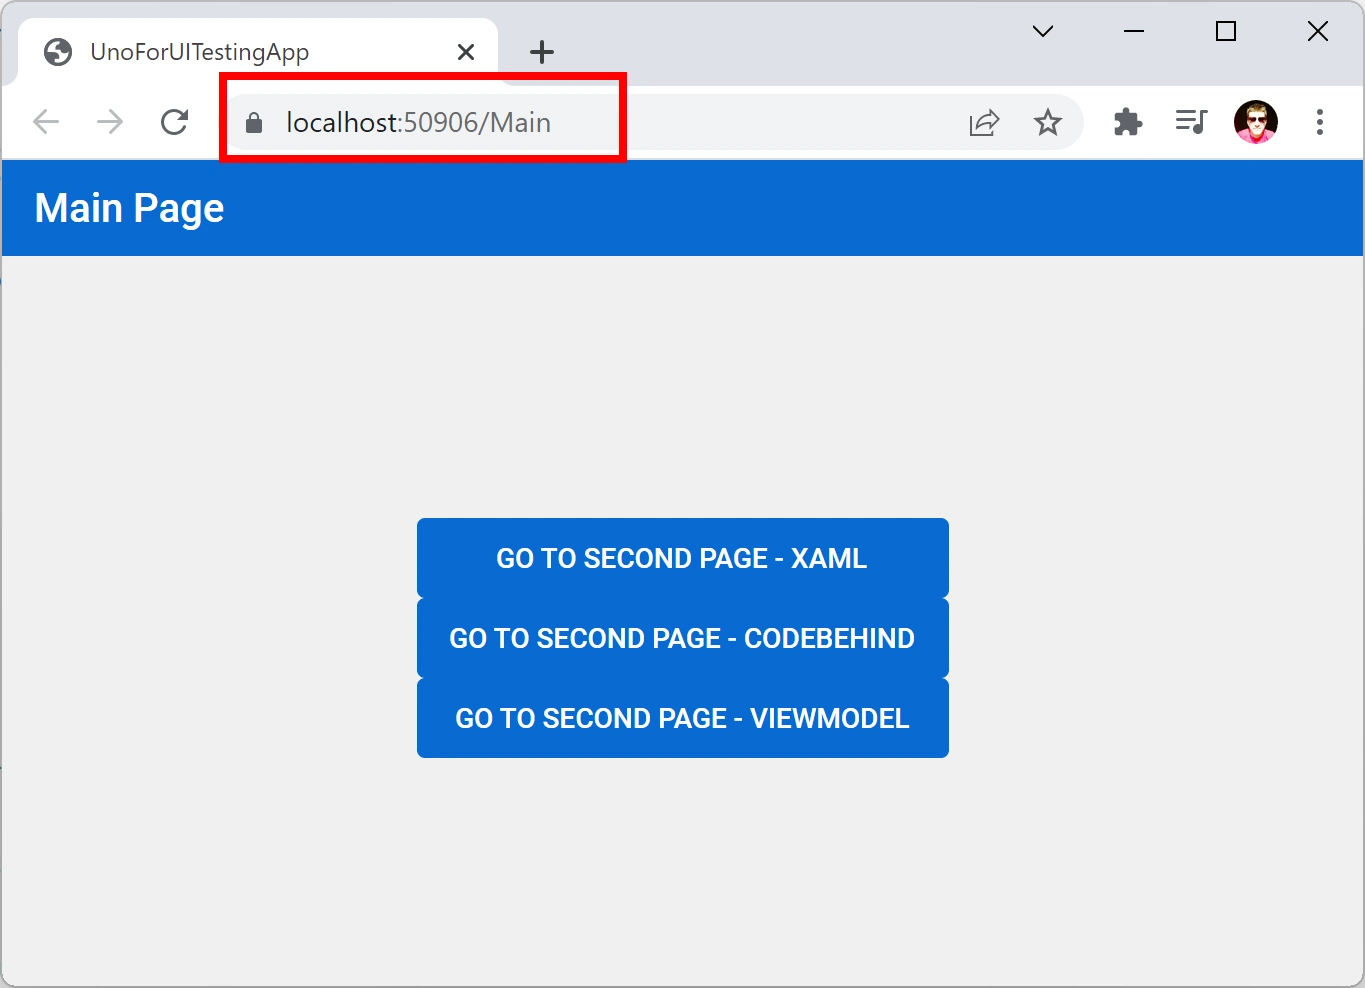
The UI Tests work by launching the browser, waiting for the application to render and then invoking some actions and verifying how the application behaves. In order for this to work, your application needs to be deployed and running (ie you need your application to be available when you navigate to localhost). To do this press Ctrl-F5, or select Start without Debugging from the Debug menu – this should launch Chrome and display the running application.
Note: If a) Chrome doesn’t launch or b) your application doesn’t load, you need to fix these issues first, before you proceed to even attempt to run your UI Tests.
Executing UI Tests
Now that you’ve configured Chrome and your application is running, the only thing left to do is to execute the UI Tests….. almost!!!
There’s one last thing you need to check, which is the url that should be launched in order to execute the UI Tests. There are two ways to get this:
1 – When you started the application and Chrome was launched with the application, you can take note of the url that gets launched.
2 – Alternatively, you can get the url from the launchSettings.json file in the wasm project.
{
  "profiles": {
    "UnoForUITestingApp.Wasm": {
      "commandName": "Project",
      "launchBrowser": true,
      "environmentVariables": {
        "ASPNETCORE_ENVIRONMENT": "Development"
      },
      "applicationUrl": "https://localhost:50906;http://localhost:50907"
    }
  }
}
Open the Constants.cs file in the UITests project and update the WebAssemblyDefaultUri constant
public readonly static string WebAssemblyDefaultUri = "https://localhost:50906/";
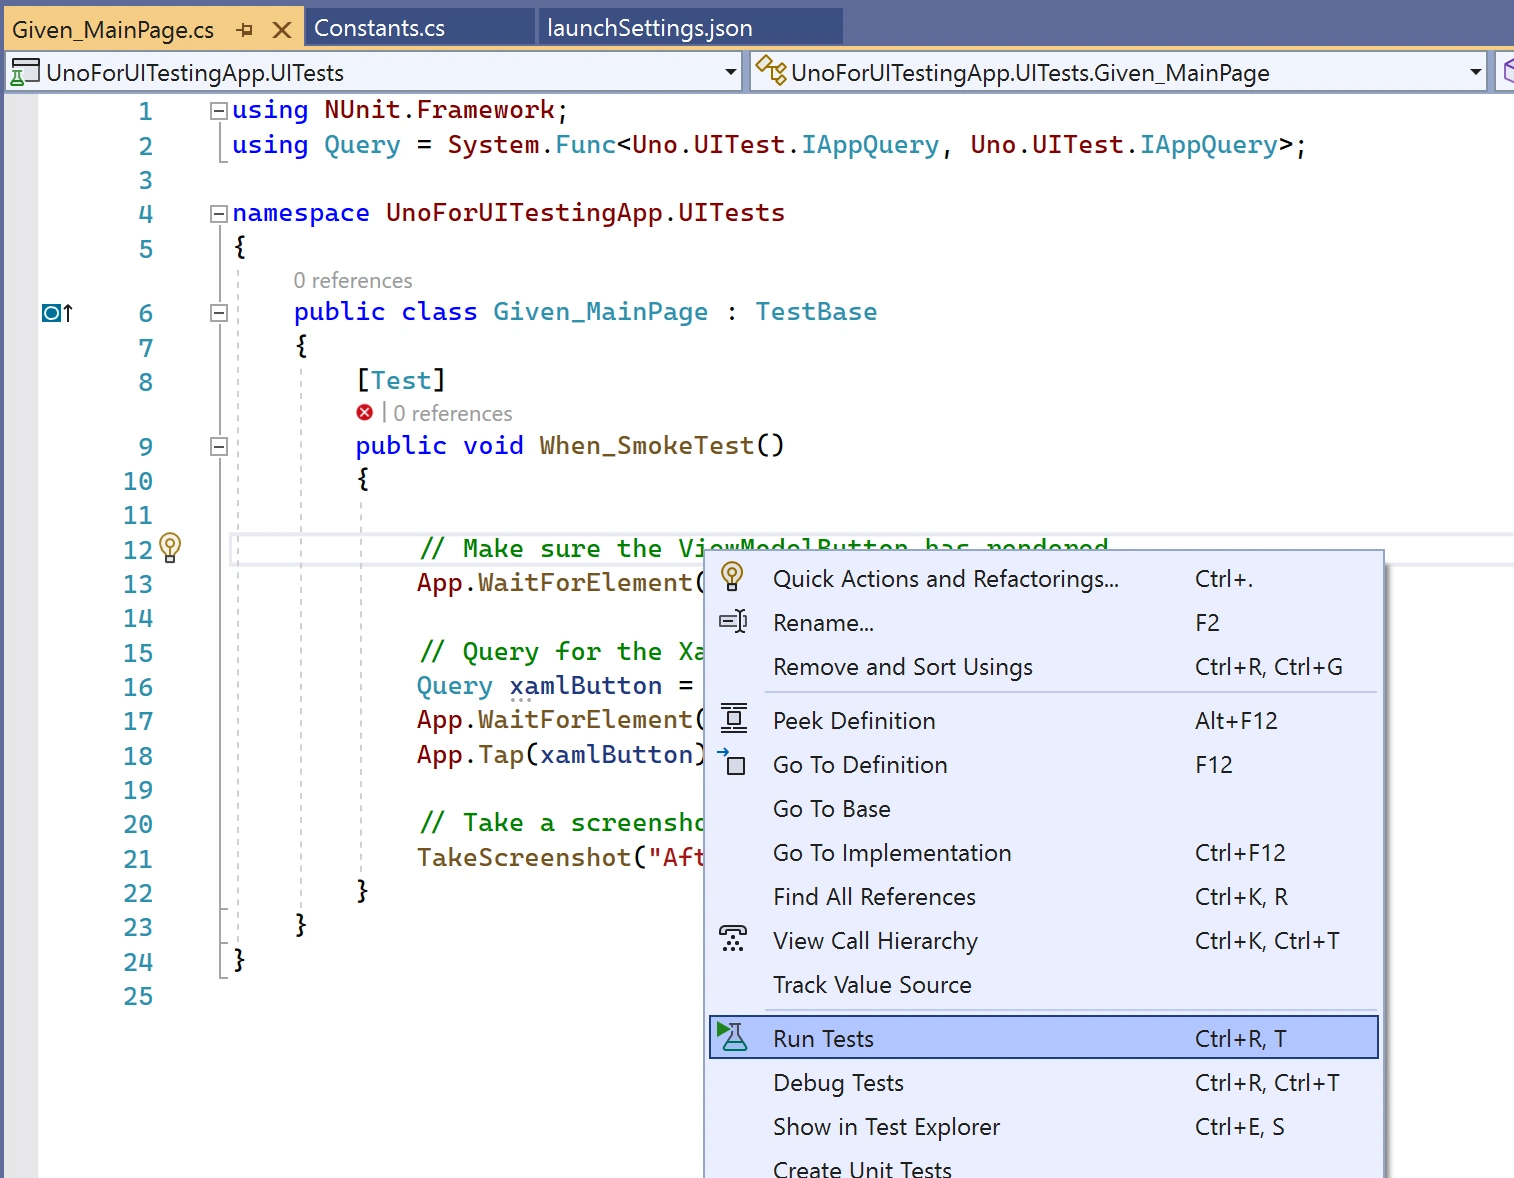
Now you can go ahead and either right-click the UITests project, or right-click inside one of the tests, and select Run Tests.
As part of running the tests, Visual Studio will display the Test Explorer window. This can be used as an alternative to select and execute individual tests, both unit tests and UI tests.

One last thing to remember – if your UI tests start failing, you may want to double check that your application is still running; simply press Ctrl-F5 to check that your application is able to be built and run.
Ok, actually one other thing to note – if you’re making changes, you need to make sure you close the browser windows in order for a new version of the application to be loaded the next time you run the UI tests.
1 thought on “UI Testing for WASM (WebAssembly) with the Uno Platform”
Comments are closed.