Code sample for this post is on GitHub: AppWindowSample
One of the more significant differences between building apps for mobile devices, such as iOS and Android, and desktop pcs (Windows or Mac) is the concept of windows. On a mobile device, your app typically runs full screen, or perhaps split screen on some devices, so you never need to worry too much about the window of the application. If you take this approach when building desktop apps, you end up producing some truly unremarkable interfaces, such as those sported by virtually every messaging platform because they’ve apparently forgotten they can launch additional windows. In this post we’re going to look at what the Windows App Sdk brings to the table in terms of window management.
One thing to note about the window apis that have been included in the first version of the Windows App Sdk is that they’ve all oriented around an individual window. There are no apis for managing multiple windows; the apis focus on resizing/repositioning and adjusting the visual style of an individual window.
Grab an AppWindow
Let’s get into it and walk through some of the apis that are part of the windowing support in the Windows App Sdk. To get started with the Windows App Sdk, you need your application to reference the Windows App Sdk – this could start with a new WinUI based application using the Visual Studio templates, or you could add a reference to your existing Win32 application. The next thing you’ll need is an AppWindow instance. Unfortunately this varies depending on what type of application you’re building. It would be nice if a future iteration of the Windows App Sdk could make this consistent and avoid the need for developers to have to retrieve the Hwnd (seriously, why is this even still a thing??)
Here’s a set of extension methods that can be used to get the AppWindow instance for WinUI, WPF and WinForms.
public static class AppWindowExtensions
{
    public static AppWindow GetAppWindowForWinUI(this Microsoft.UI.Xaml.Window window)
    {
        var windowHandle = WinRT.Interop.WindowNative.GetWindowHandle(window);

        return GetAppWindowFromWindowHandle(windowHandle);
    }
    public static AppWindow GetAppWindowForWPF(this Window window)
    {
        var hwnd = new WindowInteropHelper(window).EnsureHandle();
        return GetAppWindowFromWindowHandle(hwnd);
    }
    public static AppWindow GetAppWindowForWinForms(this Form window)
    {
        return GetAppWindowFromWindowHandle(window.Handle);
    }

    private static AppWindow GetAppWindowFromWindowHandle(IntPtr windowHandle)
    {
        var windowId = Win32Interop.GetWindowIdFromWindow(windowHandle);
        return AppWindow.GetFromWindowId(windowId);
    }
}
The type of application you’re building, WinUI, WPF or WinForms, will determine which of these extension method you need to call. For example the WPF code might look like
AppWindow appWindow;
public MainWindow()
{
    InitializeComponent();

    var success = Bootstrap.TryInitialize(0x00010000, out _);
    if (!success)
    {
        MessageBox.Show("Unable to initialize Windows App SDK - Make sure it's installed");
        return;
    }

    appWindow = this.GetAppWindowForWPF();

}
Note that in this example, we’re working with an unpackaged WPF application, so we need to make sure we call the Bootstrap.Initialize method (or as this example shows, the TryInitialize method).
Working with the AppWindow
The AppWindow class itself exposes a number of methods that you can use to adjust the window of your application. Let’s go through some of them briefly here – the AppWindowSample on GitHub has examples of these methods in applications for WinUI, WinForms and WPF (the code is 99% the same across these different application types).
Change Application Icon using the AppWindow
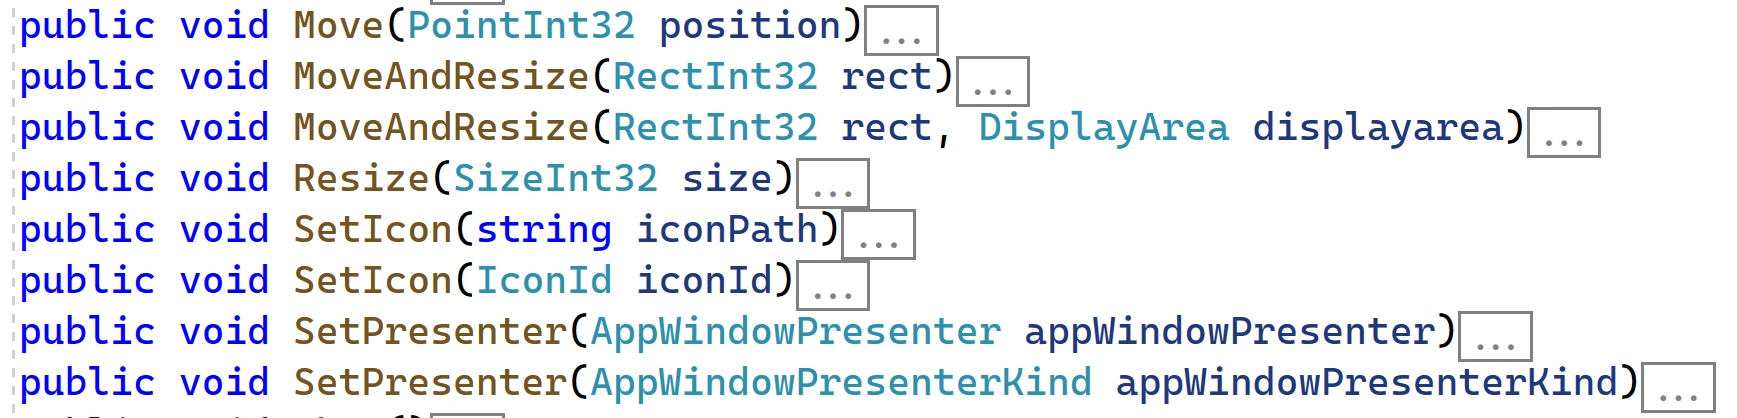
Let’s start off with something simple – the AppWindow exposes a method SetIcon which can be used to change the icon that is displayed both in the title bar and in the task bar. This method requires the full path to the icon that you want to use. For example, if you’ve included an icon as Content alongside your application, you can use the following code to get the filename and pass it to the SetIcon method.
public static void ChangeIcon(this AppWindow appWindow, string iconFileName)
{
    var path = Assembly.GetExecutingAssembly().Location;
    var filePath = Path.Combine(Path.GetDirectoryName(path), iconFileName);
    appWindow.SetIcon(filePath);
}
Running this code will update both the icon in the title bar of the application and in the taskbar, as shown in this image.
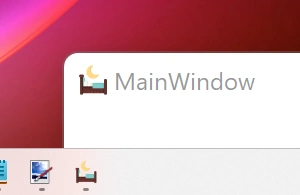
I found that .ico files worked for setting the application files. I’m not sure what other file format, if any, are supported.
Changing Size, Position and Presenter of the AppWindow
The AppWindow class itself exposes a number of methods that you can use to directly manipulate the size and position of the application window. You can also change the presenter to switch between fullscreen, compact and the default, or overlapped, window layout.
For example, the following method can be used to snap the window into an area of the screen. By default the screen is broken into 3 columns and 2 rows but you can override this by changing the totalRows and/or totalColumns arguments
public static void Reposition(this AppWindow appWindow, int row, int col, int totalRows = 2, int totalColumns = 3)
{
    IntPtr hwndDesktop = PInvoke.User32.GetDesktopWindow();
    PInvoke.RECT rectParent;
    PInvoke.User32.GetClientRect(hwndDesktop, out rectParent);

    var width = (int)(rectParent.right - rectParent.left) / totalColumns;
    var height = (int)(rectParent.bottom - rectParent.top) / totalRows;

    var winPosition = new RectInt32(width * col, height * row, width, height);

    appWindow.MoveAndResize(winPosition);
}
A couple of points that are worth noting:
- The size and position is done in absolute pixels, rather than device independent pixels. This means that if you want to correlate size/position on screen with say the size of your XAML elements, you’ll need to allow for the screen scale factor.
- It would appear that there’s no support for multiple monitors. If you have multiple monitors, the size/positioning methods will do so relative to the primary monitor.
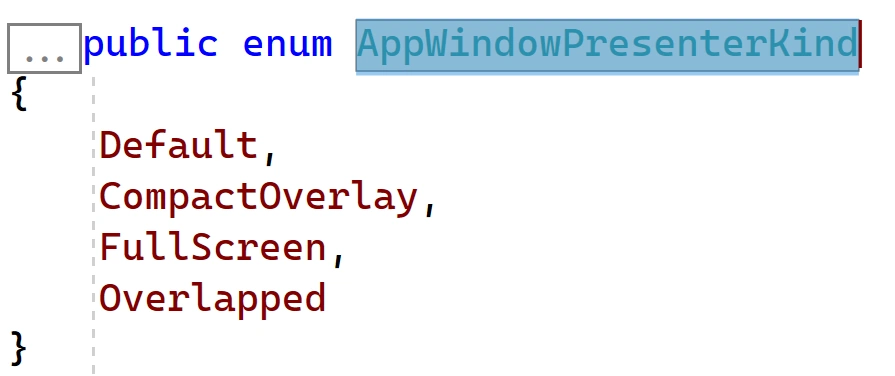
One of the more interesting APIs that is exposed on the AppWindow is the SetPresenter method that allows you to switch between different presenters. Most of the time you’ll probably just want to switch between the different kinds of presenters using the SetPresenter(AppWindowPresenterKind) overload. The three AppWindowPresenterKind values are CompactOverlay, FullScreen and Overlapped. There is a fourth, Default, which is there to represent the default presenter that the AppWindow uses, but this is essentially just the Overlapped presenter kind.
The other SetPresenter overload allows you to pass in an AppWindowPresenter. This would be useful if you wanted to toggle between multiple instances of the same kind of presenter. For example if you customise the OverlappedPresenter, which we’ll cover in the next section, you may want to have two different OverlappedPresenter instances that can be switched between.
Note that if you’re just switching between different presenters that are of a different kind, you can simply call the SetPresenter method, specifying the AppWindowPresenterKind, behind the scenes the presenter instances will be reused, meaning you don’t need to cache them separately.
Working with the OverlappedPresenter
There aren’t currently many properties/methods exposed on the CompactOverlay or the FullScreen presenters that are worth going into. However, it’s worth spending a few minutes with the OverlappedPresenter as it has a number of properties and methods that can be used to customise how the window of your application appears.
The OverlappedPresenter exposes the following properties:

- IsAlwaysOnTop – If true, the window appears as a top most window, even if focus goes to another window (that would normally move to the front and obscure the app window)
- IsMaximizable – If false, disables the maximize button. If IsMinimizable is also false, both Minimize and Maximise buttons are removed from titlebar
- IsMinimizable – If false, disable the minimize button. If IsMaximizable is also false, both Minimize and Maximise buttons are removed from titlebar
- IsModal – I’m not sure what this is supposed to do, because it currently throws a completely meaningless exception when attempting to set the value
- IsResizable – If false, this disables the ability to resize the window of the application (eg hovering over a corner/side of the app doesn’t change the cursor to the resize cursor, and prevents the app from being resized).
There are also readonly properties, HasBorder and HasTitlebar. Instead of setters, you need to use the SetBorderAndTitleBar method (yay for consistency team!). Oh, and to make matters worse, some of the combination of setting hasBorder and hasTitlebar aren’t supported, throwing an exception. Again, some documentation, or meaningful errors would be really useful.
Working with the AppWindowTitleBar
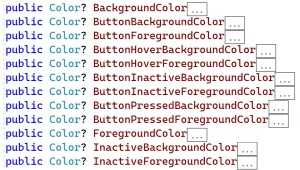
The AppWindow also exposes a read only property, TitleBar, which give you access to an instance of the AppWindowTitleBar. The AppWindowTitleBar exposes properties for setting BackgroundColor, ButtonBackgroundColor, ButtonForegroundColor, ButtonHoverBackgroundColor, ButtonHoverForegroundColor, ButtonInactiveBackgroundColor, ButtonInactiveForegroundColor, ButtonPressedBackgroundColor, ButtonPressedForegroundColor, ForegroundColor, InactiveBackgroundColor, InactiveForegroundColor.
I would avoid going down the path of setting these unless your application has a strong brand that you want to be consistent with. You may end up with something that looks plain nasty if you’re not careful.

The AppWindowTitleBar also exposes a property IconShowOptions, which allows you to toggle between ShowIconAndSystemMenu and HideIconAndSystemMenu. As you can imagine, these toggle whether the icon in the top left of the app window is shown or not. What’s weird is that setting this option to HideIconAndSystemMenu doesn’t prevent the right-click context menu from being displayed, so I’m not sure why the IconShowOptions refer to the SystemMenu?
Custom TitleBar
The AppWindowTitleBar allows you to completely customise the titlebar of your application. You can do this by setting the ExtendsContentIntoTitleBar property to true, which will hide the entire titlebar, except the minimize, maximise and close buttons. You can hide the minimize and maximise buttons by setting the IsMinimizable and IsMaximizable properties on the OverlappedPresenter to false.
Note that when you set ExtendsContentIntoTitleBar to true, the area of the window exposed to your application extends all the way to the top of the window. This means you can place whatever content you want there.
I would recommend that if you set ExtendsContentIntoTitleBar to true, you should also call the SetDragRectangles method and specify the area(s) of the window that you want to enable for the user to drag the window. Typically the drag rectangle for a window would be the titlebar area but you can decide to specify one or more rectangles anywhere in the window for this purpose – just be aware that doing so would be very confusing for users of your application.
In this example we’ve placed a coloured region at the top of the screen and set the drag rectangle to be the size of the coloured region.
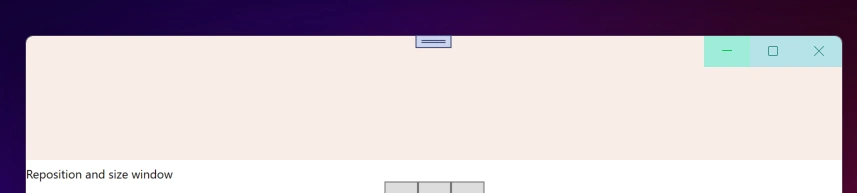
Be aware that again, the SetDragRectangles method works in actual pixels, so you’ll need to convert the dimensions of any controls on your Window to their actual size in pixels if you want the areas to align.
Summary
As you can see the AppWindow provides a consistent set of apis that can be accessed from any Windows application via the Windows App SDK. The samples at AppWindowSample provide working examples of interacting with most of these apis across WinUI (packaged), WinForms (unpackaged) and WPF (unpackaged) projects.
The AppWindow is clearly v1 and hopefully a sign that the team are looking to expose some clean APIs to help us build better windows applications going forward.