In October 2019 Microsoft announced a new category of dual screen device with flagship products Surface Neo and Surface Duo. Since then, there has been a massive undertaking by Microsoft to prepare developers of both Windows (UWP and Win32 apps) and Android apps for a new world of dual, or even multiple, screen devices. This included a day focused on building dual screen applications – Microsoft 365 Developer Day: Dual Screens (and here) (this event in itself was weird because it was branded as Microsoft 365 but other than a session on Microsof Graph it had very little to do with Microsoft 365 and everything to do with Windows and Android SDKs for dual screen devices). In this post I wanted to start exploring the dual screen emulators and talk about some points of interest when it comes to interacting with the screens.
Firstly, if you haven’t already, you can grab the emulator images either from the Microsoft Store (for the Windows 10X emulator) or via the Surface Duo SDK. Start at the documentation page for how to Get the Windows 10X development tools and how to Get the Surface Duo SDK.
Now that you’ve got the tools, let’s start to take a look at the emulators. Specifically I want to drill into how the different platforms handle spanning an application across the fold/hinge. The following image shows an image being spanned across the hinge on the Windows 10X emulator.

Notice how there’s a break in the image, making the image feel like it’s broken in two. What’s interesting is that when you take a screenshot using the emulator tools, this break isn’t visible, as shown in the following screenshot.

If we us the Maps application and again span the hinge, there is again a break across the hinge, making the map hard to process visually.

If we switch across to the Android emulator, you can now see that the image spans across the hinge without disturbing the image. The hinge masks or obscures part of the picture, but this is much easier for us to deal with.
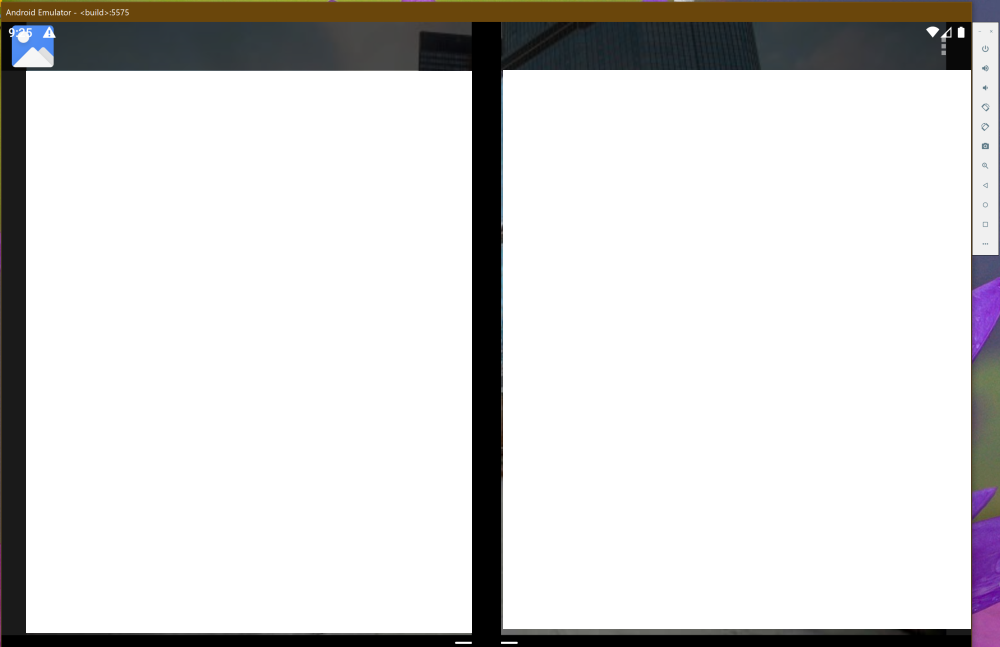
And again, using the Android emulator you can see that the map continues beneath the hinge.

Ok, so let’s jump into taking a look at some code. In this case we’re going to look at some UWP code but rather than attempting to treat the two screens as a single page (as shown in soooooo many demos/samples) we’re going to use multiple windows for the application. Into a new UWP application I’ve added a Button and a TextBlock (just to show which window is which). The Button is used to launch new Windows, each showing the MainPage.
private async void Button_Click(object sender, RoutedEventArgs e)
{
    CoreApplicationView newView = CoreApplication.CreateNewView();
    int newViewId = 0;
    await newView.Dispatcher.RunAsync(CoreDispatcherPriority.Normal, () =>
    {
        Frame frame = new Frame();
        frame.Navigate(typeof(MainPage), null);
        Window.Current.Content = frame;
        // You have to activate the window in order to show it later.
        Window.Current.Activate();

        newViewId = ApplicationView.GetForCurrentView().Id;
    });
    bool viewShown = await ApplicationViewSwitcher.TryShowAsStandaloneAsync(newViewId);
}
When I first run this, I can see my application taking up a single screen.

Clicking the button the second Window appears on the other screen – this is exactly what you’d hope would happen.

If we now press the button on the second Window, another new Window appears, again on the alternative screen.

Now we can start to arrange the Windows. Here I’ve dragged Window 3 into the lower right corner of the second screen, below Window 2. (ignoring the mouse cursor, which was a result of me attempting to screen capture the drag experience) You can see that there is a visual cue as to what will happen when I release the drag operation.

Window 3 expands to take the lower half of the second screen and prompts me to select what I want to take the top half.

Clicking on Window 2 it expands to fill the top half of the screen.

What’s interesting about this example, which uses Multiple Windows instead of dual panes or a single Window that spans the hinge, is that you get complete control over how the individual windows are positioned. The default behaviour works nicely with Windows appearing in the correct screen, yet you can easily override it by dragging the windows to where you want them.
Along the way (probably because so many apps are modeled on the iOS notion of only doing one thing at a time) we as app developers have forgotten how to take advantage of multiple Windows. Now is the time to think about how best to extend your application to use multiple windows and prepare it for the next wave of multi-screen devices.