Quite often I hear the complaint that WinUI, and thus Uno Platform, doesn’t include validation. There was some evidence a while ago that it was being worked on by the WinUI team (ie commented out validation XAML in the WinUI styles), but there doesn’t seem to be any more progress in this area, despite a lot of enterprise customers claiming it to be a core requirement. I’ve often thought the lack of built in support for validation was a weird requirement when selecting a technology because in XAML it’s so easy to add it in. In this post I’m going to cover a simple way that you can add validation to any control by changing the control template and adding a single attached property.
Lack of Visual States
If we consider that validation of an input control, such as a TextBox, is basically a visual state, then the control can either being in a ValidState, or an InvalidState. As WinUI controls don’t have these as built in states, we’re going to have to create them. Luckily XAML was built to support the ad-hoc addition of visual states. Since validation is mutually exclusive to any other built in state, such as disabled or focused, the validation state should exist in their own state group.
In order to add the validation states, we’re going to clone the DefaultTextBoxStyle into our application. Note that we’ll use the BasedOn attribute so that we only need to include the Setter for the Template, rather than the other default property values. I’ve omitted unmodified parts of the original style for brevity.
<ResourceDictionary.ThemeDictionaries>
    <ResourceDictionary x:Key="Default">
        <SolidColorBrush x:Key="ValidationErrorBorderBrush" Color="#FFB00020" />
    </ResourceDictionary>
    <ResourceDictionary x:Key="Light">
        <SolidColorBrush x:Key="ValidationErrorBorderBrush" Color="#FFB00020" />
    </ResourceDictionary>
</ResourceDictionary.ThemeDictionaries>

<Style x:Key="ValidationTextBoxStyle"
        TargetType="TextBox"
        BasedOn="{StaticResource DefaultTextBoxStyle}">
    <Setter Property="Template">
        <Setter.Value>
            <ControlTemplate TargetType="TextBox">
                <Grid>
                    ...
                    <VisualStateManager.VisualStateGroups>
                        ...
                        <VisualStateGroup x:Name="ValidationStates">
                            <VisualState x:Name="ValidState" />
                            <VisualState x:Name="InvalidState">
                                <VisualState.Setters>
                                    <Setter Target="ValidationBorder.Visibility" Value="Visible" />
                                </VisualState.Setters>
                            </VisualState>
                        </VisualStateGroup>
                    </VisualStateManager.VisualStateGroups>
                    <Grid.RowDefinitions>
                        <RowDefinition Height="Auto" />
                        <RowDefinition Height="*" />
                        <RowDefinition Height="Auto" />
                        <RowDefinition Height="Auto" />
                    </Grid.RowDefinitions>
                    ...
                    <Border x:Name="ValidationBorder"
                            Grid.Row="3" Grid.ColumnSpan="2"
                            Background="{ThemeResource ValidationErrorBorderBrush}"
                            Height="2" Margin="0,-2,0,0"
                            Visibility="Collapsed" />
                </Grid>
            </ControlTemplate>
        </Setter.Value>
    </Setter>
</Style>

<Style TargetType="TextBox" BasedOn="{StaticResource ValidationTextBoxStyle}" />
What you can see here is that there’s an additional border that appears under the TextBox in order to indicate validation state. The border is made visible by the InvalidState visual states.
IsValid Attached Property
Since the implementation of the TextBox doesn’t know about the ValidState or InvalidState visual states, we’re going to have to invoke the state change using the VisualStateManager.GoToState method. For this, we’re going to use an attached property (as an aside, the entire code for this attached property was created, without modification, by Copilot in agent mode with Claud Sonnet 4).
/// <summary>
/// Attached properties for validation state management
/// </summary>
public static class ValidationProperties
{
    /// <summary>
    /// IsValid attached property that manages visual states
    /// </summary>
    public static readonly DependencyProperty IsValidProperty =
        DependencyProperty.RegisterAttached(
            "IsValid",
            typeof(bool),
            typeof(ValidationProperties),
            new PropertyMetadata(true, OnIsValidChanged));

    /// <summary>
    /// Gets the IsValid property value
    /// </summary>
    /// <param name="obj">The target object</param>
    /// <returns>The IsValid value</returns>
    public static bool GetIsValid(DependencyObject obj)
    {
        return (bool)obj.GetValue(IsValidProperty);
    }

    /// <summary>
    /// Sets the IsValid property value
    /// </summary>
    /// <param name="obj">The target object</param>
    /// <param name="value">The IsValid value</param>
    public static void SetIsValid(DependencyObject obj, bool value)
    {
        obj.SetValue(IsValidProperty, value);
    }

    /// <summary>
    /// Handles the IsValid property changed event
    /// </summary>
    /// <param name="d">The dependency object</param>
    /// <param name="e">The event args</param>
    private static void OnIsValidChanged(DependencyObject d, DependencyPropertyChangedEventArgs e)
    {
        if (d is Control control)
        {
            bool isValid = (bool)e.NewValue;
            string stateName = isValid ? "ValidState" : "InvalidState";

            VisualStateManager.GoToState(control, stateName, true);
        }
    }
}
We can apply this to our TextBox:
xmlns:validation="using:ValidationSampleApp.AttachedProperties"

<TextBox Text="{Binding Name, Mode=TwoWay, UpdateSourceTrigger=PropertyChanged}"
            PlaceholderText="Enter your name:"
            validation:ValidationProperties.IsValid="{Binding NameIsValid}" />
And of course, we’ll need to update our ViewModel to expose the NameIsValid property.
public partial class MainViewModel : ObservableObject
{
    [ObservableProperty]
    [NotifyPropertyChangedFor(nameof(NameIsValid))]
    private string? name;

    public bool NameIsValid => Name is { Length: > 0 };
(and yes, before all you smart people out there decide to comment that this is using MVVM, despite my “Stop using MVVM” post, you’re 100% right, this is MVVM. The same mechanism will work nicely with MVUX, or any other framework you use, so long as you have a mechanism to trigger the state change between ValidState and InvalidState).
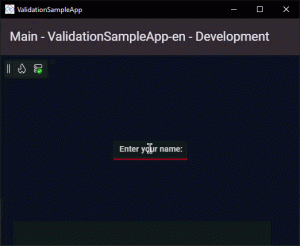
Ok, so now let’s see this in action.

As you can see, this is an incredibly simple way to add validation to your application. It requires modifying the control template for each control where you want to add validation. However, once you’ve done it once, you can set it to be the default style (which is what we did in the last line of the earlier XAML) and it will be available everywhere, even if you don’t need validation on a particular instance of the control.