In a previous post on the topic of hot reload I discussed using the CreateNewOnMetadataUpdate attribute to force updating of entire classes, rather than patching existing types. This makes hot reload more resilient but does require additional logic in order to apply the newly created types. In this post we’re going to walk through the support for hot reload in Windows UI / Win App Sdk based applications, and discuss how the CreateNewOnMetadataUpdate can be used. This also applies to the WinUI target platform for an Uno Platform application.
To get started, we’ll create a new Windows application using the Blank App, Packaged (WinUI 3 in Desktop) template in Visual Studio. This will give us a simple application made up of a MainWindow where the content of the application is defined.
Enabling Hot Reload
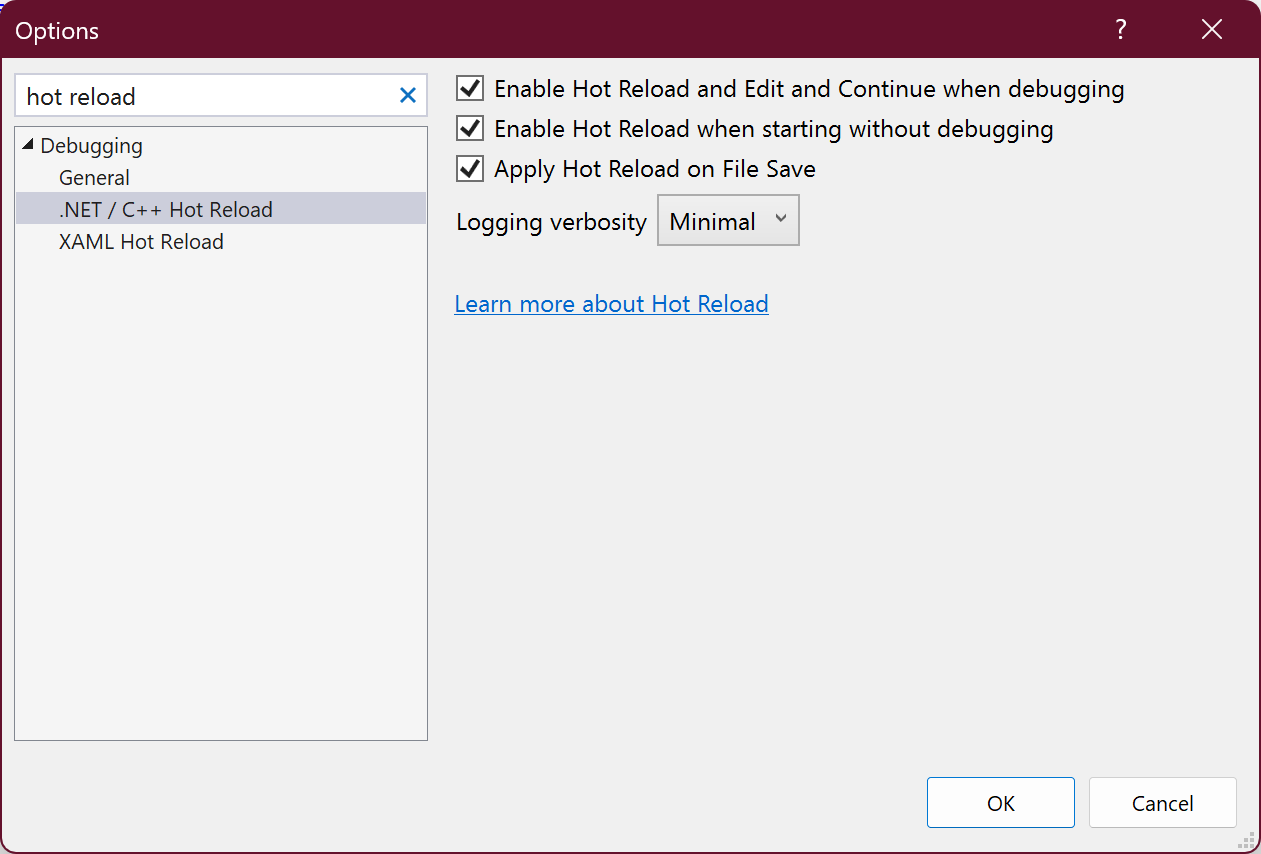
Before running the application, we’ll make sure that both C# and XAML hot reload are enabled. From the Tools menu, select Options and then enter “hot reload” into the search box. Start with the .NET/C++ Hot Reload section and make sure all options are checked.
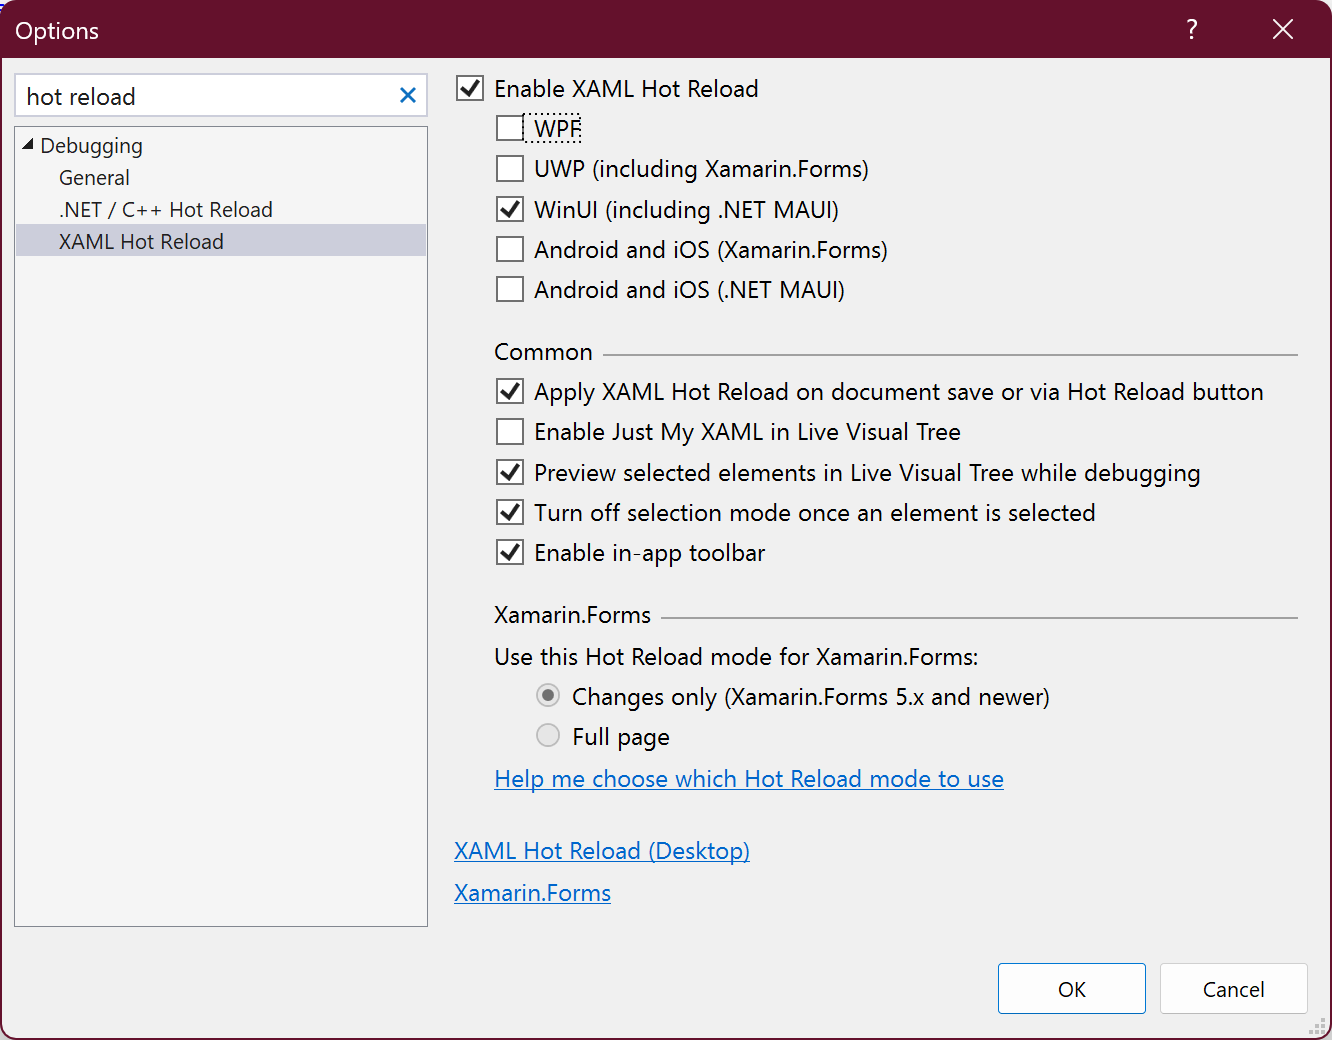
Next, select XAML Hot Reload and make sure the WinUI (including .NET MAUI) is checked.
Hot Reload in Action
When we run the application (as a packaged application) you’ll notice that XAML hot reload works when you adjust the XAML of MainWindow. For example, changing the Content on the Button and clicking Save and/or clicking the Hot Reload button changes what’s displayed in the app. Note that XMAL hot reload seems to be broken in the current Visual Studio preview (17.7.0 Preview 6.0) but is working in the stable release (17.6.5).
Altering the C# code and saving, or clicking Hot Reload, does change the running application (in both stable and preview editions of Visual Studio). For example if you change the string used to update the Button Content when the Button is clicked, when you click the Button, the Content will be set to the new value,
private void myButton_Click(object sender, RoutedEventArgs e)
{
    myButton.Content = "Clicked Now!";
}
This works because the existing myButton_Click method is patched with the updated code – you can validate this by adding a breakpoint to the constructor of the MainWindow and confirm that the constructor isn’t triggered, meaning that you’re still seeing the original instance of the MainWindow.
Advanced Hot Reload
Now that we’ve seen hot reload working, let’s look at a more complex scenario where the simple out of the box hot reload doesn’t work. With our application running, let’s add a new record called MainViewModel with a single property Title. In the constructor for MainWindow we’ll set the DataContext to be a new instance of the MainViewModel.
public sealed partial class MainWindow : Window
{
    public MainWindow()
    {
        this.InitializeComponent();
        (this.Content as FrameworkElement).DataContext = new MainViewModel("Hello World!");
    }
}
public record MainViewModel(string Title);
We’ll also update the XAML to make use of the Title property by data binding it to the Text property on a TextBlock.
<?xml version="1.0" encoding="utf-8"?>
<Window x:Class="HotReloadWindowsApp.MainWindow"
		xmlns="http://schemas.microsoft.com/winfx/2006/xaml/presentation"
		xmlns:x="http://schemas.microsoft.com/winfx/2006/xaml"
		xmlns:local="using:HotReloadWindowsApp"
		xmlns:d="http://schemas.microsoft.com/expression/blend/2008"
		xmlns:mc="http://schemas.openxmlformats.org/markup-compatibility/2006"
		mc:Ignorable="d">
	<StackPanel Orientation="Horizontal" HorizontalAlignment="Center" VerticalAlignment="Center">
                <Button x:Name="myButton" Click="myButton_Click">Click Me!</Button>
                <TextBlock Text="{Binding Title}" />
	</StackPanel>
</Window>
In this scenario both the XAML and C# code will be updated in the running application, yet the Title won’t appear in the app. This is because the existing instance of MainWindow has been patched, without invoking the constructor where the DataContext is set.
To work around this, and many other limitations of hot reload, we can use the CreateNewOnMetadataUpdate attribute. In this case, we’re going to apply this to the MainWindow, which will force a new class (eg MainWindow#1) to be created in the running application, each time there’s a change to either XAML or C#.
[CreateNewOnMetadataUpdate]
public sealed partial class MainWindow : Window
{
    ....
}
However, simply applying the CreateNewOnMetadataUpdate attribute to the MainWindow isn’t enough as all this will do is create a new type in the running application – the existing instance of MainWindow which is currently being displayed isn’t modified.
In order to use the newly created type, we need to register a class as a MetadataUpdateHandler. In the following code the WindowsAppUpdateHandler is registered using the assembly level MetadataUpdateHandler attribute. The WindowsAppUpdateHandler class has a method UpdateApplication which has an array of Types as a parameter. This method is invoked each time hot reload runs for the application. The array of Types contains the types that have been modified and any newly created types.
[assembly:MetadataUpdateHandler(typeof(WindowsAppUpdateHandler))]

namespace HotReloadWindowsApp;

public partial class App : Application
{
    public static App Instance { get; private set; }
    public static DispatcherQueue Dispatcher { get; private set; }

    public App()
    {
        Instance = this;
        this.InitializeComponent();
        Dispatcher = DispatcherQueue.GetForCurrentThread();
    }

    protected override void OnLaunched(Microsoft.UI.Xaml.LaunchActivatedEventArgs args)
    {
        m_window = new MainWindow();
        m_window.Activate();
    }

    public Window m_window;
}

public static class WindowsAppUpdateHandler
{
    public static void UpdateApplication(Type[] updatedTypes)
    {
        foreach (var updateType in updatedTypes)
        {
            if(updateType.IsSubclassOf(typeof(Window)))
            {
                App.Dispatcher.TryEnqueue(() =>
                {
                    var old_window = App.Instance.m_window;
                    App.Instance.m_window = Activator.CreateInstance(updateType) as Window;
                    App.Instance.m_window.Activate();
                    old_window.Close();
                });
            }
        }
    }
}
In this scenario, the UpdateApplication method iterates through the updatedTypes looking for any type that inherits from the Window class. If a matching type is found, a new instance is created and set as the active window instance for the application. If you run the application and make changes to the MainWindow (either XAML or C#) you’ll notice that the constructor is now called when hot reload is triggered.
Hot Reload Not Working
So you’ve made these changes to use the CreateNewOnMetadataUpdate attribute and register the MetadataUpdateHandler but now changes to XAML and C# for MainWindow aren’t resulting in any updates to the running application. This is because MetadataUpdateHandler doesn’t seem to be supported for packaged applications (the default debugging option for a new Windows application).
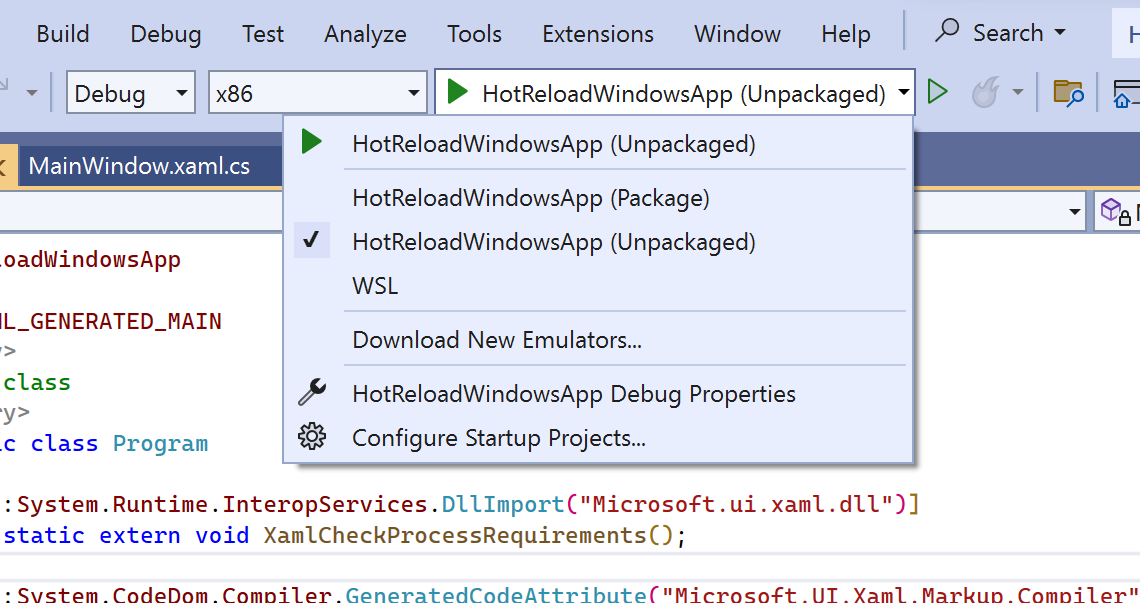
The way to get this to work is to switch to debugging the application using the unpackaged option. Select Unpackaged from the drop down menu in the debugging toolbar.
If you attempt to run the application at this point, you’re likely to see an unhandled exception, System.DllNotFoundException – Unable to load DLL ‘Microsoft.ui.xaml.dll’ or one of its dependencies.
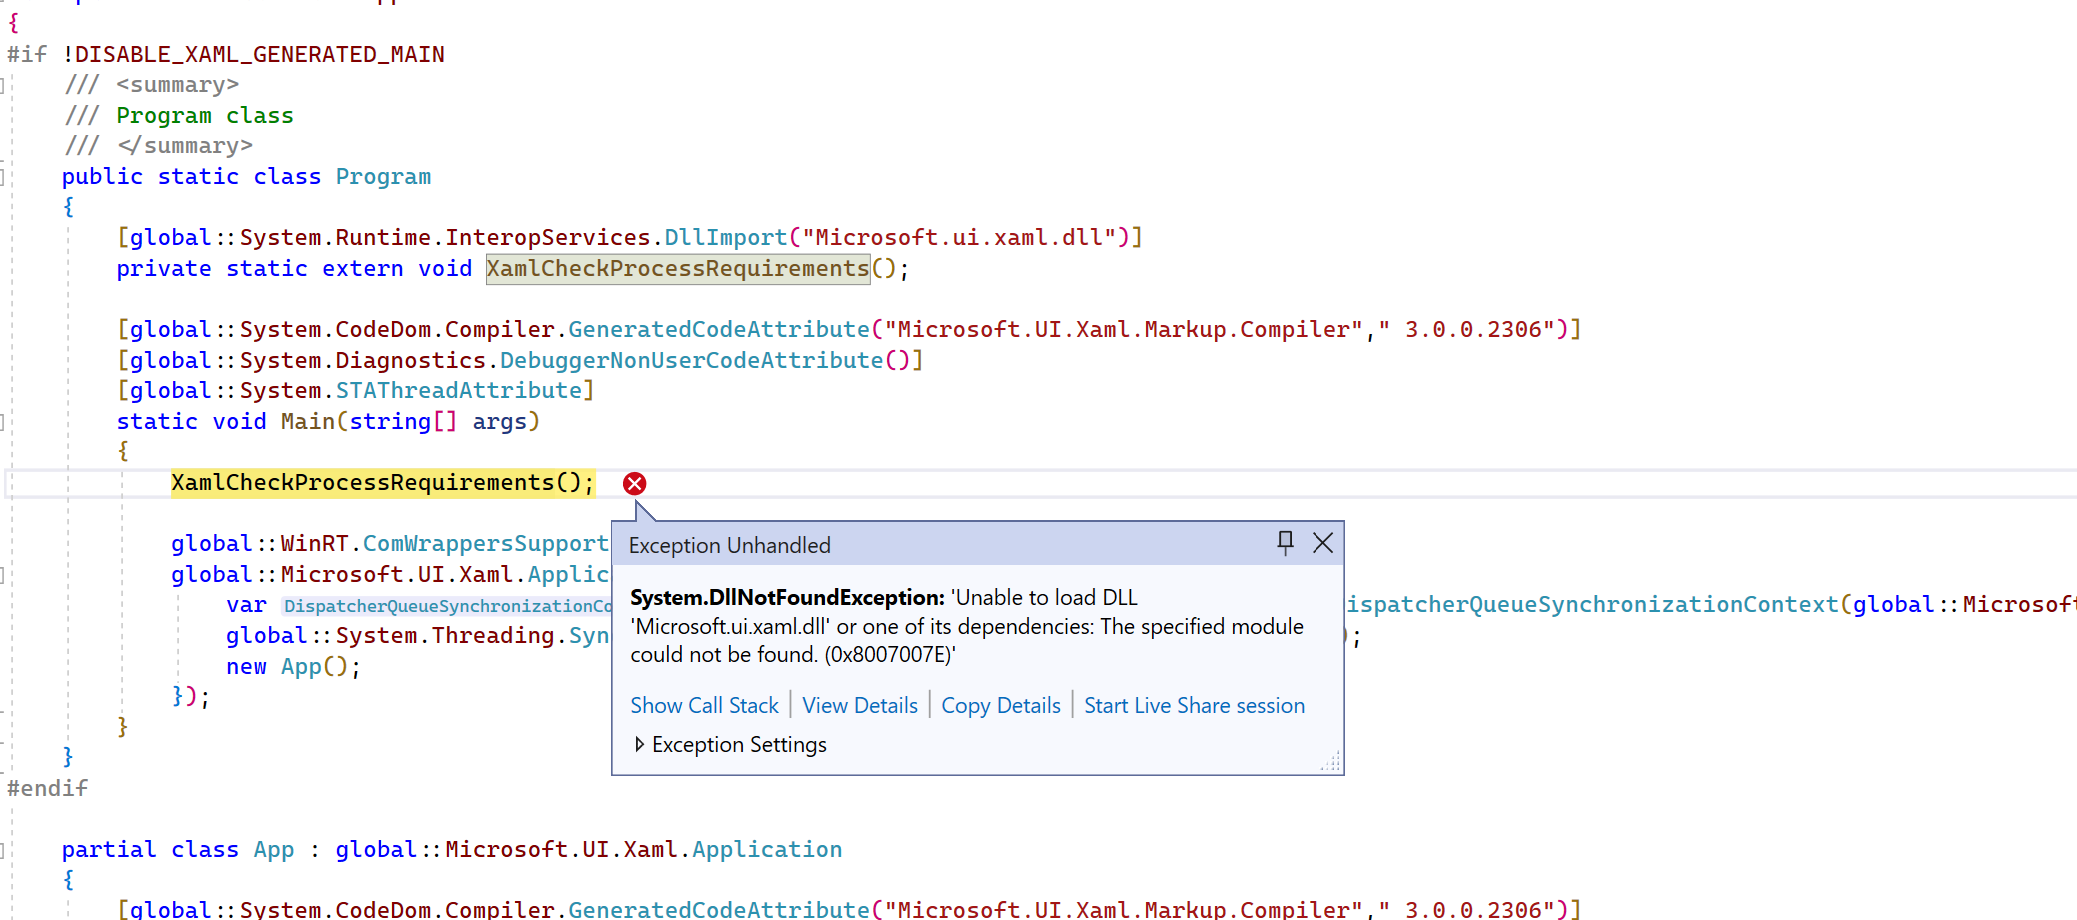
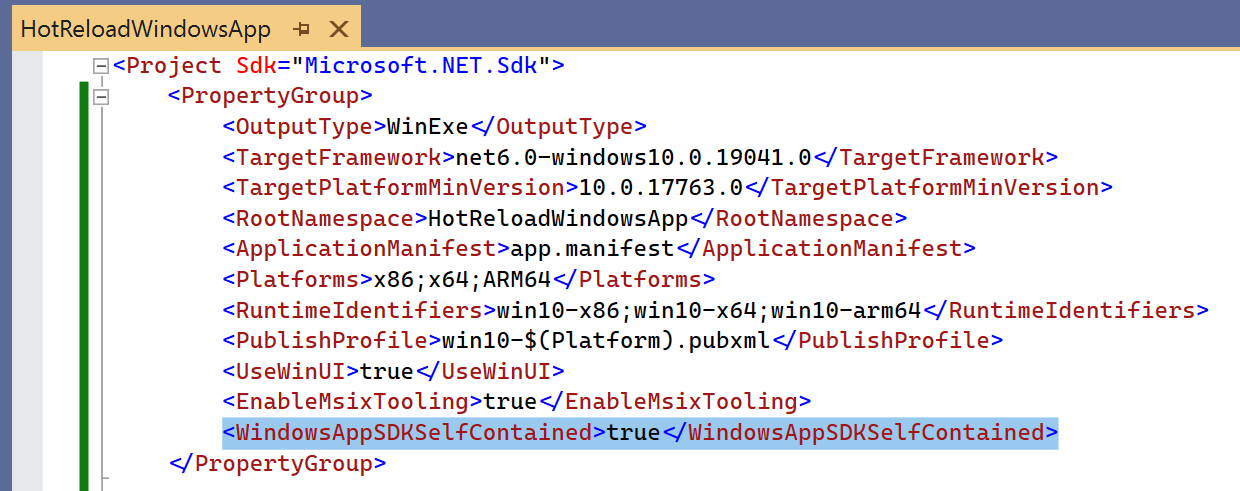
To fix this issue, you need to set the WindowsAppSDKSelfContained property to true in the csproj for the application.
With these changes done, you should be able to run the application and make any change to the MainWindow and have it reload. Note that the limitation to this approach is that the MainWindow is recreated with each hot reload, meaning that any state (eg scroll position or text entered into a TextBox) will be lost.
1 thought on “Hot Reload in Windows Applications”