Developing cross platform applications, targeting platforms such as Android, iOS, Windows and Web, is becoming progressively easier. As .NET developers, one of the leading technologies for building cross platform apps is the Uno platform. Whilst Visual Studio, and the corresponding Uno solution templates, make it easy to create a new Uno application, setting up a CI/CD pipeline is still a challenge. This post is the first in a series that will cover using Azure DevOps (Pipelines) to setup a CI/CD pipeline to build and deploy an Uno application. Specifically this post will setup the basic Azure Pipeline that makes use of a template from Pipeline Templates to build the Uno application solution.
For the purpose of this series, we’re going to start with a vanilla Uno application created using the unoapp template. The dotnet Uno templates can be installed directly from nuget and then to create a new application, simply call “dotnet net unoapp -o [appname]”. The newly created app, I called in UnoSample, can be opened in Visual Studio; the different head projects can be set as the startup project, and then build and run them.
Before I get much further I’m actually going to jump all the way to the end and list out the final yaml for building the UnoSample solution. This builds the solution with the Debug configuration and is particularly useful as a quick check to verify code changes haven’t “broken the build”. Here’s the yaml:
trigger:
  branches:
    include:
    - '*'

resources:
  repositories:
    - repository: builttoroam_templates
      type: github
      name: builttoroam/pipeline_templates
      ref: refs/tags/v0.8.0
      endpoint: github_connection

stages:

- template:  azure/stages/build-and-deploy-uno.yml@builttoroam_templates
  parameters:
    name: 'Build_Solution'
    solution_filename: 'UnoSample.sln'
    full_version_number: '$(version_prefix).$(Build.BuildId)'
    solution_build_enabled: true
There are three sections to this yaml file:
- Trigger – in this case the pipeline is set to trigger for all branches. As we get into building out the pipeline we’ll augment this with some conditional logic that changes the behaviour of the pipeline, rather than limiting which branches the pipeline is triggered for.
- Repository – this pipeline makes use of an external resource in the form of templates from the Pipeline Templates repository. In this case we’re using the v0.8.0 release to make sure the build is repeatable
- Build Template – The build-and-deploy-uno yaml template is made up of a series of steps designed to build the various Uno target platforms. It also supports deploying builds to App Center (Android, iOS and UWP) and to Static Web Apps (WASM).
If you’re familiar with Azure DevOps then you can just grab the above yaml and use it in your pipeline. The rest of this post will walk through setting up an pipeline in Azure DevOps, including referencing a GitHub repository for both source code and the template.
Create GitHub Repository
Even though we’re going to use Azure DevOps to create the build pipeline, we’re actually going to store the application source code in a GitHub repository. Whilst GitHub is a great source code repository, it’s currently an awful project management tool and as such I often find it necessary to pair a GitHub repository with an Azure DevOps project, which means I typically setup the build pipeline in Azure DevOps.
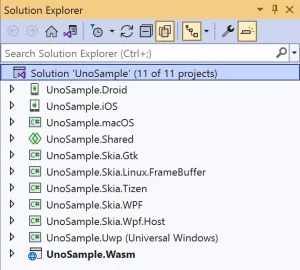
After creating an Uno application, the Solution Explorer should include projects for the various target platforms, as shown in the following image. There should also be a Shared project, which includes the bulk of the application.
In order to check the application into a GitHub repository, you can right-click on the Solution node in Solution Explorer and select the Create Git Repository menu item. This will display the Create a Git repository dialog, which you can fill in with the details for creating a new GitHub repository.
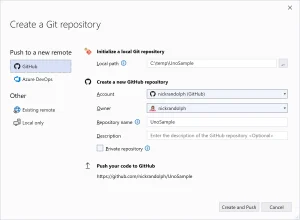
Once you’ve completed the Create a Git repository screen, click the Create and Push button in order for Visual Studio to create your GitHub repository, commit and push the application code to the main (or master) branch.
Create an Azure DevOps Pipeline
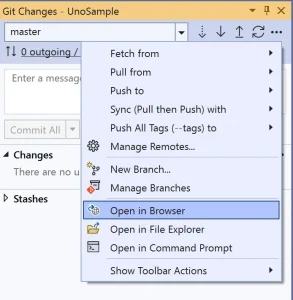
The next step is to create the Azure DevOps project which will contain the build pipeline. To do this we need to open the GitHub repository in the browser. From the Git Changes tool window in Visual Studio, click the elipses (…), followed by Open in Browser.
Next click on the Marketplace tab at the top of the screen, and search for Azure Pipelines (in this image I searched for “pipeline” and Azure Pipelines was the top search result).
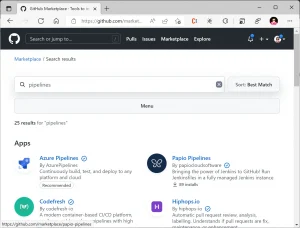
Click on the Azure Pipelines app to see more details.
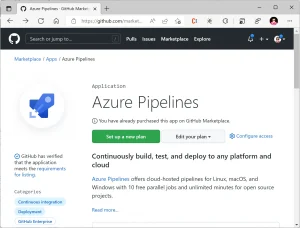
If you haven’t used the Azure Pipelines app before you’ll need to click through on the Set up a new plan button. If you’ve already installed the Azure Pipelines app into a repository that you maintain, you instead need to click through on the Configure link.
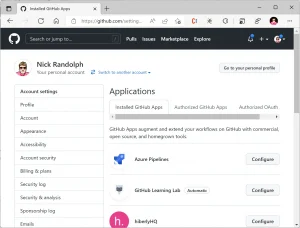
And then click through on the Configure button alongside the Azure Pipelines row in the Applications list.
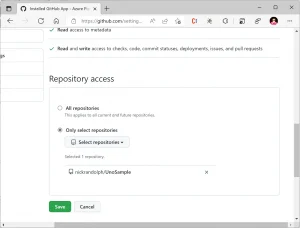
Pick the repository you want to setup or configure access to. Once you hit Save you’ll see a dialog requesting information that should be used when creating a new Azure Pipeline project (or you can pick an existing project).
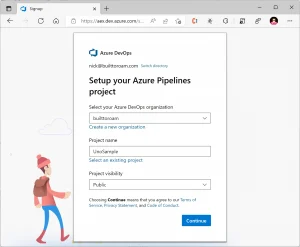
Once the new repository has been created, you’ll immediately be walked through the process of creating a build pipeline. First up, you need to pick the source code repository to use (and yes, this seems a little bit of an unnecessary set, since you just picked the repository when granting access).
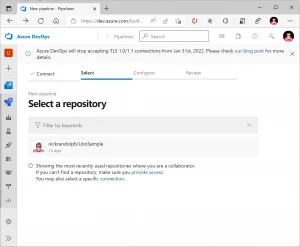
Note that if the repository doesn’t appear in the list of repositories, you may need to enter part of the repository name in the search box.
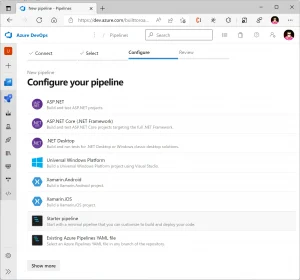
The next step is to create the yaml pipeline. Rather than picking one of the preconfigured pipelines, we’re going to select the Starter pipeline option – this still has some boilerplate yaml but we’re going to overwrite it regardless. Copy the yaml from the beginning of this post into the text editor.
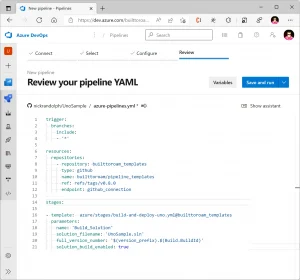
At this stage if you click Save and run you’ll run into issues because there is no connection established to the Pipeline Templates repository (for loading the build-and-deploy-uno template). Use the down arrow on the right edge of the button to instead select Save.
Pipeline Templates Service Connection
In order to use the templates from the Pipeline Templates repository, you need to setup a service connection. Select Project Settings from the bottom of the navigation bar on the left size of Azure DevOps, followed by the Service Connection tab. You should already have one service connection which is for the GitHub repository that holds the application source code (setup as part of the previous steps of creating the build pipeline).
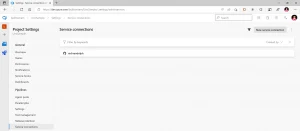
Click the New service connection button
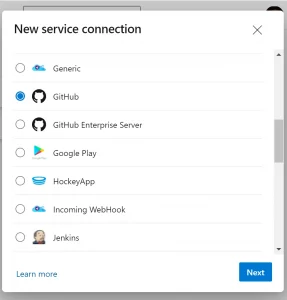
Select GitHub, followed by the Next button.
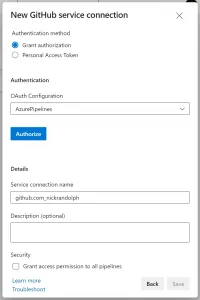
From the OAuth Configuration, select Azure Pipelines, followed by the Authorize button. You may be prompted to authenticate with GitHub and grant access to Azure Pipelines. I’ve adjusted the name of the service connection to github_connection, since this is the endpoint name used in the yaml for the build process.
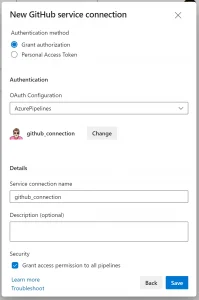
Click Save to finish setting up the service connection
Fix UWP
At this point, instead of having a build pipeline that just works (which would be ideal) there is one thing left to do, which is to fix UWP (of course). When the application was created, the certificate used to sign the application package is missing. To fix this, double-click the package.appxmanifest file in Solution Explorer.
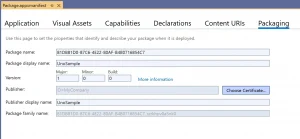
From the Packaging tab, click the Choose Certificate button.
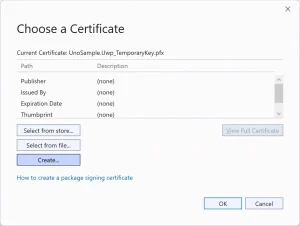
Click the Create button to create a new certificate
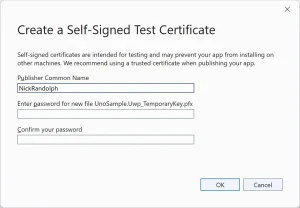
Enter the Published Common Name to be used for the self signed certificate. I don’t bother with a password, since this certificate is just going to be used for development anyhow. Click Ok to create the certificate.
In order for this certificate to be used by the build process, you need to manually add the certificate to the GitHub repository (pfx files are ignored by default). Right-click the pfx file in Solution Explorer, select Git and then Add Ignored File to Source Control.
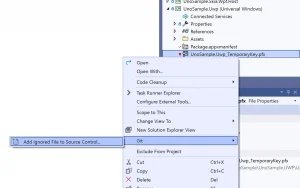
Lastly, commit and push changes to the GitHub repository – as the build process is set to trigger on all branches, the build pipeline should be executed after you push the changes to the repository.
Summary
At this point we’ve successfully setup a simple build process for our Uno application. As you can see from this image, the pipeline has two stages: the first is used to print out any parameters passed into the template; the second builds the solution.
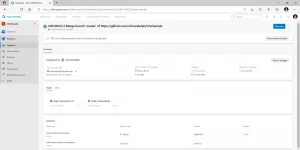
The solution is built with the Debug configuration and should only be used to verify that code changes haven’t broken the solution build. Note that there is still a risk code changes will break the Release build and/or the application packaging step but at least if the Debug build is successful, the risk of a broken build is reduced.
In the subsequent posts we’re going to continue with this build pipeline and show how you can package the application for the different platforms and how you can deploy the application for testing.