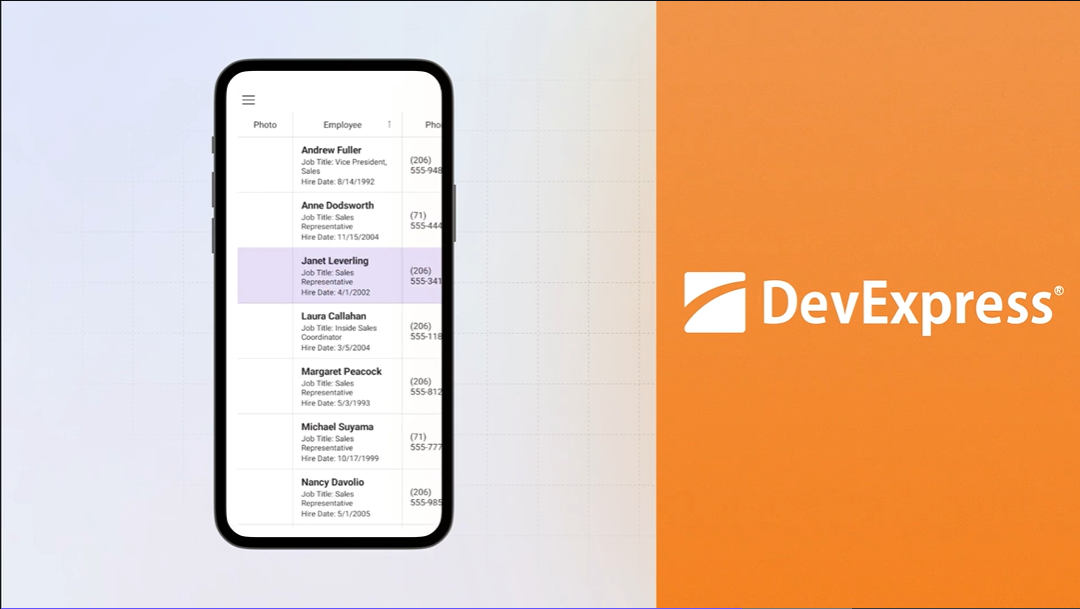
In case you haven’t seen the release notes or the blog post the 4.10 release for the Uno Platform was pretty huge with a couple of big features shipping in this release. One of these features was .NET MAUI Embedding with allows any .NET MAUI Control to be embedded within an Uno Platform application. If you think about all the third party control vendors, such as Syncfusion, Grial Kit, Telerik, DevExpress, Esri, Grape City, and of course, the .NET MAUI Community Toolkit, this feature enable Uno Platform applications to leverage the growing ecosystem of controls being developed for .NET MAUI. One caveat is that the controls are only supported on the platforms that the vendor decides to support. Most vendors have opted to support the full set of targets, including iOS, Android, MacCatalyst and Windows; others have opted for a narrower subset. In this post we’re going to walk through adding the .NET MAUI controls from DevExpress, that currently only support iOS and Android, to an Uno Platform application that targets iOS, Android, MacCatalyst, Windows, GTK and WASM.
You might be asking how this going to work? Well, the first thing to realise is that there’s no magic solution for have the .NET MAUI controls render on the platforms they’re not supported on. At the end of the day, each .NET MAUI controls generates a native view and that native view is embedded into the native views generated by the Uno Platform part of the application. On a platform that doesn’t support the .NET MAUI control, there’s no native view, so there will effectively be a whole in the view in the position where the .NET MAUI control was designed to be.
This is all well and good except that the library from DevExpress only targets net7.0-ios and net7.0-android, which will cause a build error if you attempt to reference the package in a project that includes other targets. This is easily fixed, as we’ll see via selective inclusion of the package but then this leads to the next issue which is making the use of MauiHost (the Uno Platform element that hosts the .NET MAUI control) limited to the supported targets.
Let’s jump in and take a look at this in action.
Uno Platform Application
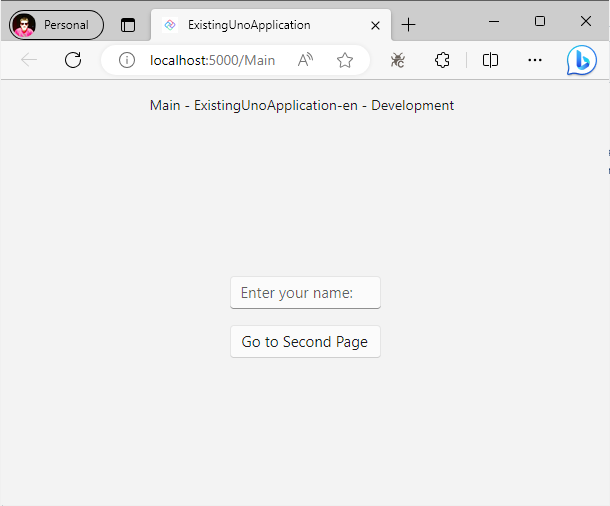
To start with we need to create the Uno Platform application which will represent our existing application. We’ll use the Uno Platform Template Wizard to generate an app based on the default configuration.
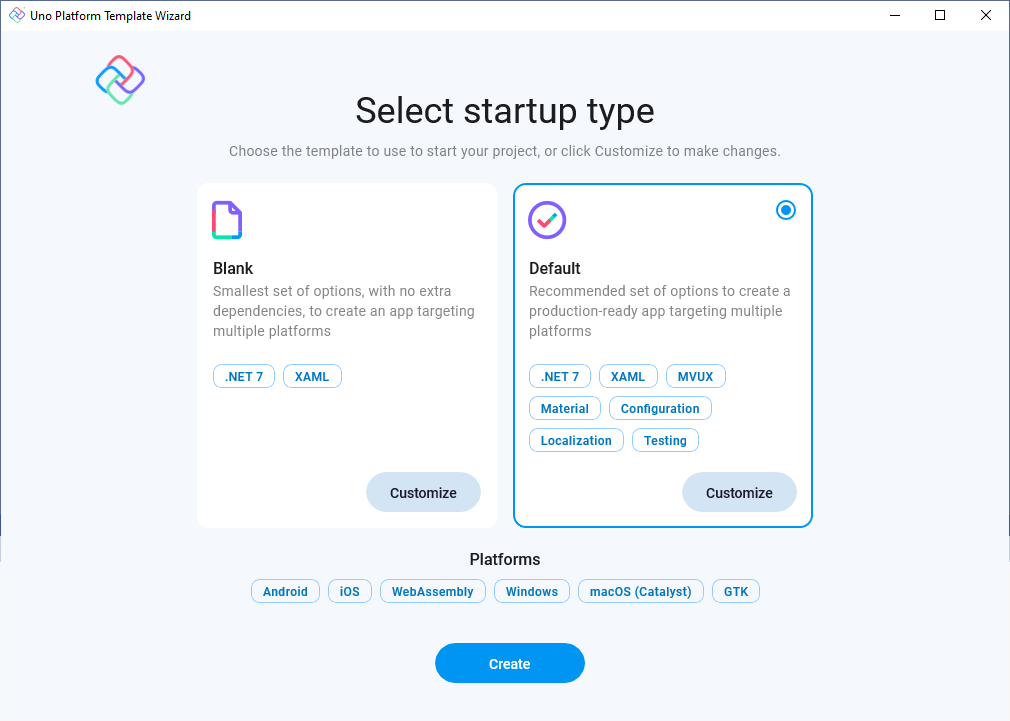
If we click on Customize, we can see the full list of target platforms that are going to be included in the application. We’ll click Create to proceed with the current selection.
Note: If you’re using the wizard to create an application that already has the .NET MAUI Embedding setup, you need to uncheck the unsupported platforms and then go to Features and check the MAUI Embedding feature.
Setting Up .NET MAUI Embedding
The steps we’re going to follow here mirror those outlined in the Uno Platform documentation and starts by adding a reference into the existing Uno class library for the Uno.Extensions.Maui.WinUI package.
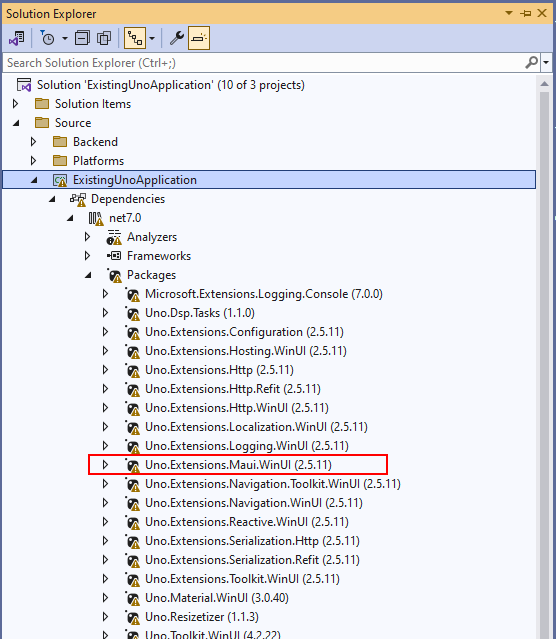
As you can see from the image, there are some issues with restoring the class library and in fact if you attempt to build at this point you’ll get a bunch of build issues related to the conflicting package references between .NET MAUI and the Uno Platform.
To fix these issues, we’ll adjust both the Directory.Packages.props (under Solution Items folder) and the PackageReferences in both the class library as well as the Mobile and Windows target projects. In the Directory.Packages.props, remove the PackageVersion entries for Microsoft.Windows.SDK.BuildTools, Microsoft.WindowsAppSDK and Xamarin.Google.Android.Material.
Add the following block to the csproj for the class library
<ItemGroup Condition="$(IsAndroid)">
    <PackageReference Include="Xamarin.Google.Android.Material" VersionOverride="1.9.0.2" />
    <PackageReference Include="Xamarin.AndroidX.Navigation.UI" VersionOverride="2.6.0.1" />
    <PackageReference Include="Xamarin.AndroidX.Navigation.Fragment" VersionOverride="2.6.0.1" />
    <PackageReference Include="Xamarin.AndroidX.Navigation.Runtime" VersionOverride="2.6.0.1" />
    <PackageReference Include="Xamarin.AndroidX.Navigation.Common" VersionOverride="2.6.0.1" />
  </ItemGroup>
Next, adjust the PackageReferences for Microsoft.WindowsAppSDK and Microsoft.Windows.SDK.BuildTools to specify the VersionOverride value in both the class library and the Windows target project.
<ItemGroup>
	<PackageReference Include="Microsoft.WindowsAppSDK" VersionOverride="1.3.230724000" />
	<PackageReference Include="Microsoft.Windows.SDK.BuildTools" VersionOverride="10.0.22621.756" />
</ItemGroup>
The last PackageReference we need to adjust is for the Xamarin.Google.Android.Material package in the Mobile target project. Update the PackageReference as follows and include the additional PackageReference elements for Xamarin.AndroidX.
        <!-- Add, or amend, the reference to Xamarin.Google.Android.Material with the VersionOverride -->
        <PackageReference Include="Xamarin.Google.Android.Material" VersionOverride="1.9.0.2" />

        <!-- Add reference to additional Android wrapper libraries -->
        <PackageReference Include="Xamarin.AndroidX.Navigation.UI" VersionOverride="2.6.0.1" />
        <PackageReference Include="Xamarin.AndroidX.Navigation.Fragment" VersionOverride="2.6.0.1" />
        <PackageReference Include="Xamarin.AndroidX.Navigation.Runtime" VersionOverride="2.6.0.1" />
        <PackageReference Include="Xamarin.AndroidX.Navigation.Common" VersionOverride="2.6.0.1" />
One further adjustment you can make at this point, particularly if you’re like me and hate having unnecessary warnings in the build output, which is to ignore the warning NETSDK1023.
2>C:\Program Files\dotnet\sdk\7.0.401\Sdks\Microsoft.NET.Sdk\targets\Microsoft.NET.Sdk.DefaultItems.Shared.targets(152,5): warning NETSDK1023: A PackageReference for 'Xamarin.Google.Android.Material' was included in your project. This package is implicitly referenced by the .NET SDK and you do not typically need to reference it from your project. For more information, see https://aka.ms/sdkimplicitrefs
In most cases this is a legitimate warning. However, due to the way .NET MAUI works (in .NET7) specifying VersionOverride values is the only workable solution. To ignore NETSDK1023, you can add it to the NoWarn property in Directory.Build.props
<Project>
	...
	<PropertyGroup>
		...
		<NoWarn>$(NoWarn);CA1416;NU1507;NETSDK1023</NoWarn>
		...
	</PropertyGroup>
Adding .NET MAUI Controls
Now that we’ve added the reference to .NET MAUI Embedding for the Uno Platform application, the next step is to add .NET MAUI controls to the XAML of our application. The way that .NET MAUI Embedding works is that you add a MauiHost element into the XAML and set the Source property to be the Type of the .NET MAUI control you want to display. We recommend that rather than referencing a control from either .NET MAUI or from a third-party library, we recommend adding a a .NET MAUI control to your application which act as a layout container for the other control(s) you want to display. This pattern, which we’ll walk through next, makes it easier to set properties, define data binding, wire up event handlers or connect to commands.
You can’t create a .NET MAUI control directly in the existing Uno Platform class library. Instead, we recommend a pattern that involves adding a .NET MAUI class library to your application. This will not only hold any new controls you create but will also contain an App class (that inherits from the .NET MAUI Application class) which means you can wire up colors, styles and templates in XAML by referencing them in the Resources collection in App.xaml.
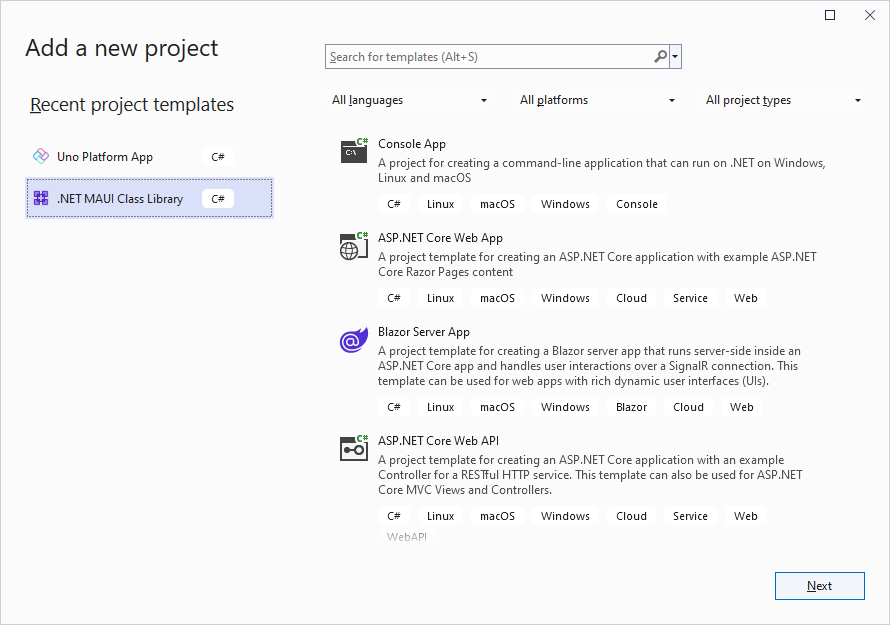
So let’s add a new project based on the .NET MAUI Class Library project template; we’ll call it ExistingUnoApplication.MauiControls.
The new project will come with an existing class, Class1.cs. Let’s rename this file to AppBuilderExtensions.cs (and if prompted, agree for the class to be renamed accordingly). We’ll come back to this class shortly to add an extension method that will be used to initialize the DevExpress controls.
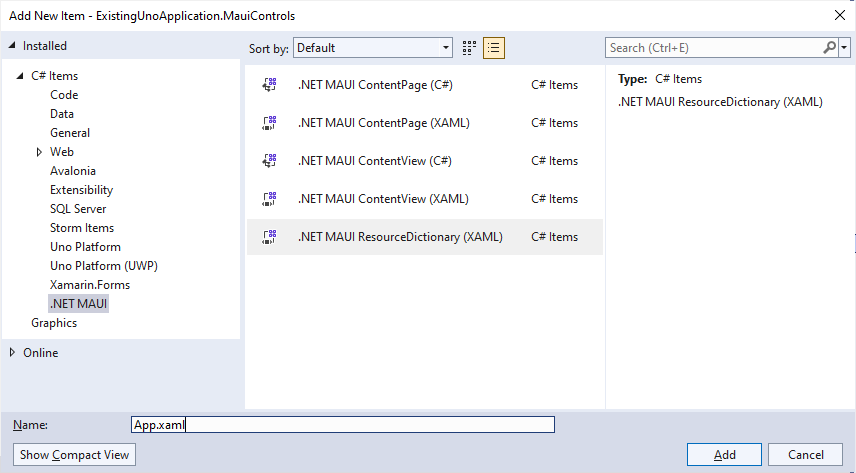
Next, we’re going to add App.xaml, based on the .NET MAUI ResourceDictionary (XAML) item template.
Update the XAML as follows:
<?xml version = "1.0" encoding = "UTF-8" ?>
<Application xmlns="http://schemas.microsoft.com/dotnet/2021/maui"
      xmlns:x="http://schemas.microsoft.com/winfx/2009/xaml"
      x:Class="ExistingUnoApplication.MauiControls.App">
  <Application.Resources>
    <ResourceDictionary>
      <ResourceDictionary.MergedDictionaries>
      </ResourceDictionary.MergedDictionaries>
    </ResourceDictionary>
  </Application.Resources>
</Application>
And the codebehind:
namespace ExistingUnoApplication.MauiControls;

public partial class App : Application
{
	public App()
	{
		InitializeComponent();
	}
}
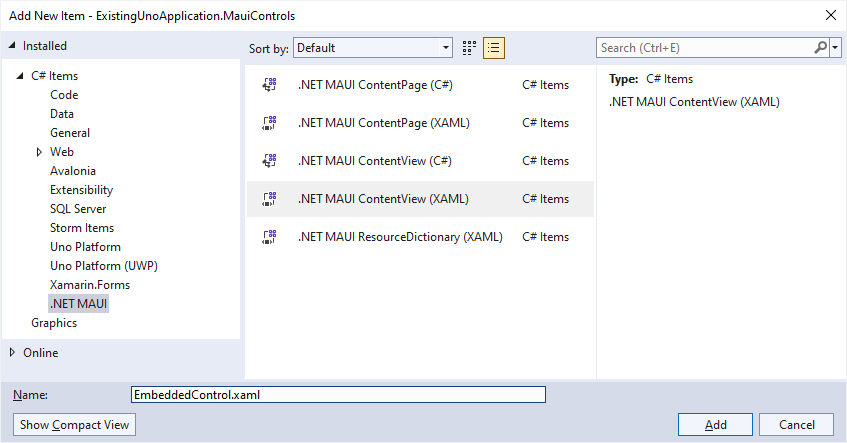
Next, add a new item, EmbeddedControl, based on the .NET MAUI ContentView (XAML) item template.
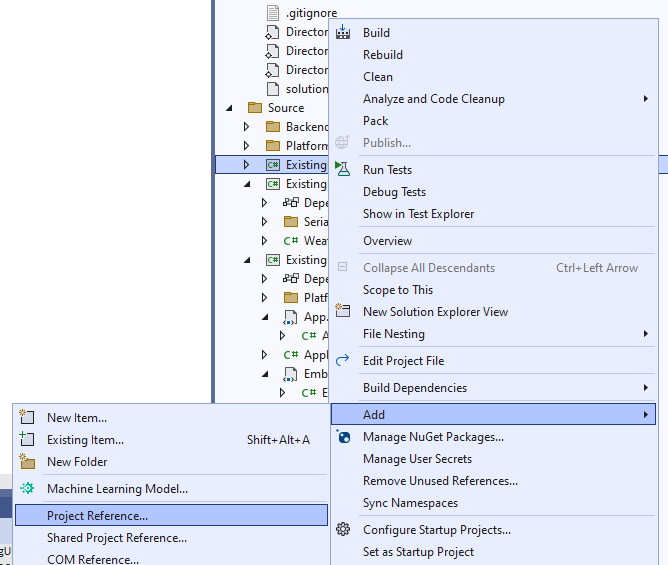
In order to use the EmbeddedControl in the Uno Platform application, we need to add a reference into the Uno class library to the .NET MAUI class library.
With the reference added, it’s time to add the MauiHost to MainPage.xaml.
<embed:MauiHost x:Name="MauiHostElement"
				xmlns:embed="using:Uno.Extensions.Maui"
				xmlns:controls="using:ExistingUnoApplication.MauiControls"
				Source="controls:EmbeddedControl" />
Before we run the application we just need to make a couple of tweaks to the App class within the Uno class library. Change the App class to inherit from EmbeggingApplication.
public class App : EmbeddingApplication
.NET MAUI Embedding needs to be initialized by calling the UseMauiEmbedding extension method as part of the host builder initialization in App.xaml.cs
protected async override void OnLaunched(LaunchActivatedEventArgs args)
{
    var builder = this.CreateBuilder(args)
        .UseMauiEmbedding<MauiControls.App>()
        .Configure(host => host .,.....
Note: If you’re not using the Uno.Extensions host builder, you can simply call this.UseMauiEmbedding<MauiControls.App>() in the App.xaml.cs of your Uno Platform application before navigating to the first page of your application.
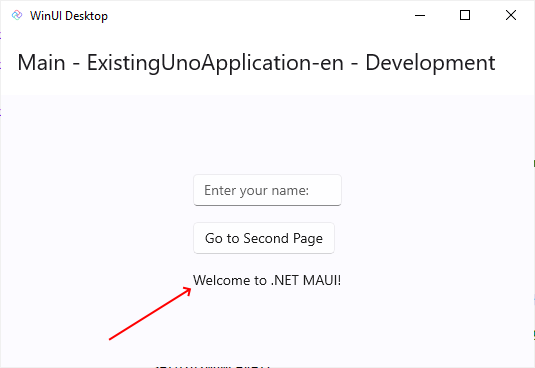
Now we can run our application and observe the .NET MAUI Label (which was included in the EmbeddedControl we created) saying “Welcome to .NET MAUI”.
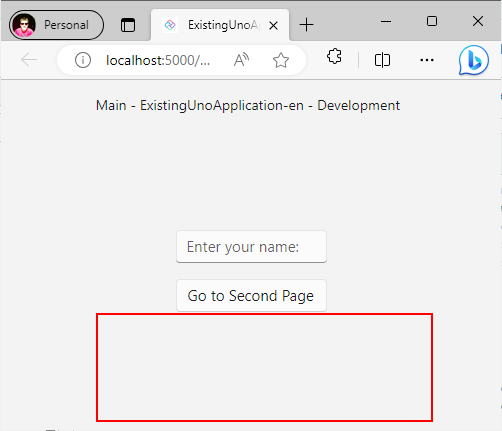
If we run this same application on a target that isn’t supported by .NET MAUI, we’ll see an empty space where the control would have rendered (highlighted in the following image by the Red border).
Limited Target Frameworks
As I mentioned earlier the DevExpress .NET MAUI Controls only support iOS and Android. Rather than adding the reference to the DevExpress packages and then having to unpick the conditional logic added by NuGet, I’m going to start by removing the target frameworks that aren’t supported by DevExpress from the MauiControls class library.
<!-- Replace this
<TargetFrameworks>net7.0;net7.0-android;net7.0-ios;net7.0-maccatalyst</TargetFrameworks>
<TargetFrameworks Condition="$([MSBuild]::IsOSPlatform('windows'))">$(TargetFrameworks);net7.0-windows10.0.19041.0</TargetFrameworks>-->
<!-- with this!-->
<TargetFrameworks>net7.0-android;net7.0-ios</TargetFrameworks>
If prompted, reload the MauiControls project and force a Rebuild to make sure the class library is still building correctly.
As the MauiControls project now only supports iOS and Android, we’ll need to adjust the Uno class library. We’ll start by making the project reference conditional by altering the project file (csproj) for the Uno class library.
<ItemGroup Condition="$(IsiOS) or $(IsAndroid)">
	<ProjectReference Include="..\..\ExistingUnoApplication.MauiControls\ExistingUnoApplication.MauiControls.csproj" />
</ItemGroup>
The IsiOS and IsAndroid properties are defined in the Directory.Build.props file when creating an application using the Uno Platform template. If you don’t have these properties defined in your application I would suggest creating a new temporary application using the latest template and then copying the definition of these properties across to your application.
Whilst we’re making changes to the project file, we’re going to define a new XAML namespace prefix, mobile, for the iOS and Android target frameworks.
<ItemGroup Condition="$(IsiOS) or $(IsAndroid)">
	<ProjectReference Include="..\..\ExistingUnoApplication.MauiControls\ExistingUnoApplication.MauiControls.csproj" />
	<IncludeXamlNamespaces Include="mobile" />
</ItemGroup>

<ItemGroup Condition="!($(IsiOS) or $(IsAndroid))">
	<ExcludeXamlNamespaces Include="mobile" />
</ItemGroup>
The mobile prefix can be applied to any XAML element that we want to only be included when targeting iOS or Android. In this case we want to apply this to the MauiHost element. However, since this element already has a namespace prefix, we’ll wrap the element in a Grid with the mobile prefix.
<Page x:Class="ExistingUnoApplication.Presentation.MainPage"
    ...
    xmlns:mobile="http://uno.ui/mobile"
    mc:Ignorable="d mobile"
    ... >
    ...
    <mobile:Grid>
        <embed:MauiHost x:Name="MauiHostElement"
	        xmlns:embed="using:Uno.Extensions.Maui"
		xmlns:controls="using:ExistingUnoApplication.MauiControls"
		Source="controls:EmbeddedControl" />
    </mobile:Grid>
    ...
</Page>
We’ll also need to make the call to UseMauiEmbedding conditional. This is because the MauiControls.App class will only be able to be resolved when compiling for iOS and Android.
protected async override void OnLaunched(LaunchActivatedEventArgs args)
{
    var builder = this.CreateBuilder(args)
        .UseToolkitNavigation()
#if (__IOS__ && !MACCATALYST) || ANDROID
        .UseMauiEmbedding<MauiControls.App>()
#endif
        .Configure(host => host
At this point if you run the application on Windows (which included the .NET MAUI Label in the earlier screenshot) you’ll observe that the “Welcome to .NET MAUI!” no longer appears.
DevExpress .NET MAUI Controls
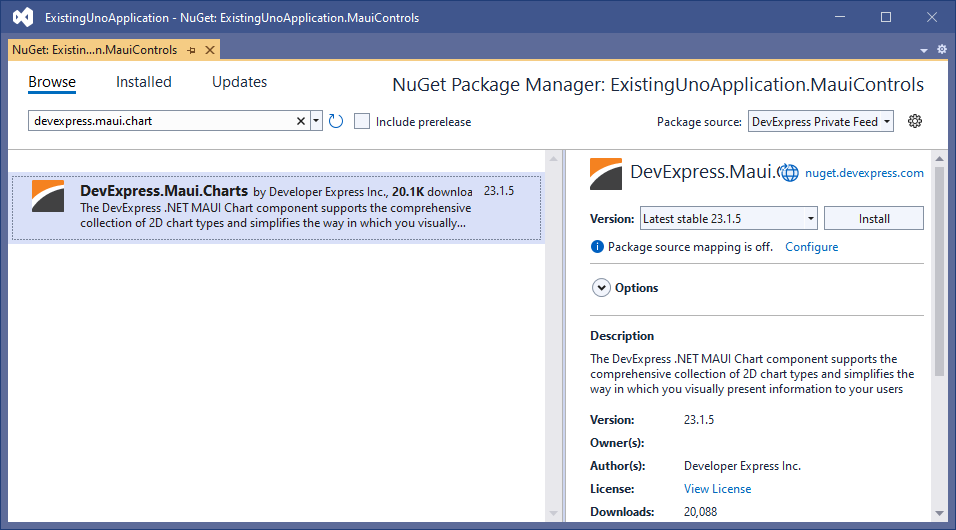
Ok, we’re finally ready to add the DevExpress chart to the application. Start by following the installation instructions in the Uno Platform documentation for DevExpress – this will get you to setup the nuget.config file necessary to access the DevExpress packages. Once you’ve set this up, you can right-click on the MauiControls project and click on Manage NuGet Packages.
Search for “devexpress.maui.chart” and install the DevExpress.Maui.Charts package
The DevExpress controls need to be initialized by invoking the UseDevExpress extension method. We’ll update the AppBuilderExtensions class we created earlier.
using DevExpress.Maui;

namespace ExistingUnoApplication.MauiControls;

public static class AppBuilderExtensions
{
    public static MauiAppBuilder UseMauiControls(this MauiAppBuilder builder) =>
       builder.UseDevExpress();
}
The UseMauiControls extension method then needs to be invoked in the callback argument to the UseMauiEmbedding method in app.xaml.cs.
.UseMauiEmbedding<MauiControls.App>(builder=>builder.UseMauiControls())
We’ll update the XAML for the EmbeddedControl to include a ChartView
<?xml version="1.0" encoding="utf-8" ?>
<ContentView xmlns="http://schemas.microsoft.com/dotnet/2021/maui"
			 xmlns:x="http://schemas.microsoft.com/winfx/2009/xaml"
			 xmlns:dxc="clr-namespace:DevExpress.Maui.Charts;assembly=DevExpress.Maui.Charts"
			 xmlns:local="clr-namespace:ExistingUnoApplication.MauiControls"
			 x:Class="ExistingUnoApplication.MauiControls.EmbeddedControl">
	<dxc:ChartView>
		<dxc:ChartView.BindingContext>
			<local:ViewModel />
		</dxc:ChartView.BindingContext>
		<dxc:ChartView.Series>
			<dxc:LineSeries DisplayName="{Binding GdpValueForUSA.CountryName}">
				<dxc:LineSeries.Data>
					<dxc:SeriesDataAdapter DataSource="{Binding GdpValueForUSA.Values}"
										   ArgumentDataMember="Year">
						<dxc:ValueDataMember Type="Value"
											 Member="Value" />
					</dxc:SeriesDataAdapter>
				</dxc:LineSeries.Data>
			</dxc:LineSeries>

			<dxc:LineSeries DisplayName="{Binding GdpValueForChina.CountryName}">
				<dxc:LineSeries.Data>
					<dxc:SeriesDataAdapter DataSource="{Binding GdpValueForChina.Values}"
										   ArgumentDataMember="Year">
						<dxc:ValueDataMember Type="Value"
											 Member="Value" />
					</dxc:SeriesDataAdapter>
				</dxc:LineSeries.Data>
			</dxc:LineSeries>

			<dxc:LineSeries DisplayName="{Binding GdpValueForJapan.CountryName}">
				<dxc:LineSeries.Data>
					<dxc:SeriesDataAdapter DataSource="{Binding GdpValueForJapan.Values}"
										   ArgumentDataMember="Year">
						<dxc:ValueDataMember Type="Value"
											 Member="Value" />
					</dxc:SeriesDataAdapter>
				</dxc:LineSeries.Data>
			</dxc:LineSeries>
		</dxc:ChartView.Series>
	</dxc:ChartView>
</ContentView>
And add the following ViewModel code for some basic data for the ChartView
public class ViewModel
{
    public CountryGdp GdpValueForUSA { get; }
    public CountryGdp GdpValueForChina { get; }
    public CountryGdp GdpValueForJapan { get; }

    public ViewModel()
    {
        GdpValueForUSA = new CountryGdp(
            "USA",
            new GdpValue(new DateTime(2020, 1, 1), 20.93),
            new GdpValue(new DateTime(2019, 1, 1), 21.43),
            new GdpValue(new DateTime(2018, 1, 1), 20.58),
            new GdpValue(new DateTime(2017, 1, 1), 19.391),
            new GdpValue(new DateTime(2016, 1, 1), 18.624),
            new GdpValue(new DateTime(2015, 1, 1), 18.121),
            new GdpValue(new DateTime(2014, 1, 1), 17.428),
            new GdpValue(new DateTime(2013, 1, 1), 16.692),
            new GdpValue(new DateTime(2012, 1, 1), 16.155),
            new GdpValue(new DateTime(2011, 1, 1), 15.518),
            new GdpValue(new DateTime(2010, 1, 1), 14.964)
        );
        GdpValueForChina = new CountryGdp(
            "China",
            new GdpValue(new DateTime(2020, 1, 1), 14.72),
            new GdpValue(new DateTime(2019, 1, 1), 14.34),
            new GdpValue(new DateTime(2018, 1, 1), 13.89),
            new GdpValue(new DateTime(2017, 1, 1), 12.238),
            new GdpValue(new DateTime(2016, 1, 1), 11.191),
            new GdpValue(new DateTime(2015, 1, 1), 11.065),
            new GdpValue(new DateTime(2014, 1, 1), 10.482),
            new GdpValue(new DateTime(2013, 1, 1), 9.607),
            new GdpValue(new DateTime(2012, 1, 1), 8.561),
            new GdpValue(new DateTime(2011, 1, 1), 7.573),
            new GdpValue(new DateTime(2010, 1, 1), 6.101)
        );
        GdpValueForJapan = new CountryGdp(
            "Japan",
            new GdpValue(new DateTime(2020, 1, 1), 4.888),
            new GdpValue(new DateTime(2019, 1, 1), 5.082),
            new GdpValue(new DateTime(2018, 1, 1), 4.955),
            new GdpValue(new DateTime(2017, 1, 1), 4.872),
            new GdpValue(new DateTime(2016, 1, 1), 4.949),
            new GdpValue(new DateTime(2015, 1, 1), 4.395),
            new GdpValue(new DateTime(2014, 1, 1), 4.850),
            new GdpValue(new DateTime(2013, 1, 1), 5.156),
            new GdpValue(new DateTime(2012, 1, 1), 6.203),
            new GdpValue(new DateTime(2011, 1, 1), 6.156),
            new GdpValue(new DateTime(2010, 1, 1), 5.700)
        );
    }
}

public class CountryGdp
{
    public string CountryName { get; }
    public IList<GdpValue> Values { get; }

    public CountryGdp(string country, params GdpValue[] values)
    {
        this.CountryName = country;
        this.Values = new List<GdpValue>(values);
    }
}

public class GdpValue
{
    public DateTime Year { get; }
    public double Value { get; }

    public GdpValue(DateTime year, double value)
    {
        this.Year = year;
        this.Value = value;
    }
}
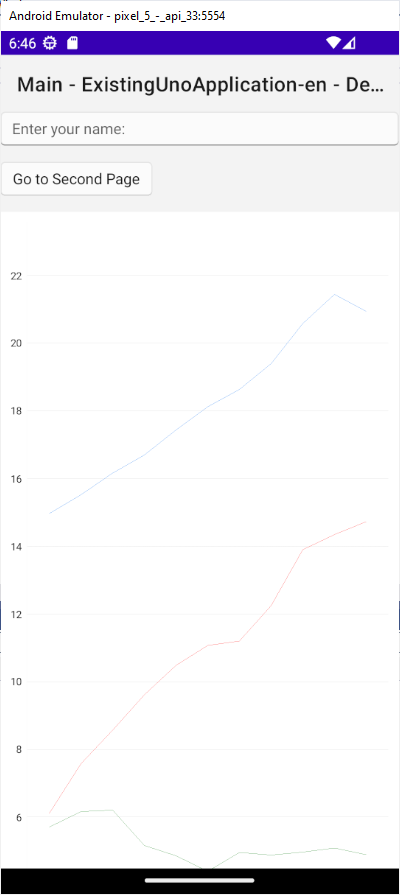
We can go ahead and run the application on iOS or Android and we’ll see a ChartView being displayed below the Uno content on MainPage.
If we run this on a platform that isn’t supported by DevExpress, we’ll just see an empty space where the ChartView would otherwise be.
Summary
Adding .NET MAUI controls to your Uno Platform application can be a great way to include controls that would otherwise not be available. Whilst it is limited to the target frameworks supported by the control vendor, as you’ve seen in this post, you can work around the limitation for the platforms that aren’t supported. An extension to what we’ve seen here is to provide alternative content for when the application is running on a platform where the third party control isn’t supported.
2 thoughts on “Adding .NET MAUI Controls to an Existing Uno-Platform Application”